v7.0.354
v7.0.344
_drawingModeChange(drawingMode) {
v7.0.338
displayAnnIndicator
v7.0.327
v7.0.315
v7.0.311
- To improve this functionality by enhancing the user interface.
- Users can create and edit the text and image stamps. Users can also manage the stamps.
v7.0.309
_pageInvert
_docSplit
_docRedact
v7.0.307
v7.0.306
v7.0.294
v7.0.287
v7.0.279
v7.0.275
getIconService
v7.0.272
v7.0.266
v7.0.265
- Redact Complete Page
- Redact Selected Text
v7.0.264
v7.0.259
_docSaveComplete
v7.0.255
v7.0.254
docExportWithOptions
v7.0.252
v7.0.240
v7.0.239
tabSwitch
v7.0.235
_tabSwitch
v7.0.231
v7.0.221
v7.0.220
_updateDefaultCertificate
v7.0.219
v7.0.213
v7.0.210
v7.0.209
- An option to reverse page colors.
- An API to invert pages has also been introduced that allows inverting single or multiple pages at once.
v7.0.197
_onContextMenu
v7.0.192
_newCertificate
_newAppearance
_preferenceUpdate
_zoomChange
v7.0.182
- Access any document and sign them from anywhere, on mobile or desktop.
- Your recipients can sign in a snap — no downloads or sign-ups required.
- Sign by typing, scanning signature, or by touch.
- Secure your documents with data encryption, audit trails, tamper-proofing, and industry-standard compliances.
v7.0.180
v7.0.178
getPageInfo
docCompleteNotification
v7.0.172
v7.0.165
v7.0.158
v7.0.154
v7.0.141
v7.0.121
_docLoadComplete
_firstPageRendered
v7.0.105
IBM Deployment of Viewer Component
This section details the creation and deployment of the eViewer WAR file on the IBM WebSphere. Make sure the file name of eViewer 7 is in the following format:
eViewer7.0.xx
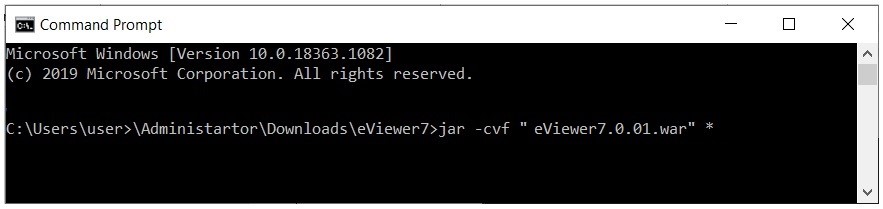
Step 1: Use the following command to generate the war file:
jar –cvf “.war” *
For example: Open the command prompt and input the path of the location of eViewer7.0.xx file. Then the command to make it a war file.
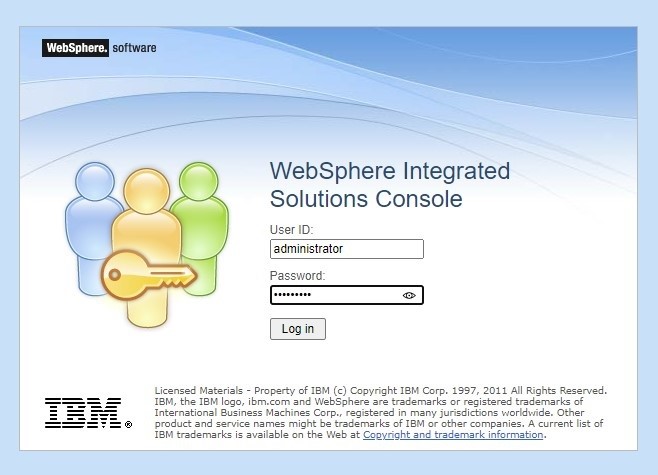
Step 2: Access the IBM WebSphere console and log into WebSphere.
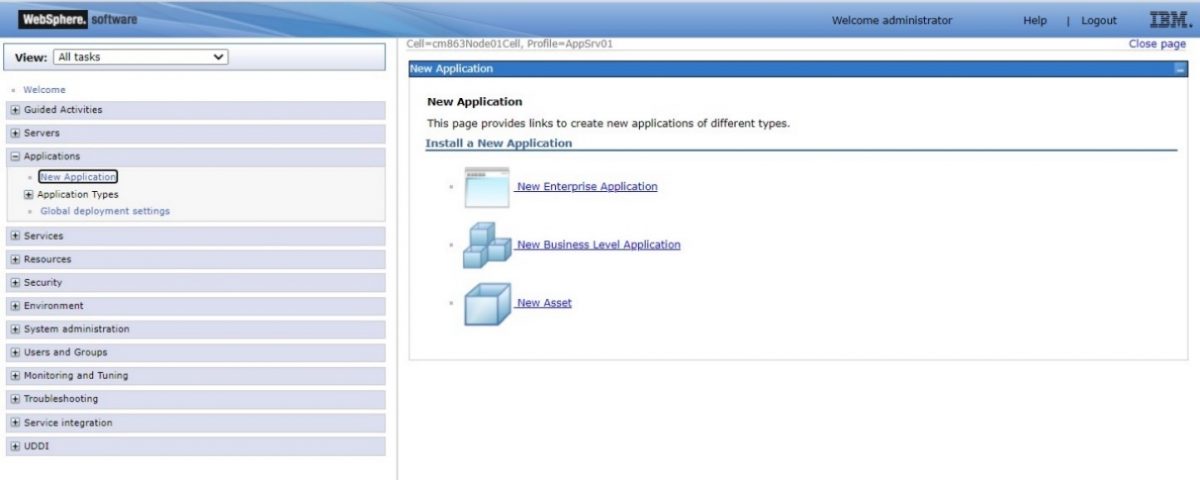
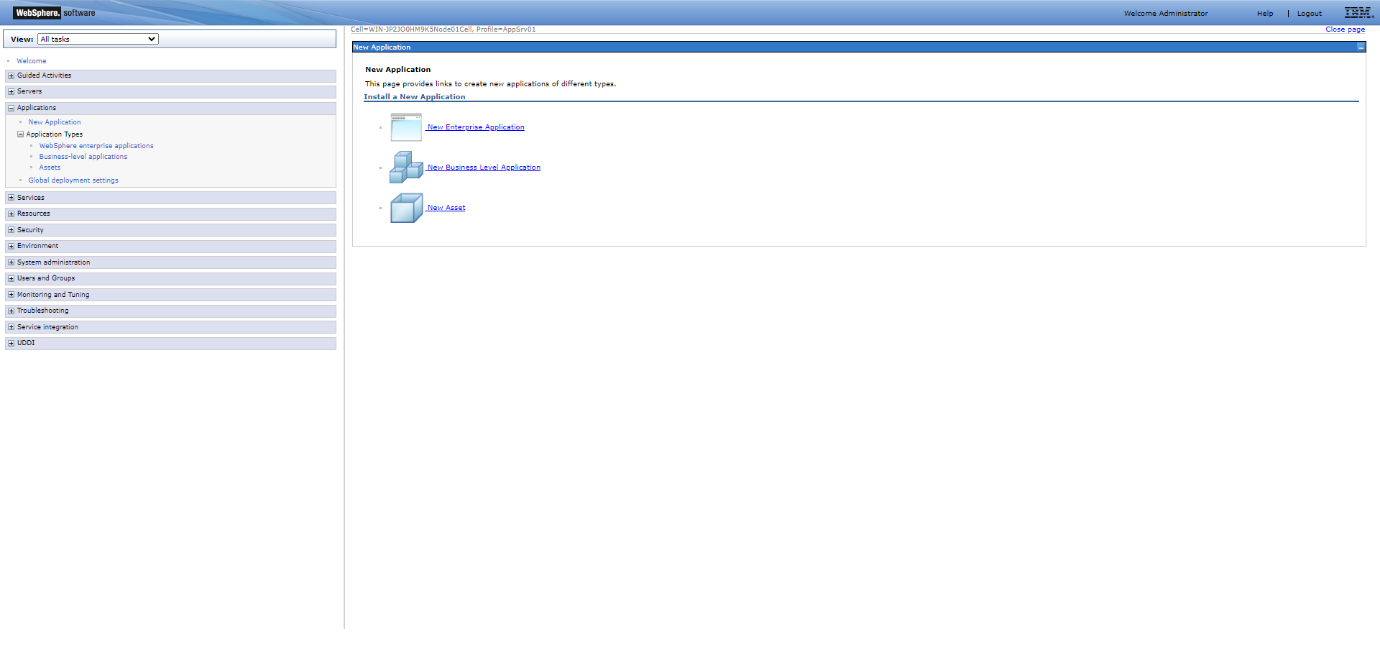
Step 3: Go to Applications and select “New Application”. Next, select the “New Enterprise Application” in order to deploy eViewer in WebSphere.

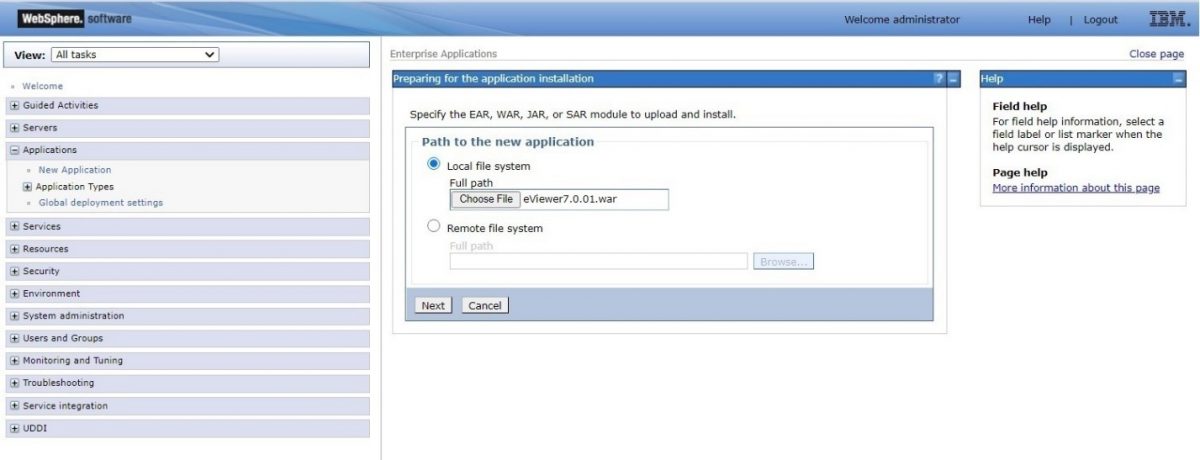
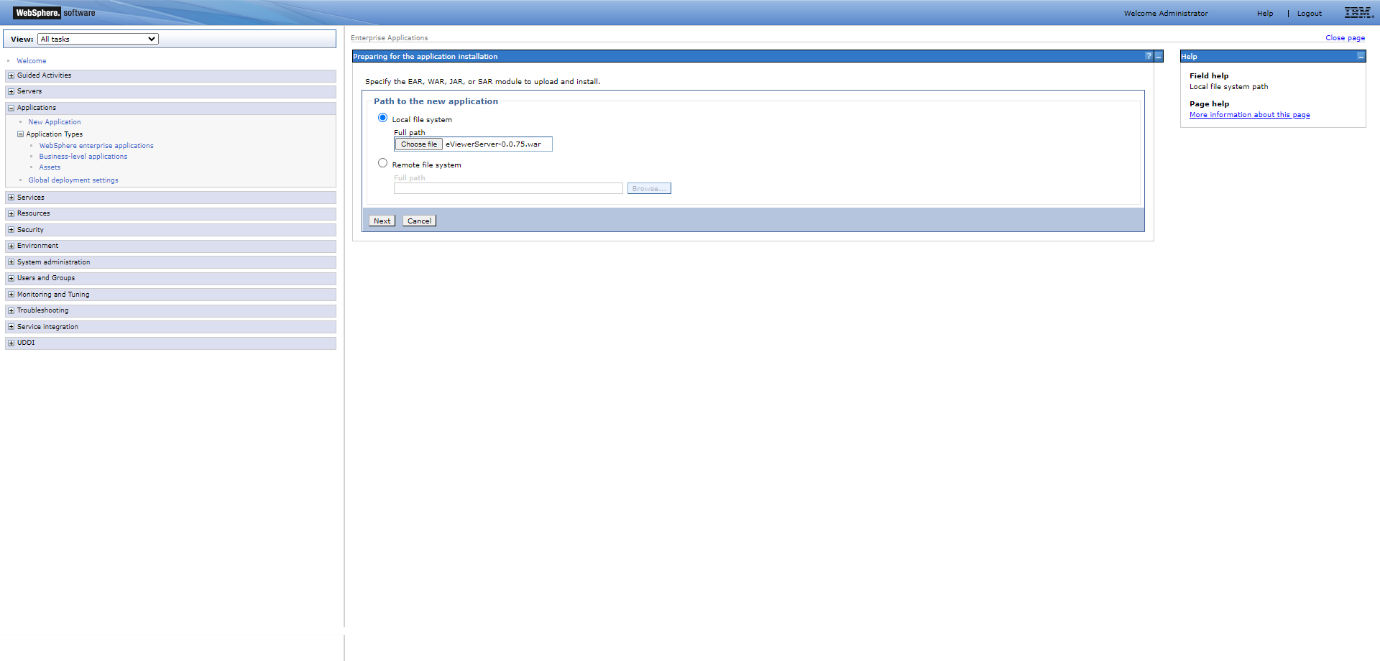
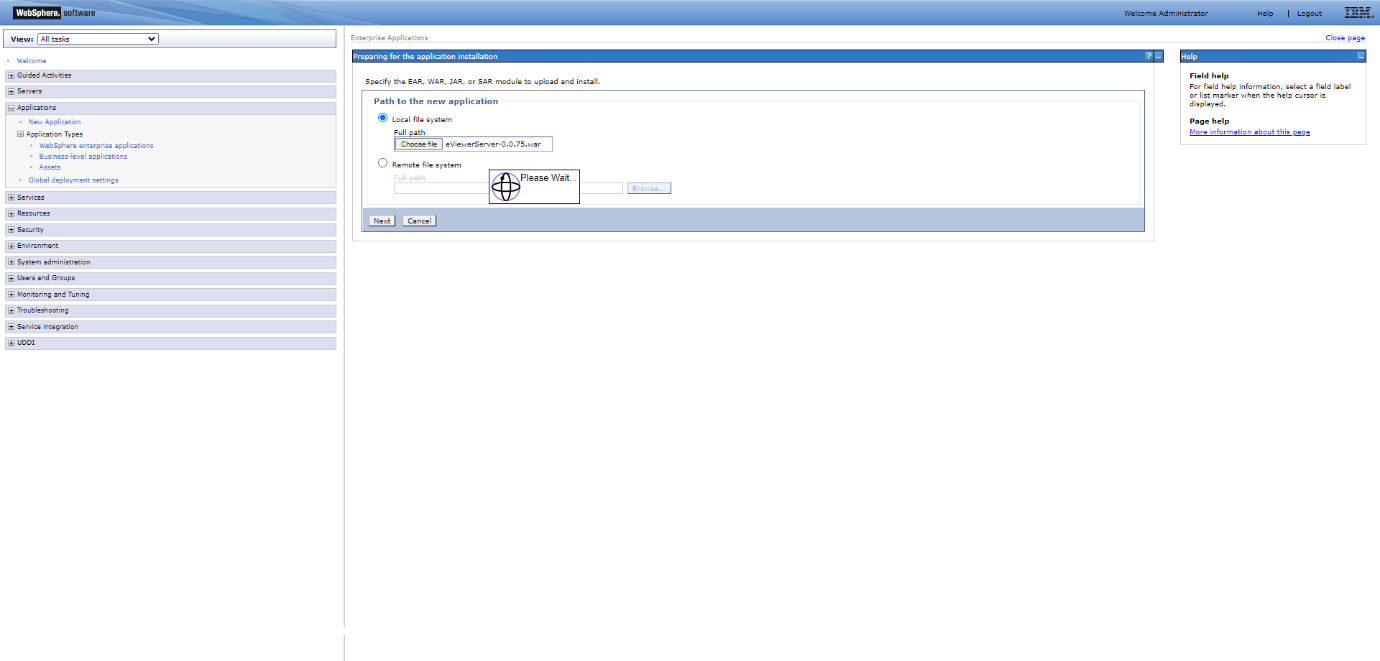
Step 4: Select the location of the eViewer7.0.01.war file and then select “Next”.
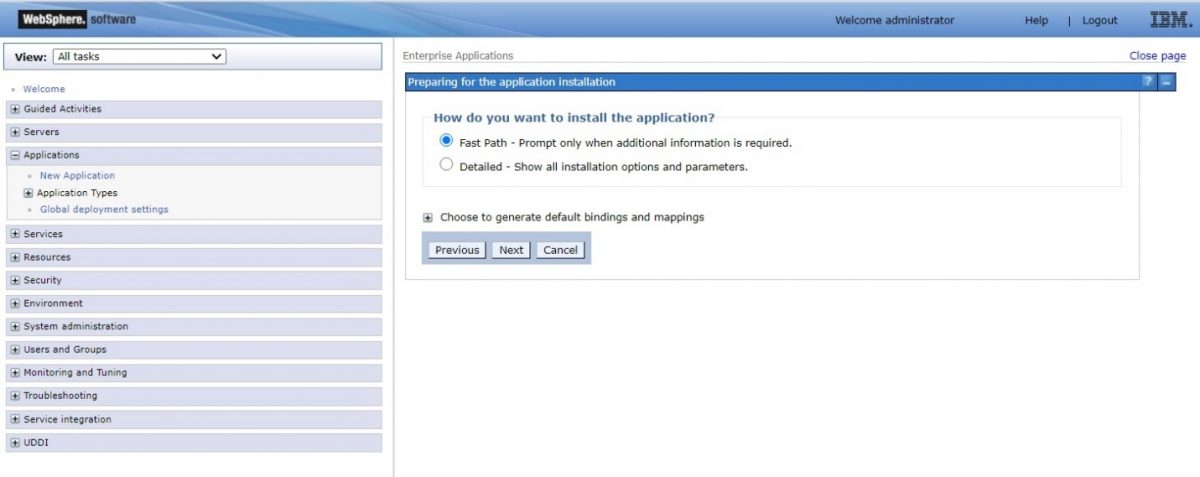
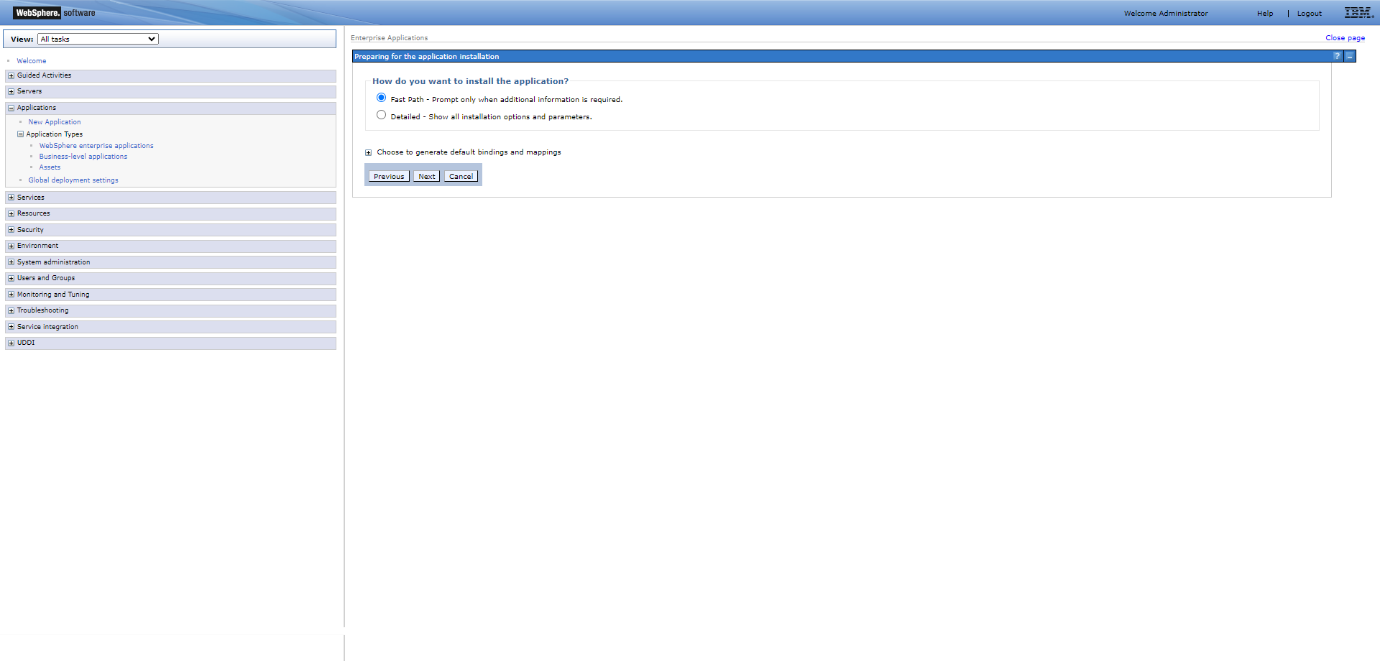
Step 5: Select the “Fast Path – Prompt only when additional information is required” option and the click “Next”.
Step 6: Add and verify the installation details for the “Application Name” and “Application Build ID” fields, then click “Next” to go to the Step 2.

Step 7: For Step 2: Map modules with server, it will show all the modules which needs to be mapped with the IBM application services. Select the eViewer7.0.01.war module and then select Next.

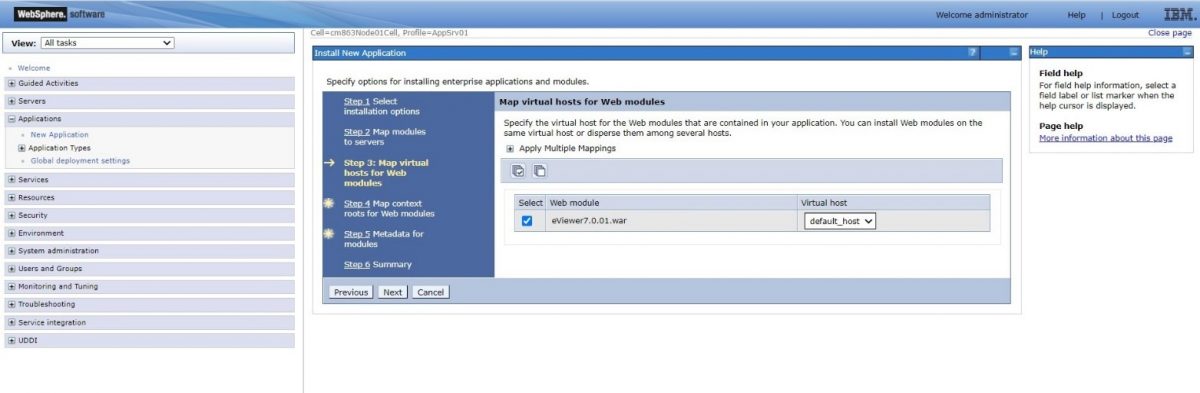
Step 8: Select the desired “Virtual host” from the dropdown menu and then select Next.
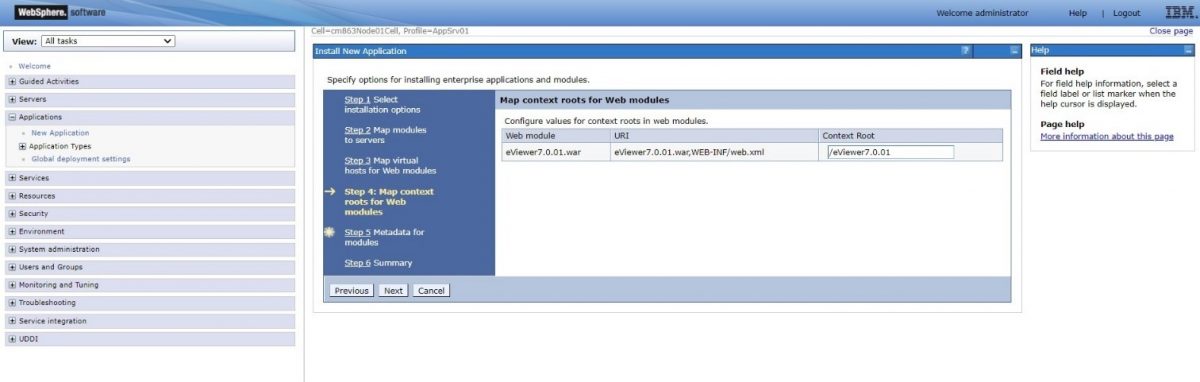
Step 9: Configure values for the context roots in web modules and select Next.
Step 10: Select the checkbox to enable metadata if needed and select Next.

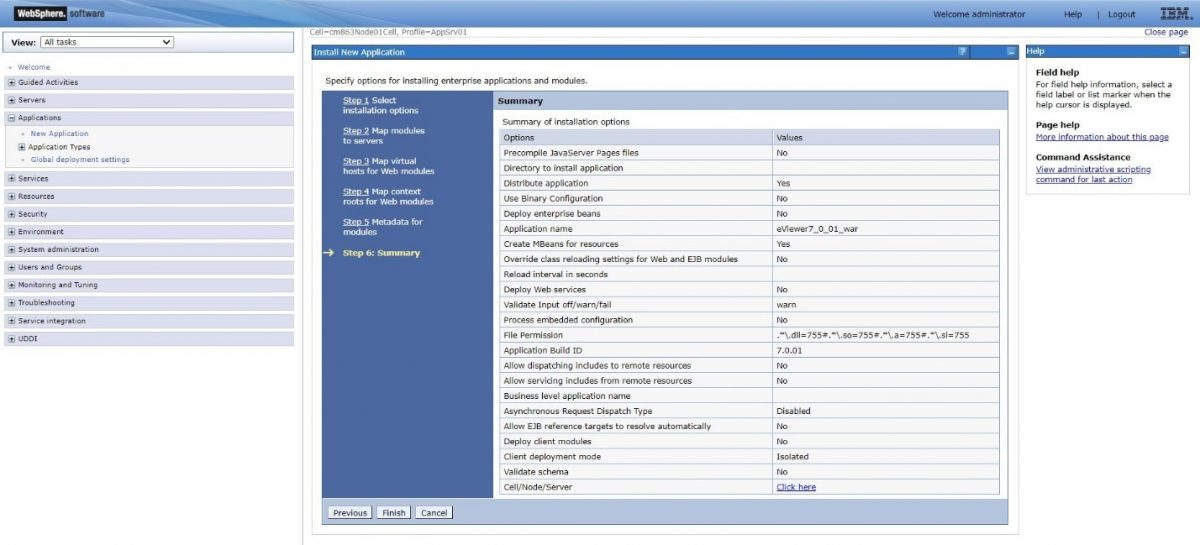
Step 11: Confirm the details in the Summary. If the details are correct, select Finish.
Step 12: Select Save for saving the final changes and finalize the deployment.
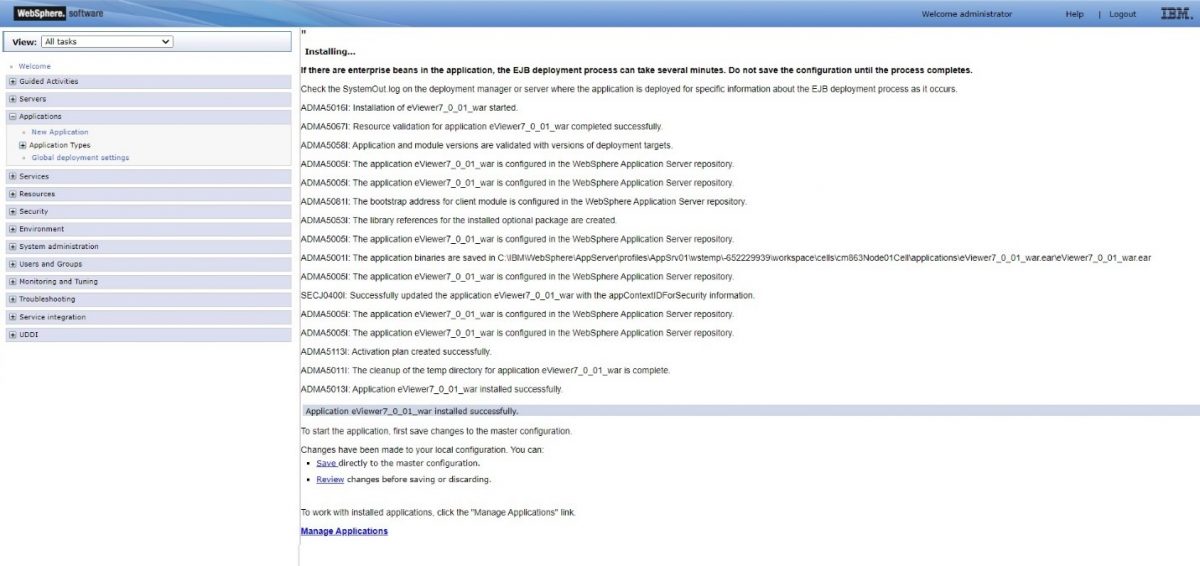
Step 13: To confirm the deployment of the WAR file, go to Applications>Application types>WebSphere enterprise applications, eViewer7_0_01_war application should be displayed.
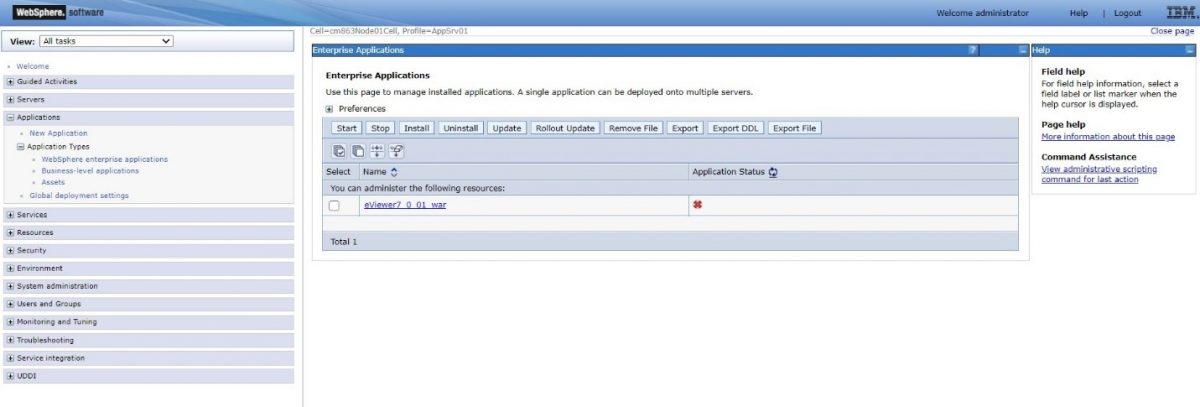
Step 14: You can start the application by clicking the “Start” button.
IBM Deployment of server component
This section details the creation and deployment of the eViewer Server WAR file on the IBM WebSphere.
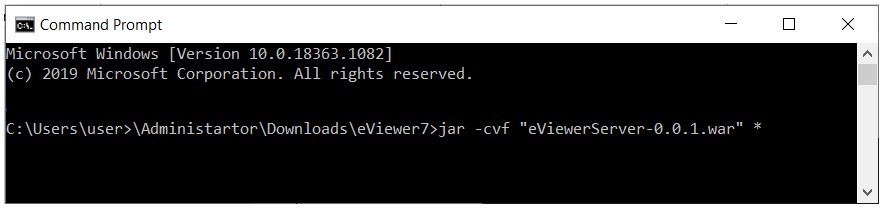
Step 1:
jar –cvf “eViewerServer-0.0.1.war” *
Open the command prompt and navigate to the path of the eViewer7 folder. Then enter in the command to generate a war file. For example:
Step 2: Access the IBM WebSphere console and log into WebSphere.
Step 3: Go to Applications and select “New Application”. Next, select the “New Enterprise Application” in order to deploy eViewer in WebSphere.
Step 4: Select the eViewerServer-0.0.1.war file from the folder and select Next.
Step 5: Add and verify the installation details for the “Application Name” and “Application Build ID” fields, then click “Next” to go to the Step 2.
Step 6: For Step 2: Map modules with server, it will show all the modules which needs to be mapped with the IBM application services. Select the eViewerServer-0.0.1.war module and then select Next.
Step 7: Select the desired “Virtual host” from the dropdown menu and then select Next.

Step 8: Configure values for the context roots in web modules and select Next.
Step 9: Select the checkbox to enable metadata if needed and select Next.
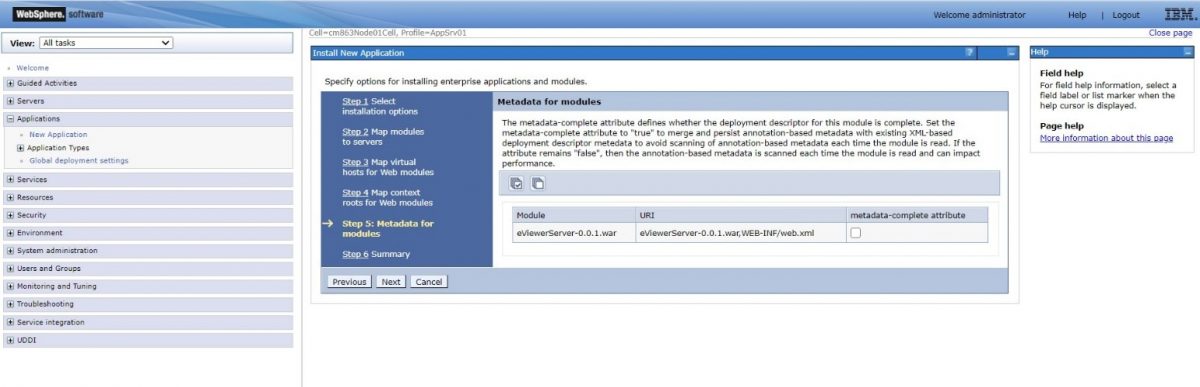
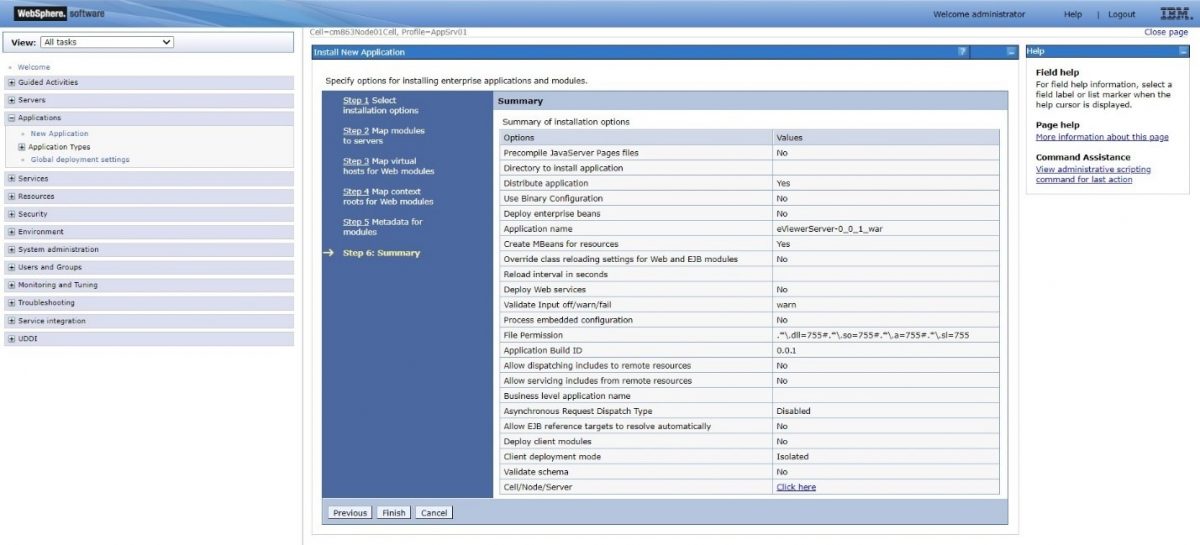
Step 10: Confirm the details in the Summary. If the details are correct, select Finish.
Step 11: Select Save for saving the final changes and finalize the deployment.
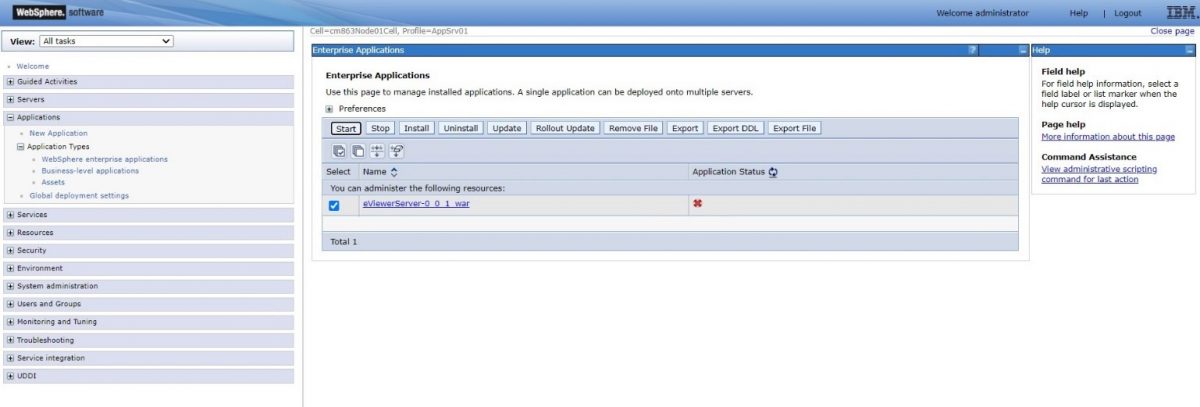
Step 12: To confirm the deployment of the WAR file, go to Applications>Application types>WebSphere enterprise applications, eViewerServer_0_0_1_war application should be displayed.

Step 13: You can start the application by clicking the “Start” button.

Apache Tomcat Deployment on Windows Server
This section describes the installation of the eViewer 7 viewer as well as server component on the Apache Tomcat application server.
Step 1: For deploying eViewer 7 on Apache Tomcat server, place the complete eViewer folders, eViewer7.0.01 and eViewerServer-0.0.1, and the corresponding WAR files in the Tomcat webapps folder.

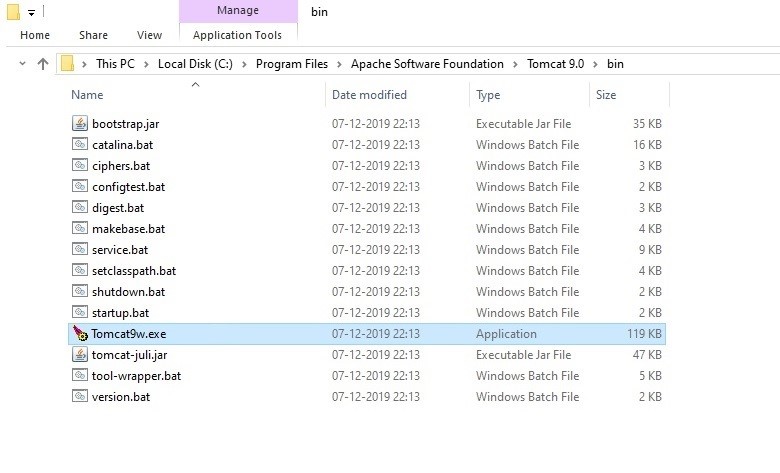
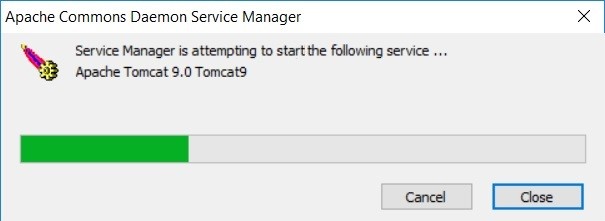
Step 2: Navigate to the bin folder of the Apache Tomcat service and then click on the Tomcat(xx).exe file to launch.
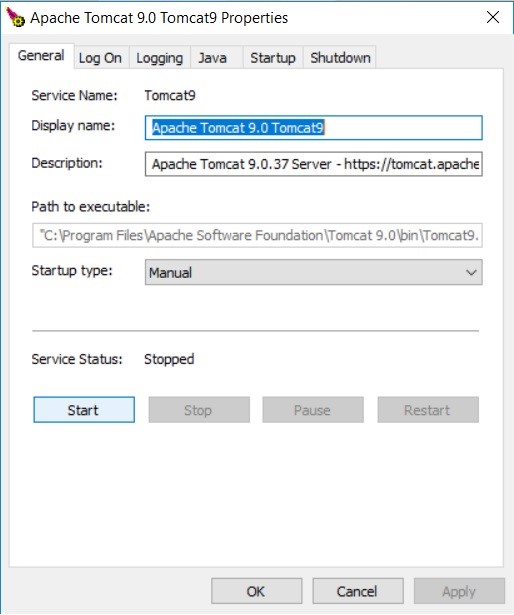
Step 3: A dialogue box will appear through which the service can be started by clicking the Start button.
Step 4: Service manager is attempting to start the following service and automatically deploy the WAR files.
Architecture Overview: Deployment over AWS App Runner
eViewer consists of multiple app services that can be deployed over the AWS infrastructure. In this guide, we will focus on deploying two specific services of eViewer: eViewer 7 and eViewer server
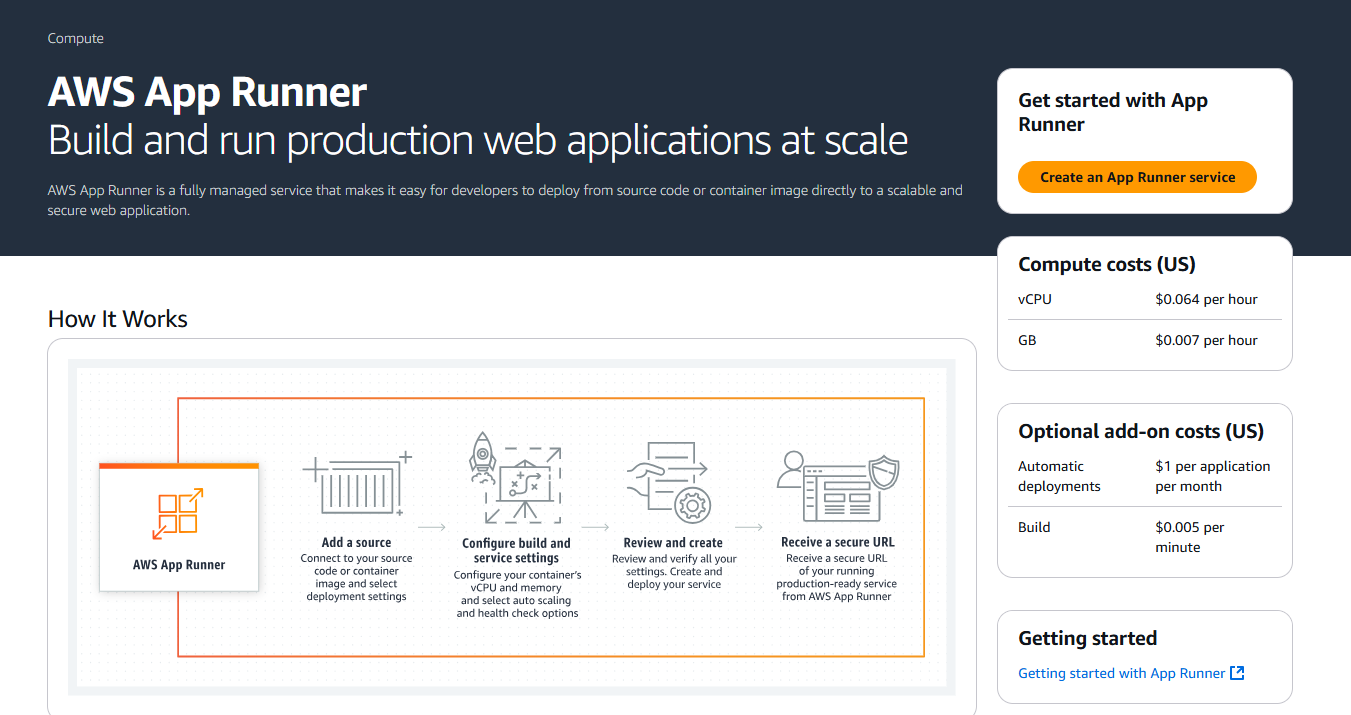
To begin, navigate to AWS Console and select AWS App Runner. Below are the services we will discuss how to deploy them step by step.
eViewer v7
- Purpose: The primary frontend service required for advanced document viewing, editing, and collaboration features. It allows users to view, edit, fill out PDF form fields, add watermarks, annotations, save documents, and more.
- Deployment: Runs in a Linux-based Docker container.
- Docker Image: For instance, the Docker image can be referenced as index.docker.io/mstechinc/eviewer7:<version_tag>
Deployment Steps:
Step1: In the AWS App Runner, click on ‘Create an App Runner service’ on the right side.

Step 2: Choose ‘Container Registry’ as a source, and provide the ‘public.ecr.aws/z7l1z8s2/mstechinc/eviewer7:<version_tag>’ in the container image URI.
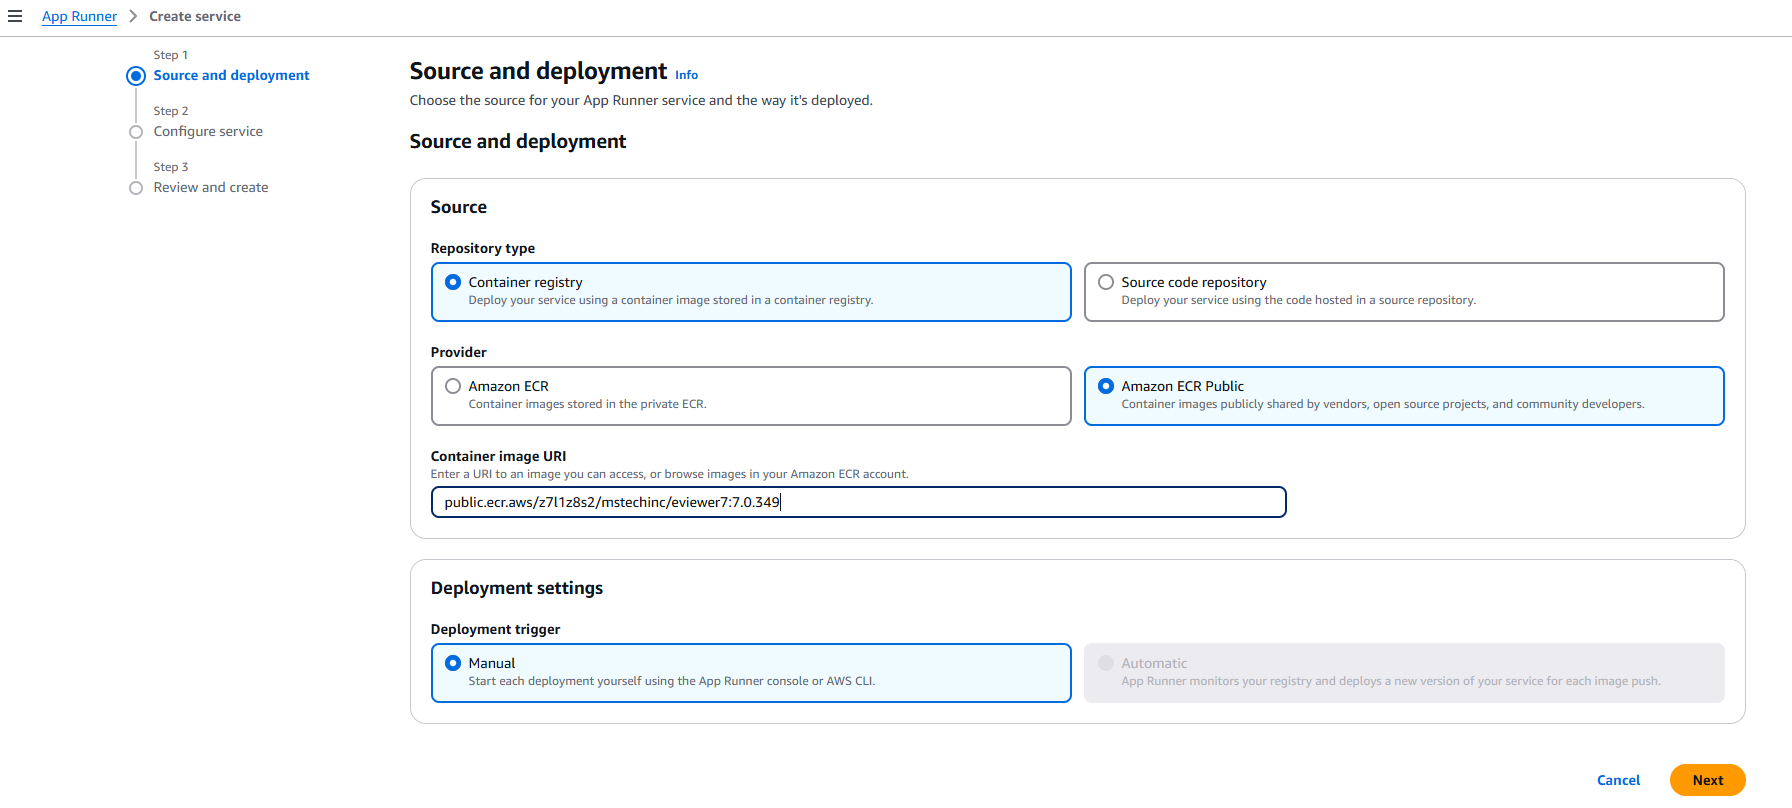
Step 3: Click Next.
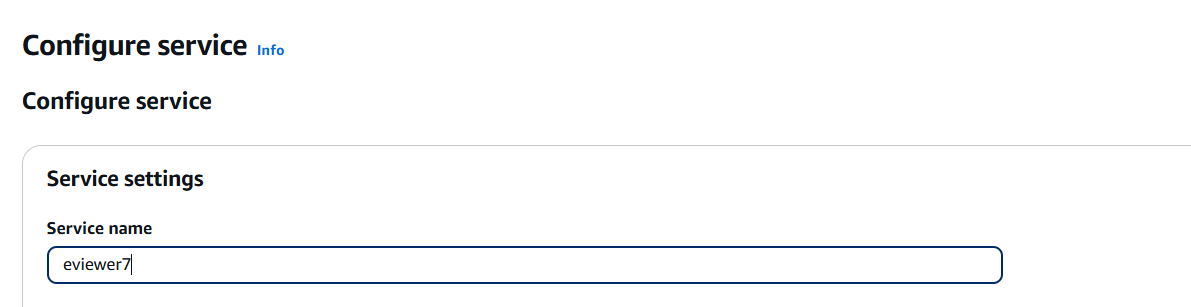
Step 4: Provide a name to the service. For example, eviewer7.
Step 5: Choose the Virtual CPU memory, eViewer requires a minimum of 2 GB.

Step 6: Create Next and select Create & deploy.
Step 7: Once deployed, access the resource. You can view the eviewer7 service running.
Step 8: Now, verify the URL in the Default domain field.
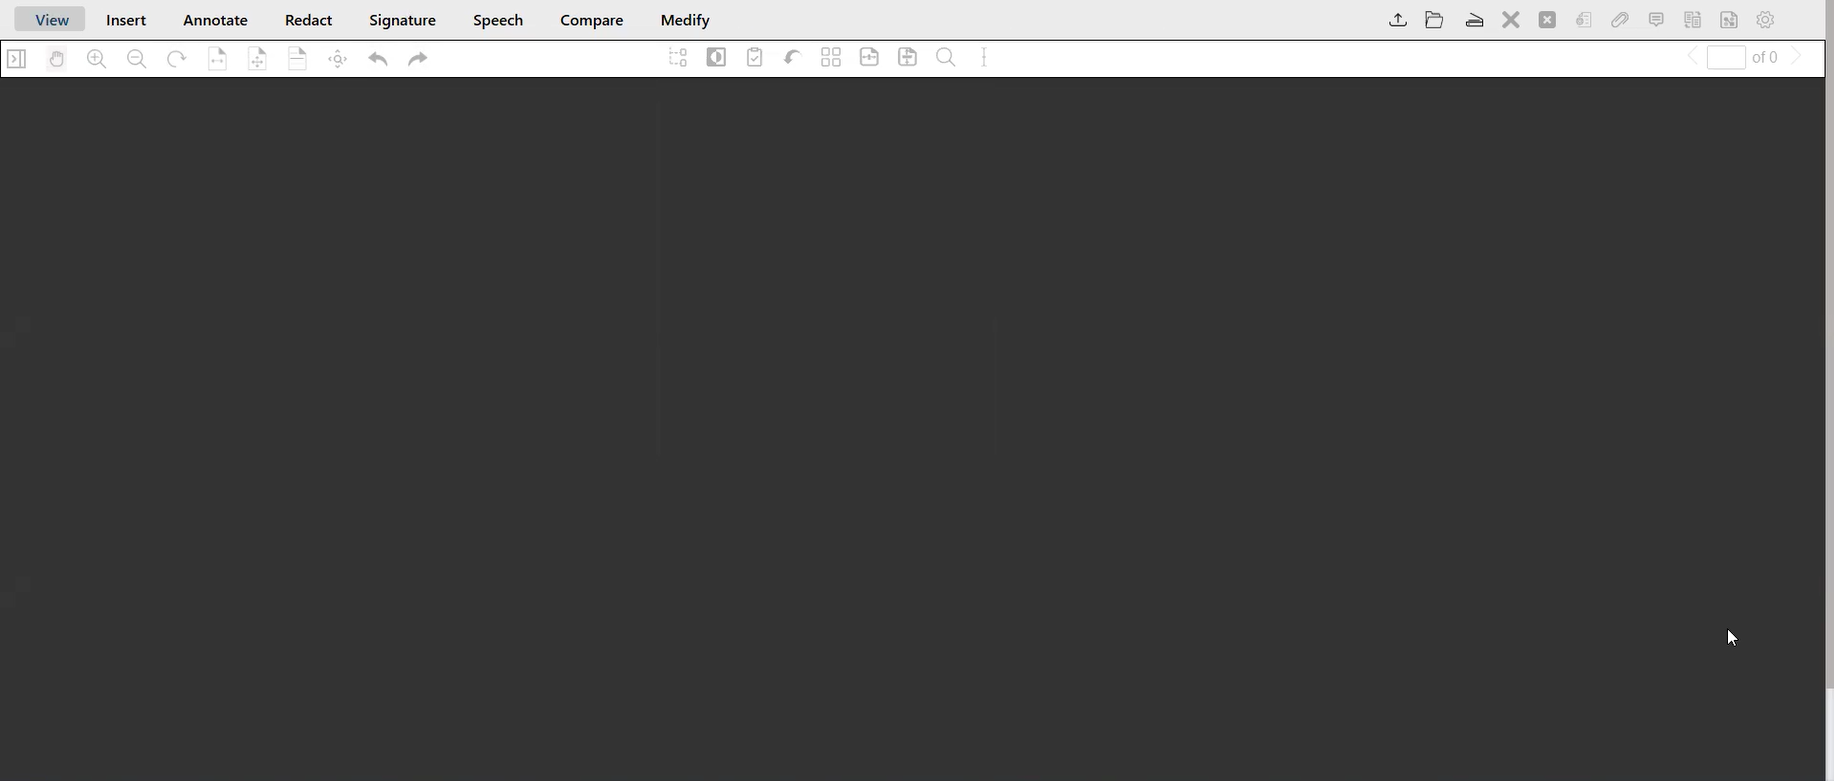
Step 9: Open the URL to ensure the viewer is rendered correctly.

eViewer Server
- Purpose: The viewer’s backend service requires the eViewer server to support advanced functionalities such as redaction, document comparison, digital signature, crop page, and office document rendering.
- Deployment: This service is optional and will be deployed using a Linux-based Docker container.
- Docker Image: For instance, the Docker image can be referenced as index.docker.io/mstechinc/eviewer-server:<version_tag>
Deployment Steps:
Step 1: In the AWS App Runner, click on ‘Create an App Runner service’ on the right side.
Step 2: Choose Container Registry as a source, and provide the public.ecr.aws/z7l1z8s2/mstechinc/eviewer-server:<version_tag> in the container image URI.
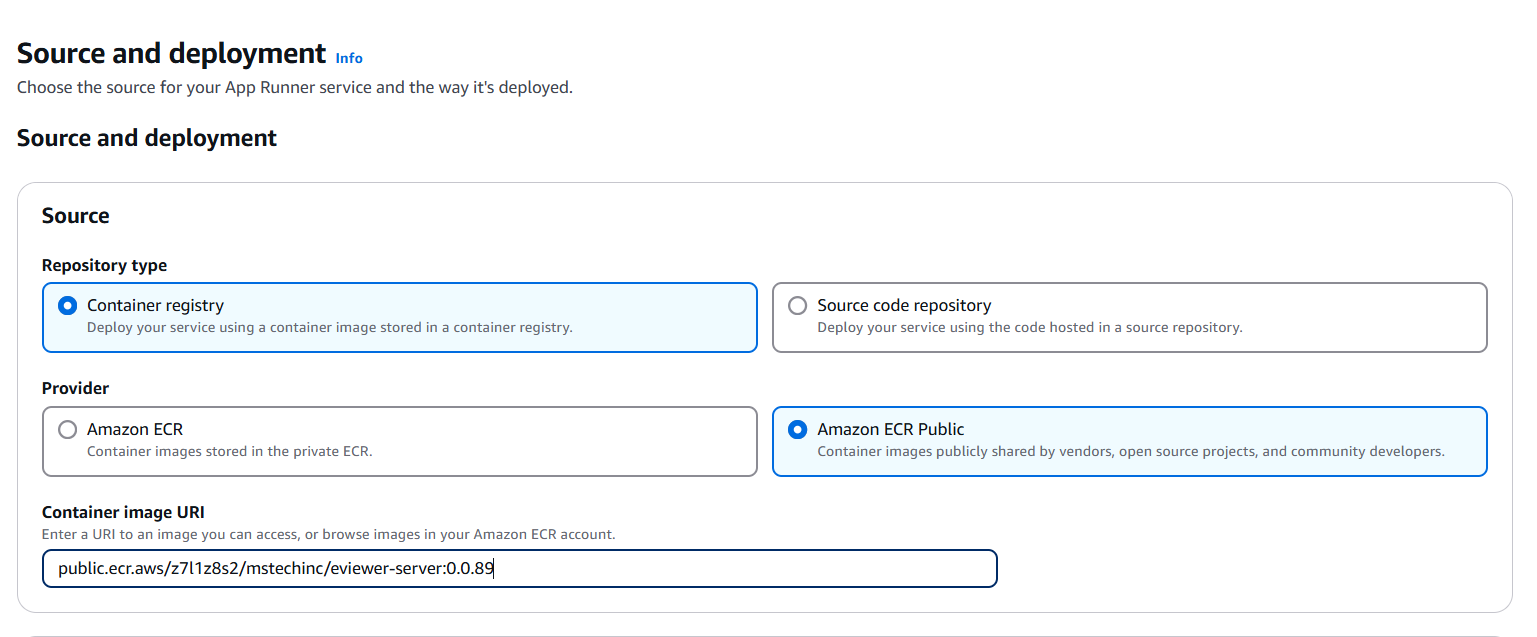
Step 3: Click Next.
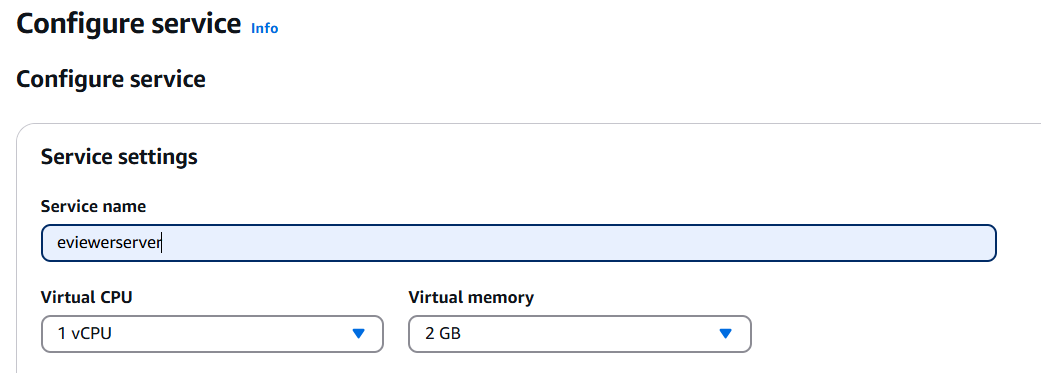
Step 4: Provide a name to the service. For example, eviewerserver.
Step 5: Choose Virtual CPU memory, 4 GB or higher is recommended.
Step 6: Add an environment variable for the license named: evSrvrLicenseKey

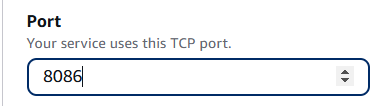
Step 7: Set port to: 8086
Step 8: Create Next and select Create & deploy. The deployment of eviewer7 will be completed successfully.
Step 9: Once deployed, access Resource, where you can view the eviewer7 service running.
Step 10: Now, verify the URL in the Default domain field.
Step 11: Open the URL in the browser with /api/v1/getCurrentTimeStamp. This will display the current date and time of the server.
By completing these steps, you can successfully deploy eViewer into AWS. This deployment will grant you access to advanced features for document viewing and editing capabilities, ensuring smooth and effective management of your documents.
Introduction: Deployment with Docker Compose
Deploying eViewer in a Docker environment allows seamless integration into web applications while minimizing setup complexities. Using Docker Compose, we can define the eViewer service in a docker-compose.yml file, manage dependencies, and quickly spin up the application. By the end of this guide, you will have a fully functional eViewer instance running in a Docker container, accessible through a web browser.
eViewer consists of multiple app services that can be deployed over the Docker Compose. In this guide, we will focus on deploying two specific services of eViewer: eViewer 7 and eViewer server
eViewer v7
Purpose: This service is the primary frontend service required for document viewing, editing, and collaboration features. The docker-compose.yml file script is provided by MST.
Deployment Steps:
Step 1: Create a directory for the project and navigate to it.
Step 2: Create a docker-compose.yml file using the script provided below:
version: '3.8'
services:
    eviewer7-service:
        image: mstechinc/eviewer7:7.0.349
        container_name: eviewer7-container
        ports:
             - "8080:80"
        restart: always
Explanation:
- Services: This defines a service called eviewer7-service.
- Image: Specifies the Docker image to use for this service. For example, mstechinc/eviewer7:<version_tag>. This will be pulled from Docker Hub.
- Container Name: Sets the name of the running container. For example, eviewer7-container.
- Ports: Maps port 80 inside the container to port 8080 (you can change the port if 8080 is already in use). This allows you to access eViewer by visiting http://localhost:8080 in a browser.
Step 3: Run the following command to pull the image and start the service: docker-compose up -d

Step 4: Once deployed, you can view the eviewer7 service running.
Step 5: Open the URL to ensure the viewer is rendered correctly.
eViewer Server
Purpose: This service is the viewer’s backend component to support advanced functionalities of MS Office document rendering, OCR, document redaction, document comparison, digital signatures, and page cropping.
Deployment Steps:
Step 1: Create a directory for the project and navigate to it.
Step 2: Create a docker-compose.yml file using the script provided below:
version: '3.8'
services:
    eviewerserver-service:
        image: mstechinc/eviewer-server:0.0.89
        container_name: eviewerserver-container
        ports:
            - "8086:8086"
        environment:
             - evSrvrLicenseKey= PROVIDED BY MST
        restart: always
Explanation:
- Services: This defines a service called: eviewerserver-service.
- Image: Specifies the Docker image to use for this service. For example, mstechinc/eviewer-server:<version_tag>. This will be pulled from Docker Hub.
- Container Name: Sets the name of the running container. For example, eviewerserver-container.
- Ports: Maps port 8086 inside the container to port 8086 (you can change the port if 8086 is already in use).
- Environment Variables: Includes evSrvrLicenseKey, the eViewer license key provided by MST.
Step 3. Run the following command to pull the image and start the service: docker-compose up -d

Step 4: Once deployed, now verify the URL in the browser with http://localhost:8086/api/v1/getCurrentTimeStamp. This will display the current date and time of the server.
By completing these steps, you can successfully deploy eViewer with Docker Compose.
Configuring IBM CM8 Connector
eViewer server connector using IBM Java CM8 beans would search for “cmbicmsrvs.ini” and other supporting “.INI” files which are deployed with the IBM Content Manager 8 pClient/eClient or ICN installation.
Step 1: The path to the connectors folder needs to be pointed within eViewer server component deployment.
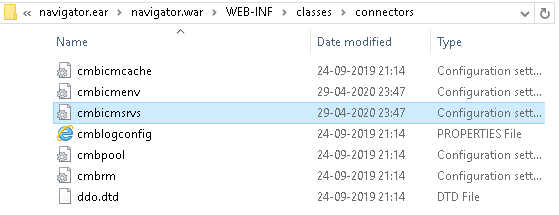
Step 2: The “Connectors” folder consists of multiple files for configuration settings of IBM CM8 with eViewer 7. IBM CM8 reads the file “cmbicmsrvs.ini” at runtime.
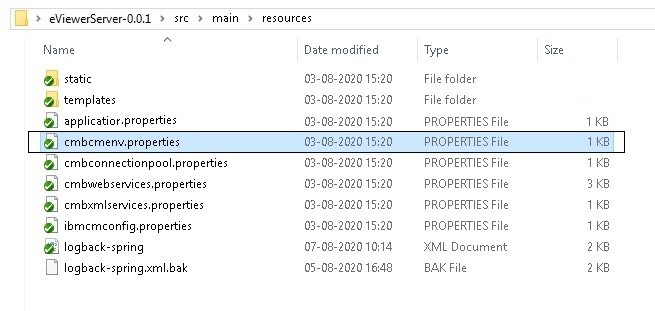
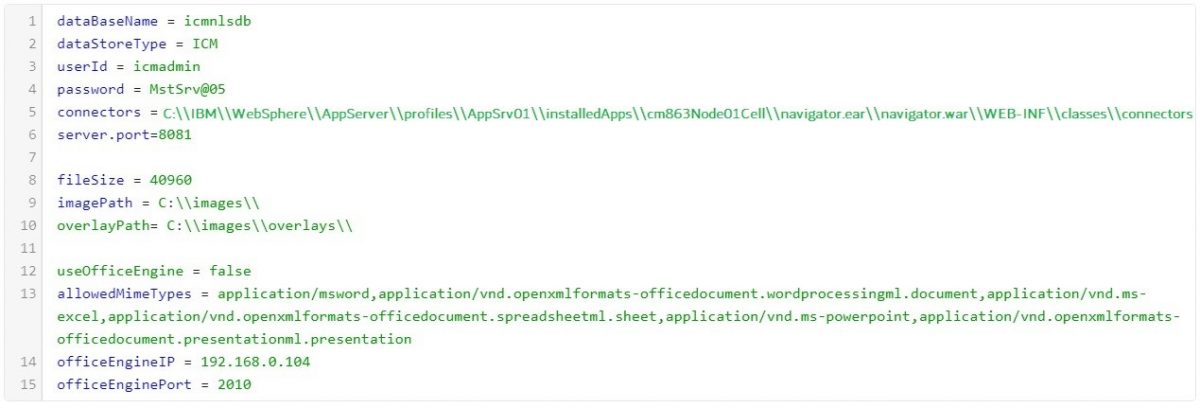
Step 3: Go to the eViewer 7 application server folder, and locate the property file named cmbcmenv.properties. Open the file in an editor application.
Step 4: The cmbcmenv.properties file contains the concrete path of the “connectors” folder for making the connection between the CM8 application with eViewer 7.
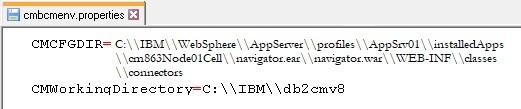
Step 5: Set the values in the application property file for making connection with IBM CM8 and save.
IBM Content Navigator
Extracting eViewer 7 Plug-In
To begin, download the eViewer all deliverables (including JAR files). Follow these steps:
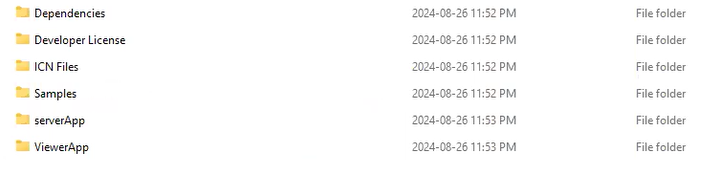
Step 1: Locate the package named eViewer v7.0.xxx.zip and extract its contents.
Step 2: Inside the extracted folder, go to the ViewerApp folder and copy all the files.
Step 3: Navigate to the FileNet server where IBM Content Navigator (ICN) is installed.
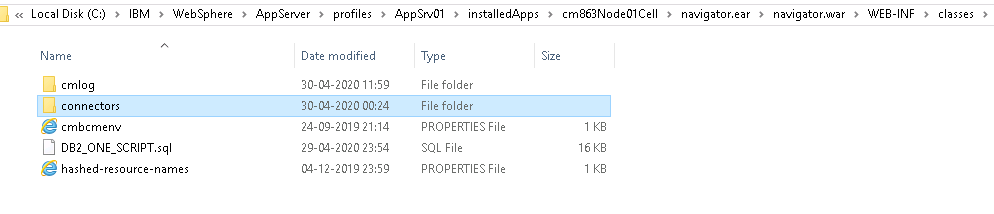
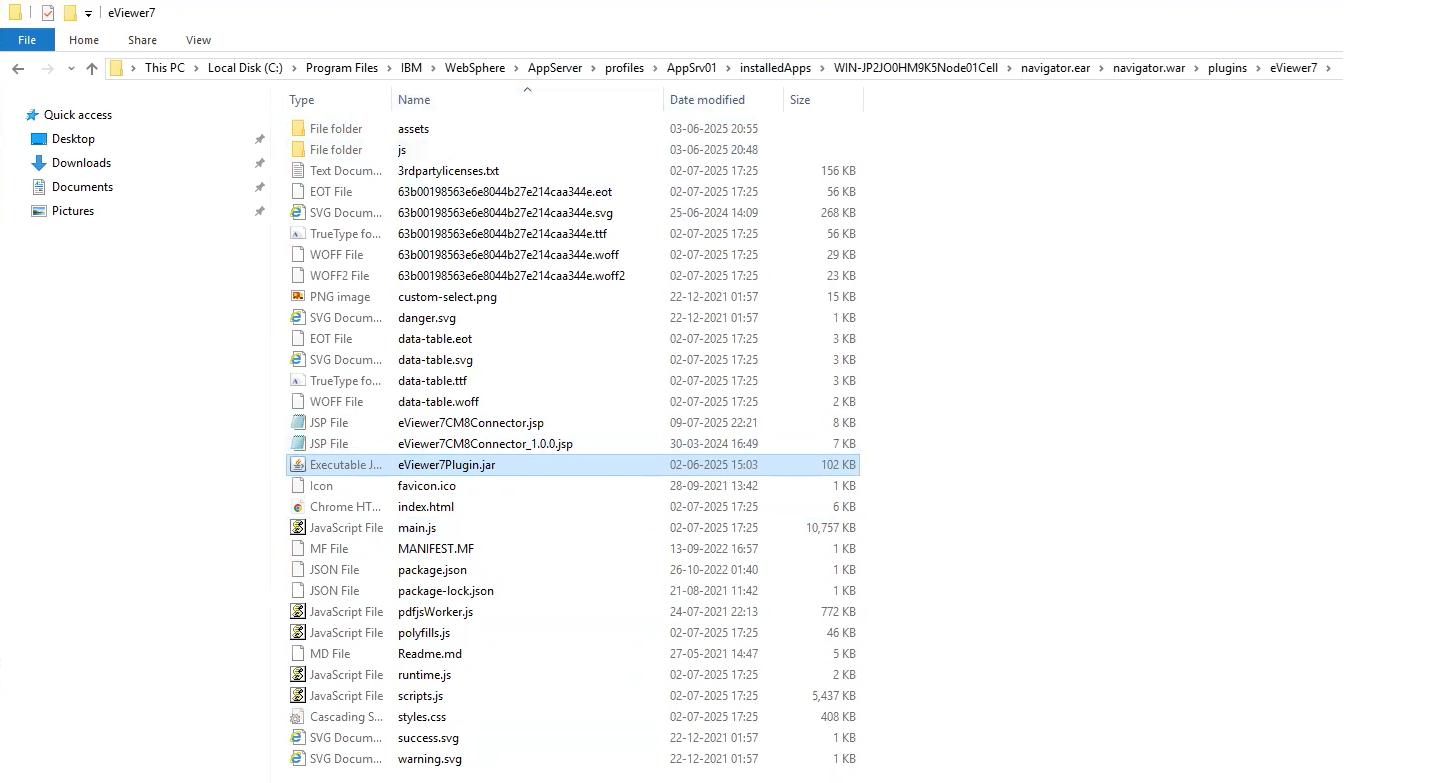
Step 4: Follow this path: WebSphere > AppServer > profiles > AppSrv01 > installedApps > Node cell folder > navigator.ear > navigator.war > plugins.

Step 5: Inside the plugins folder, create a new folder named eViewer7.
Step 6: Paste the copied files into this eViewer7 folder.
Step 7: Go back to the extracted folder, navigate to the ICN Files folder, and copy the eViewer7CM8Connector.jsp and eViewer7Plugin.jar files. Then, paste these files into the eViewer7 folder.
Deploying eViewer Server on IBM WebSphere
Perform the following steps to deploy the eViewerServer WAR file on IBM WebSphere.
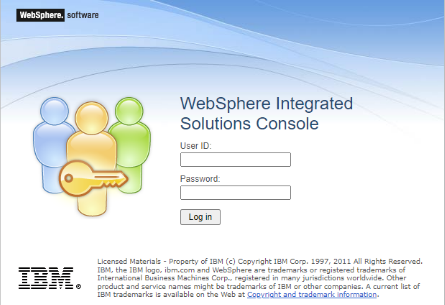
Step 1: Access the URL to log into WebSphere: https://servername:portnumber/ibm/console/logon.jsp
Step 2: Select Applications in the left menu of the WebSphere console.

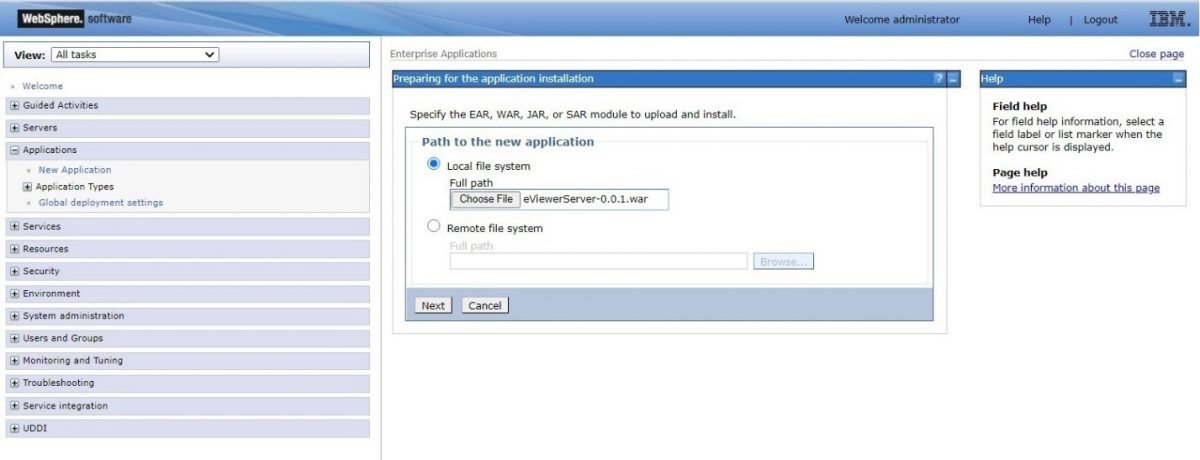
Step 3: Select New Application > New Enterprise Application.
Step 4: Enter the complete file path for the WAR file for eViewer. Navigate to the eViewer v7.0.xxx folder, then go to serverApp > WAR. Copy the WAR file and upload it, for example, eViewerServer.war
Step 5: Click Next and wait for the application to be loaded.
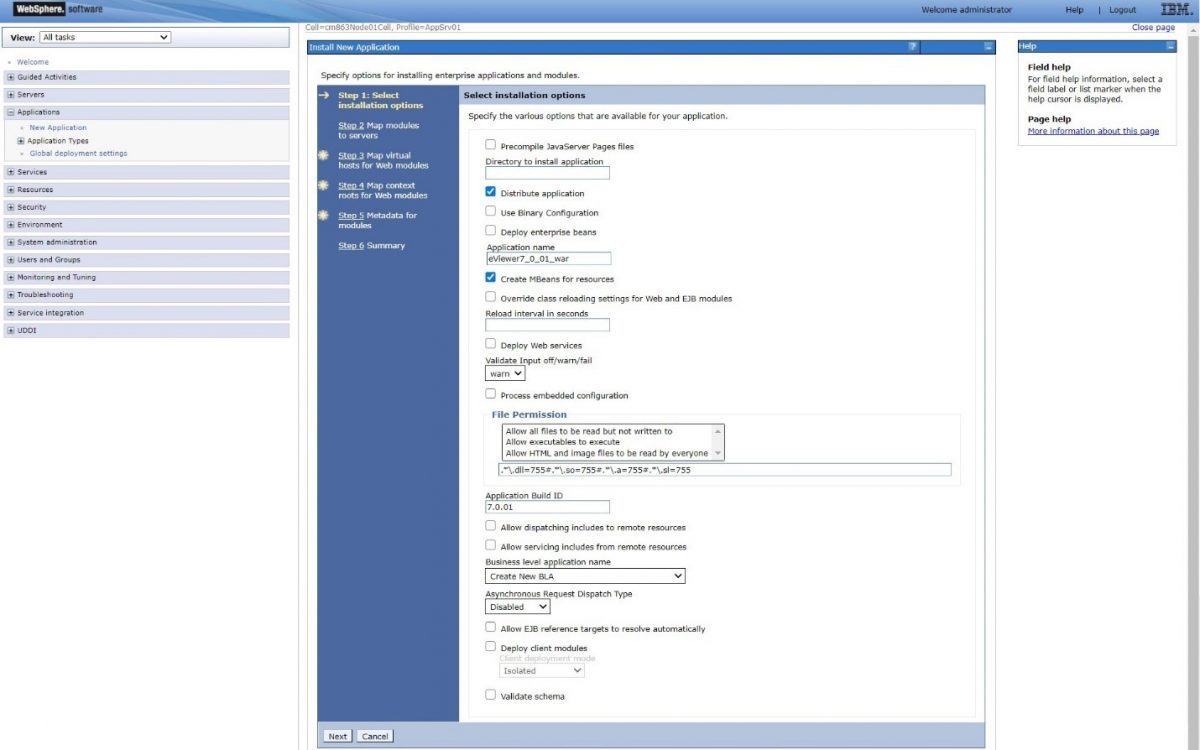
Step 6: Click Next to continue using the “Fast Path” option.
Step 7: Choose the required checkboxes as per your configuration needs.
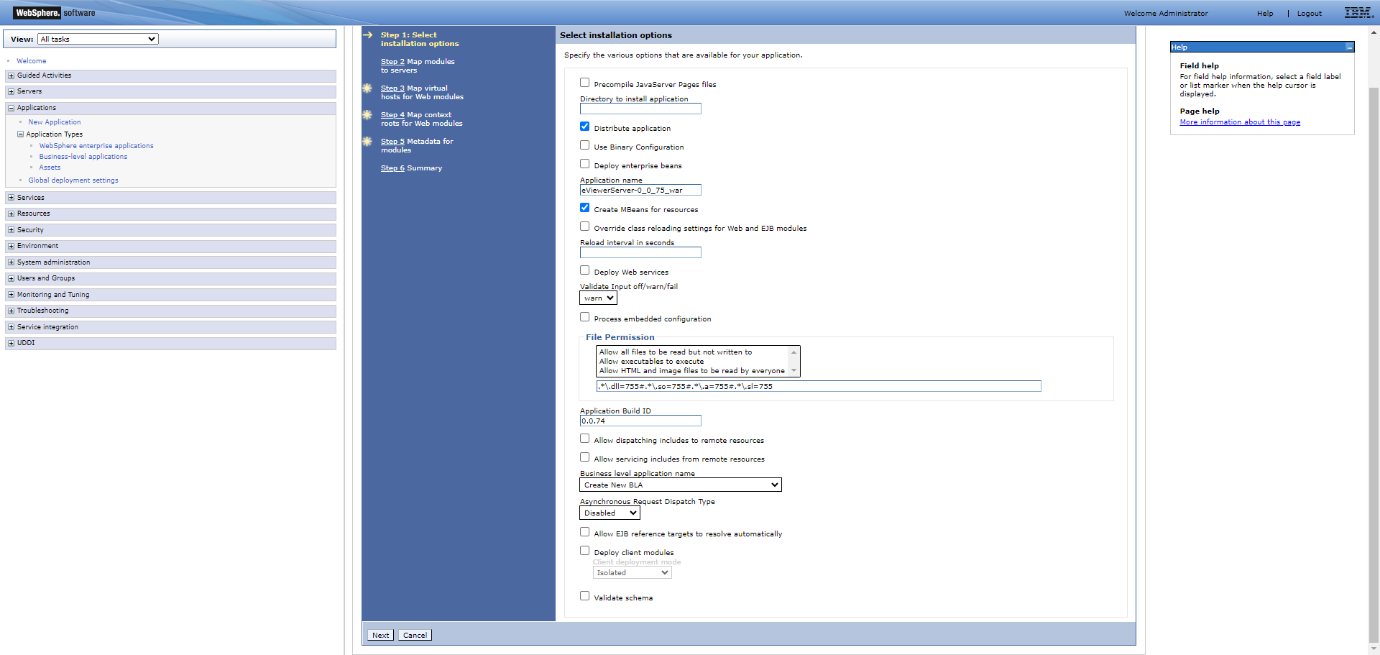
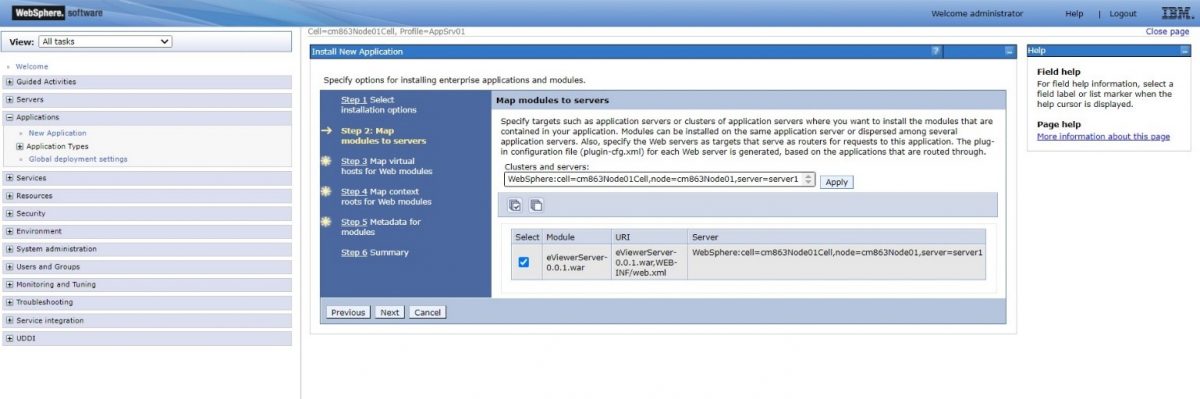
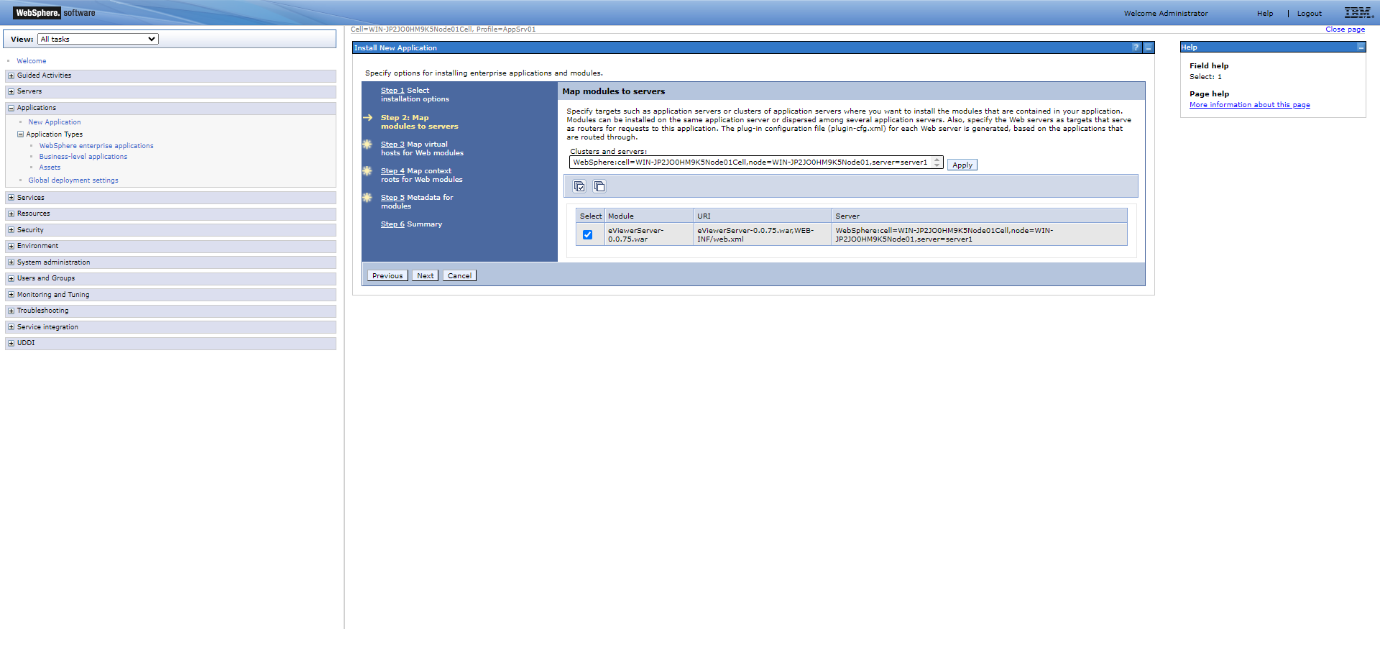
Step 8: Click Next to continue to Step 2.
Step 9: Select the checkbox for the eViewer WAR file, and click Next to continue to Step 3.
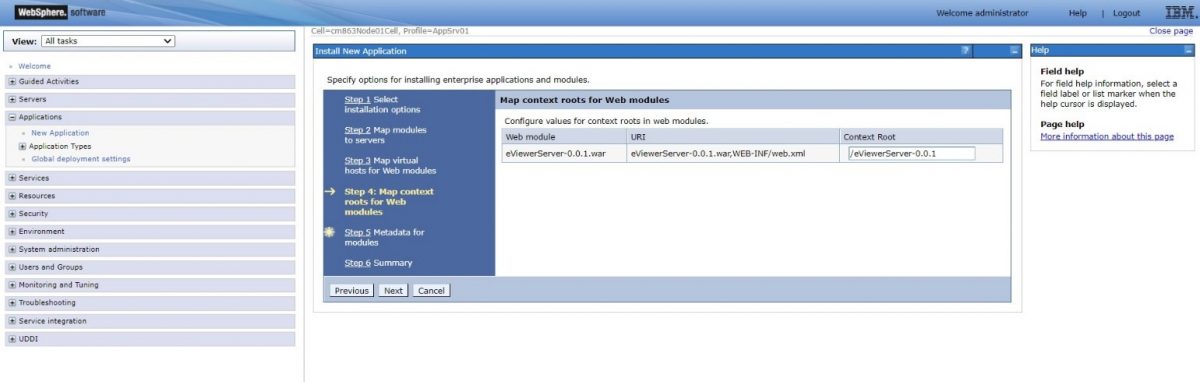
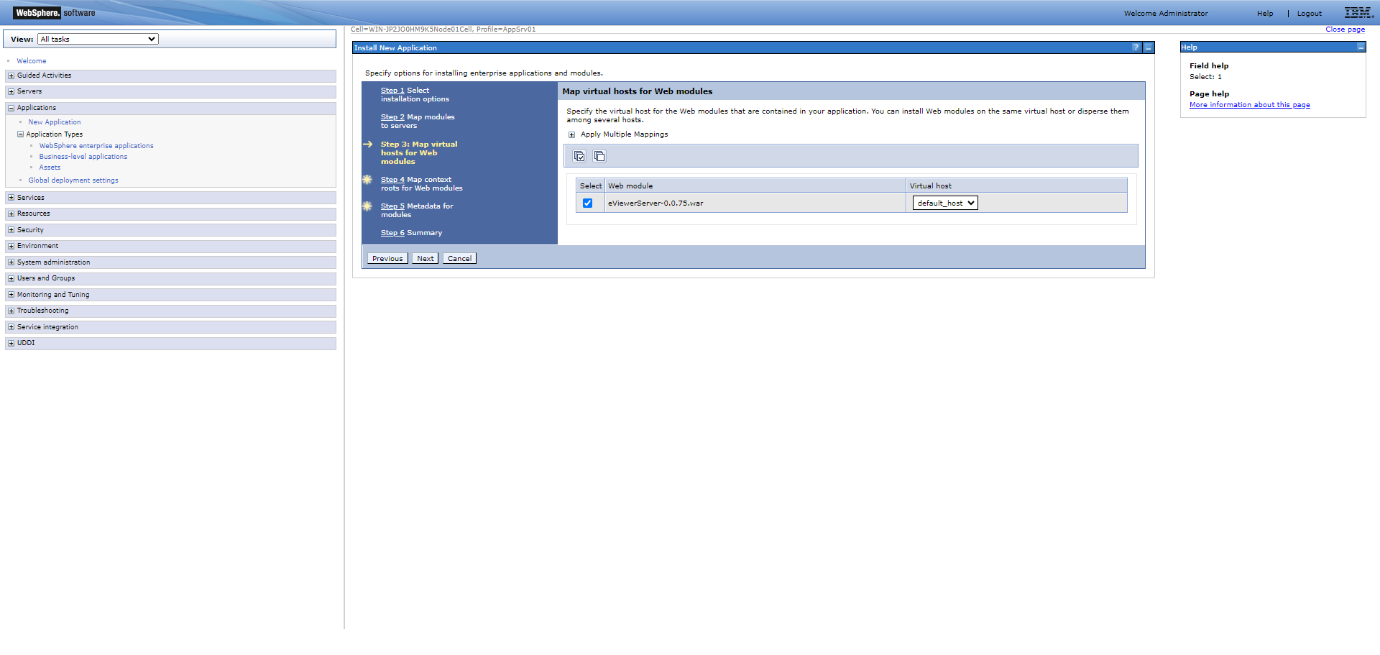
Step 10: Make sure the checkbox is selected and click Next to continue to Step 4.
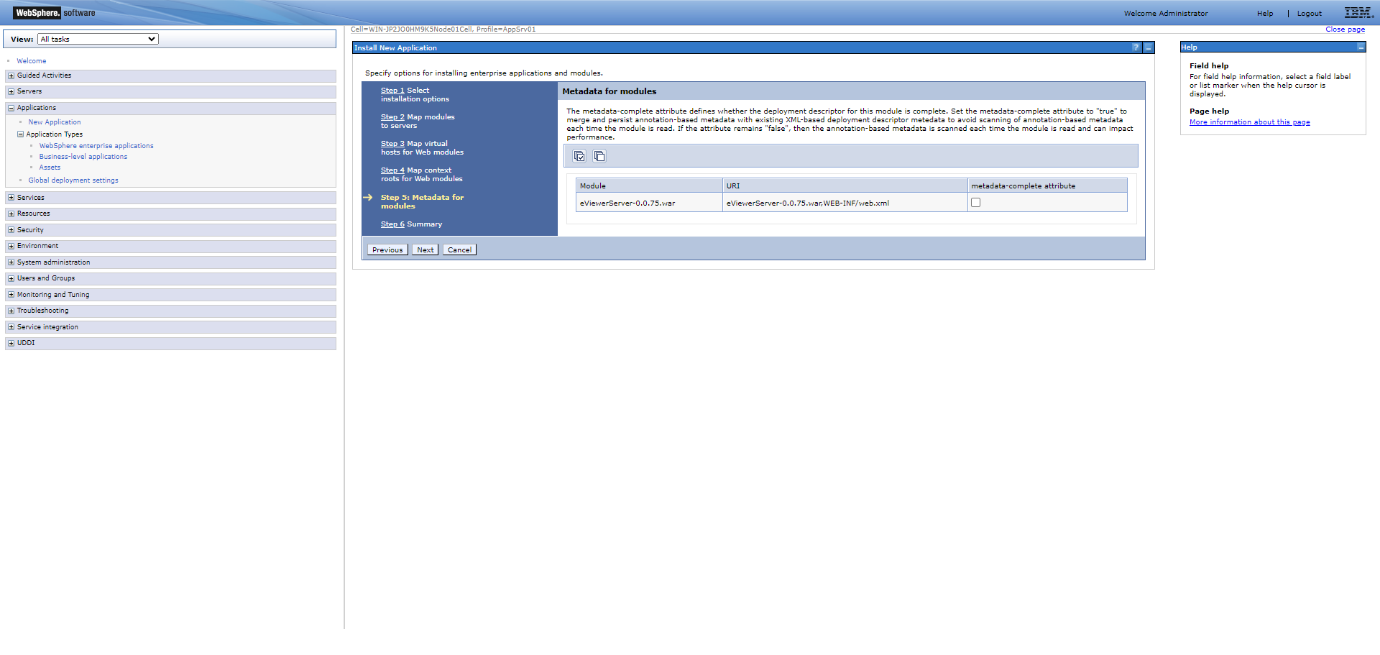
Step 11: Enter the Context Root. For example: /eViewerServer-0.0.75

Step 12: Click Next to continue to Step 5.
Step 13: Review the Summary, then click Finish and wait for the application to install.
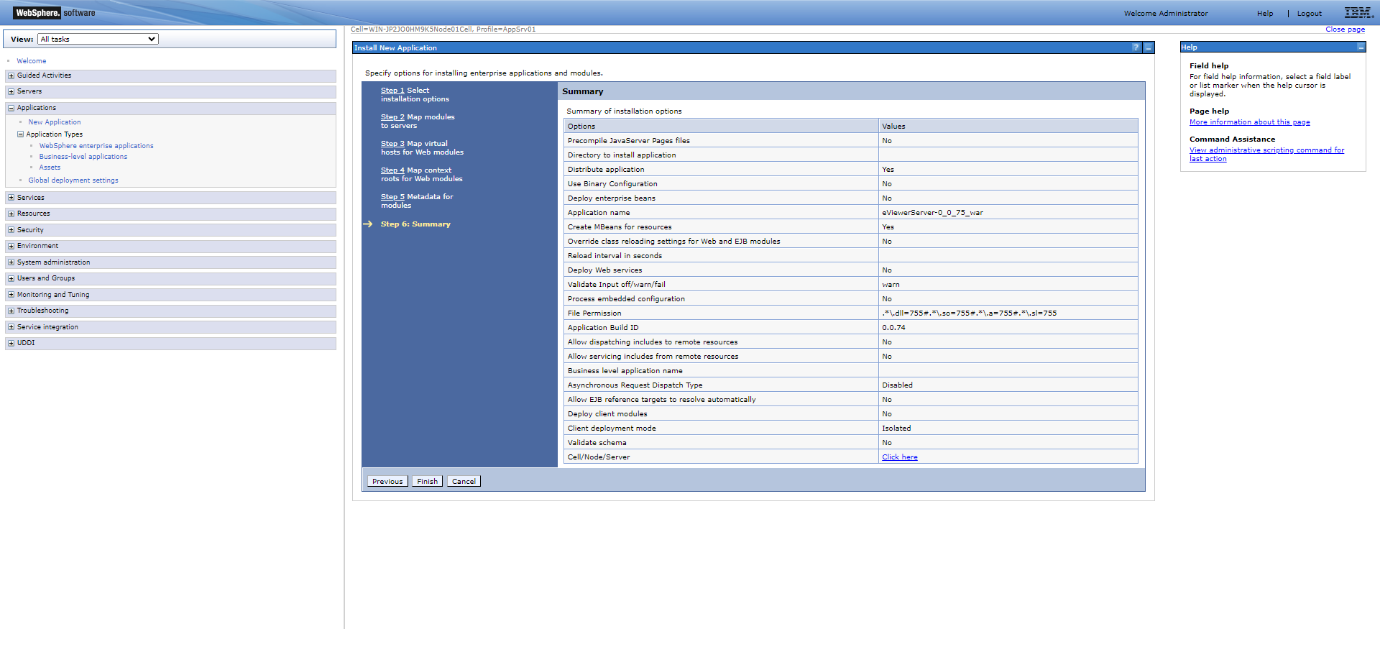
Step 14: Once it’s installed, click Save to confirm the deployment settings.
Starting the Service on IBM WebSphere
Once the server is deployed, follow these steps to start the service on WebSphere.
Step 1: Click Applications in the left menu of the WebSphere console.
Step 2: Click Application Types > WebSphere enterprise application, and find your installed WAR file in the list.

Step 3: Select the checkbox for the eViewer application that is not running.
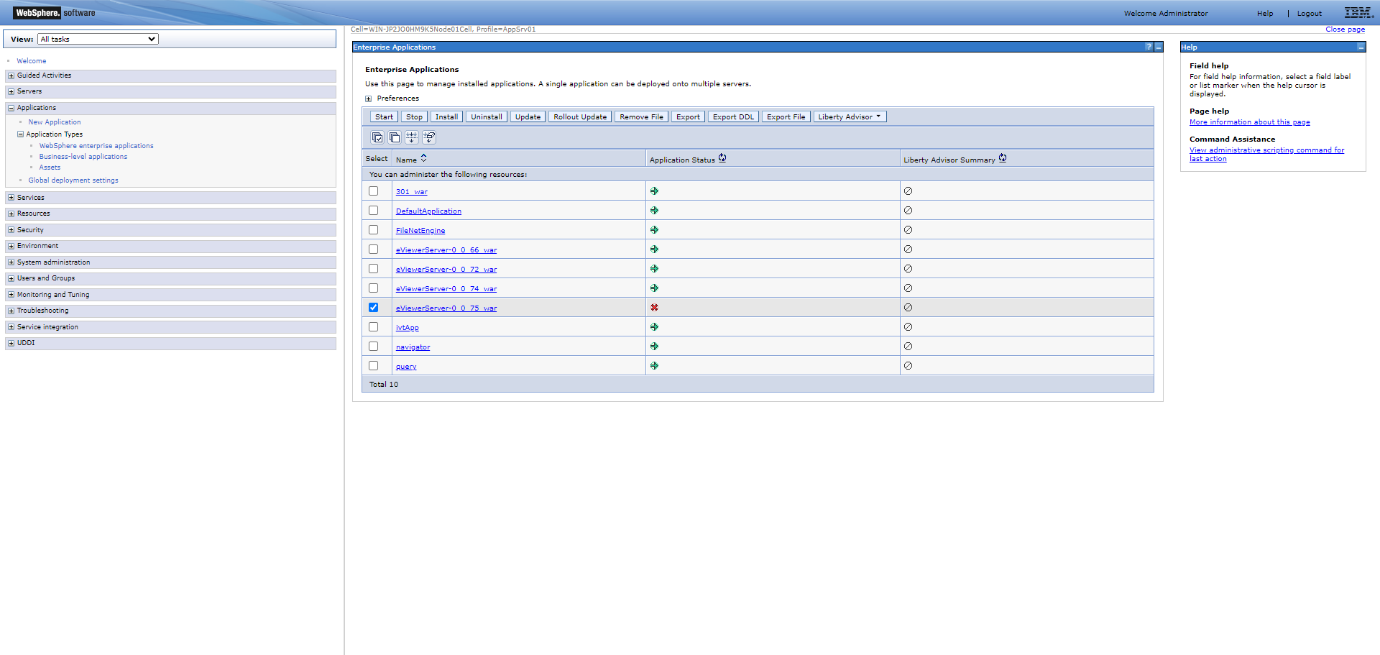
Step 4: Click the Start button.
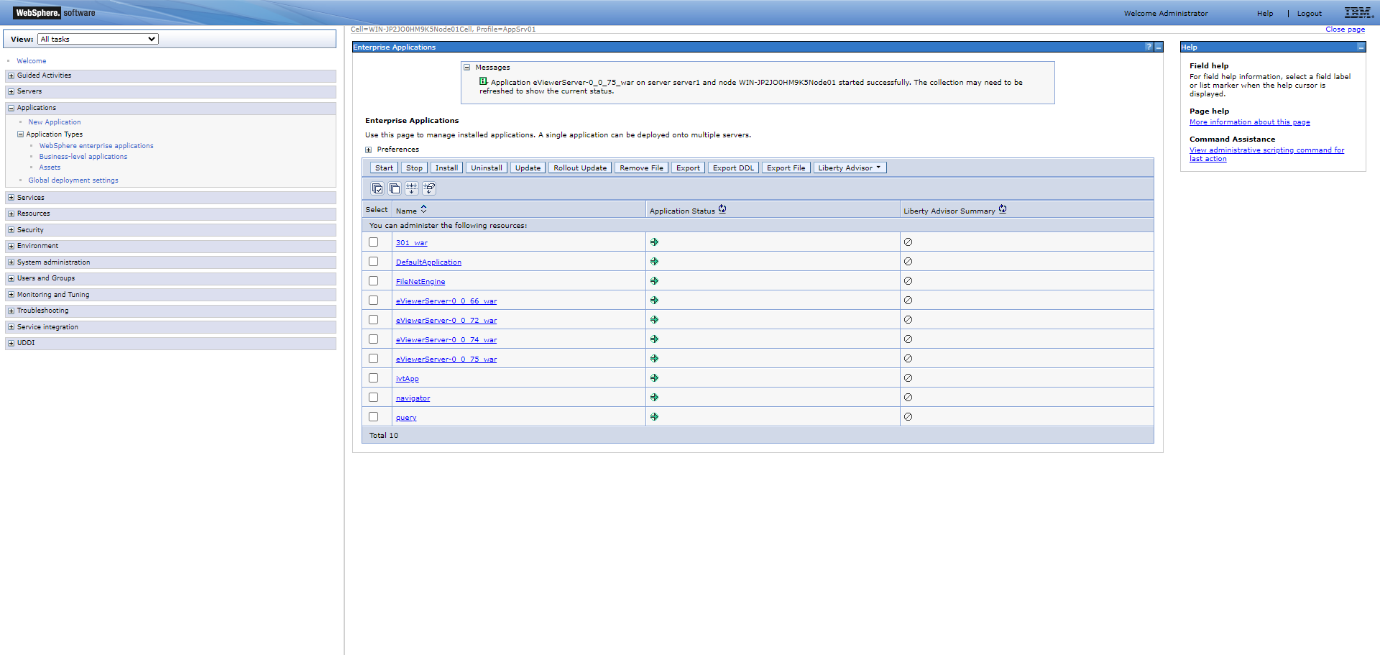
The application status will turn to a green arrow once eViewer is running. To verify this, open the URL in the browser: https://servername:serverportnumber/eViewerServer-0.0.xx/api/v1/getCurrentTimeStamp
This will display the current date and time of the server.
Deploying eViewer 7 Plug-In
The following steps are for deploying eViewer 7 plug-in in IBM Content Navigator.
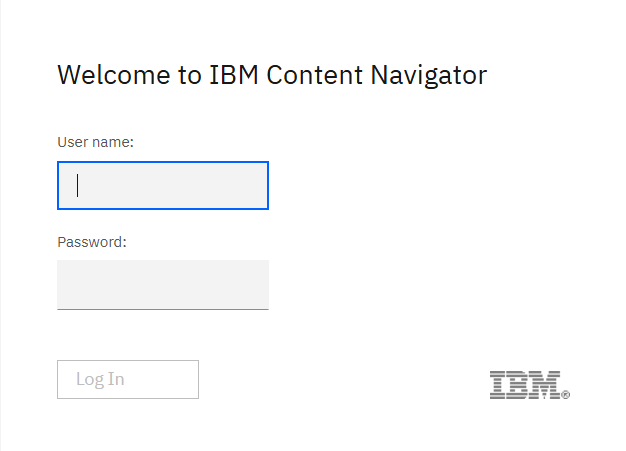
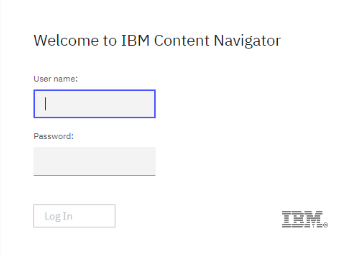
Access the URL to log into ICN and enter in your credentials: https://servername:portnumber/navigator/?desktop=admin
Load eViewer 7 Plug-In
Once logged into ICN, load the eViewer 7 plug-in by follow these steps:
Step 1: Click Plug-ins from the left menu.
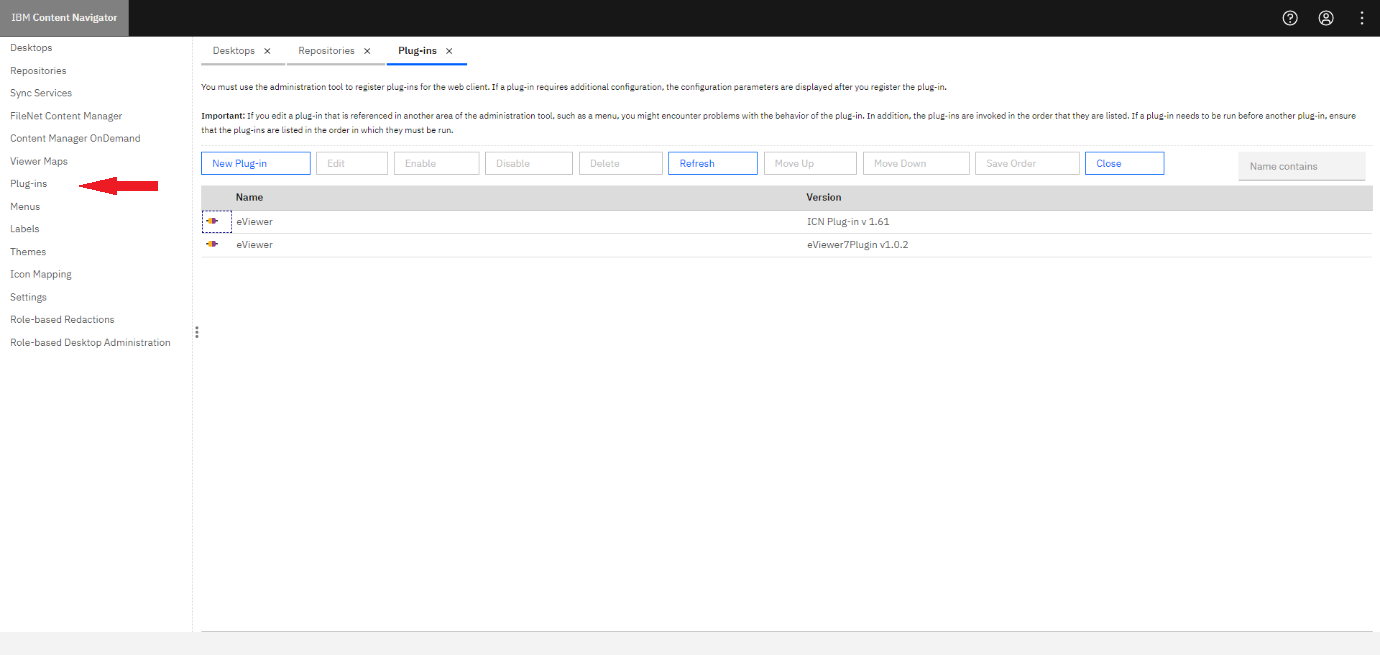
Step 2: Select New Plug-in from the ribbon.
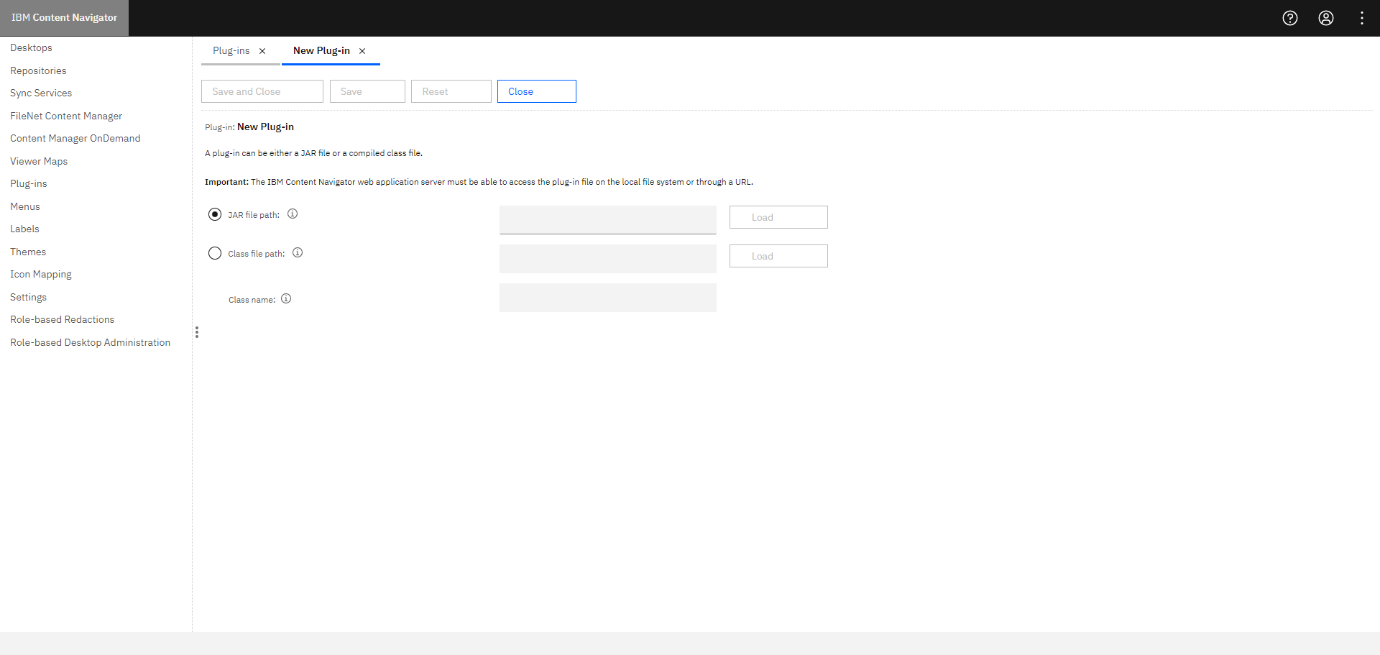
Step 3: Select the JAR file path radio button and enter the path of the plug-in jar: i.e. https://servername:portnumber/navigator/plugins/eViewer7/eViewer7Plugin.jar
Step 4: Click Load.

Step 5: Enter the required details for the following fields:
- saveUrl: https://servername:serverportnumber/eViewerServer-0.0.xx/saveDocumentMPToICN
- serverSocket: 9090
- serverUrl: https://servername:portnumber/api/v1/
Step 6: Click Save and Close.
The plug-in has been installed successfully.
Mapping the Plug-in
Next, we need to correctly map the plug-in between eViewer and ICN. Follow these steps:
Step 1: Click Viewer Maps from the left menu.
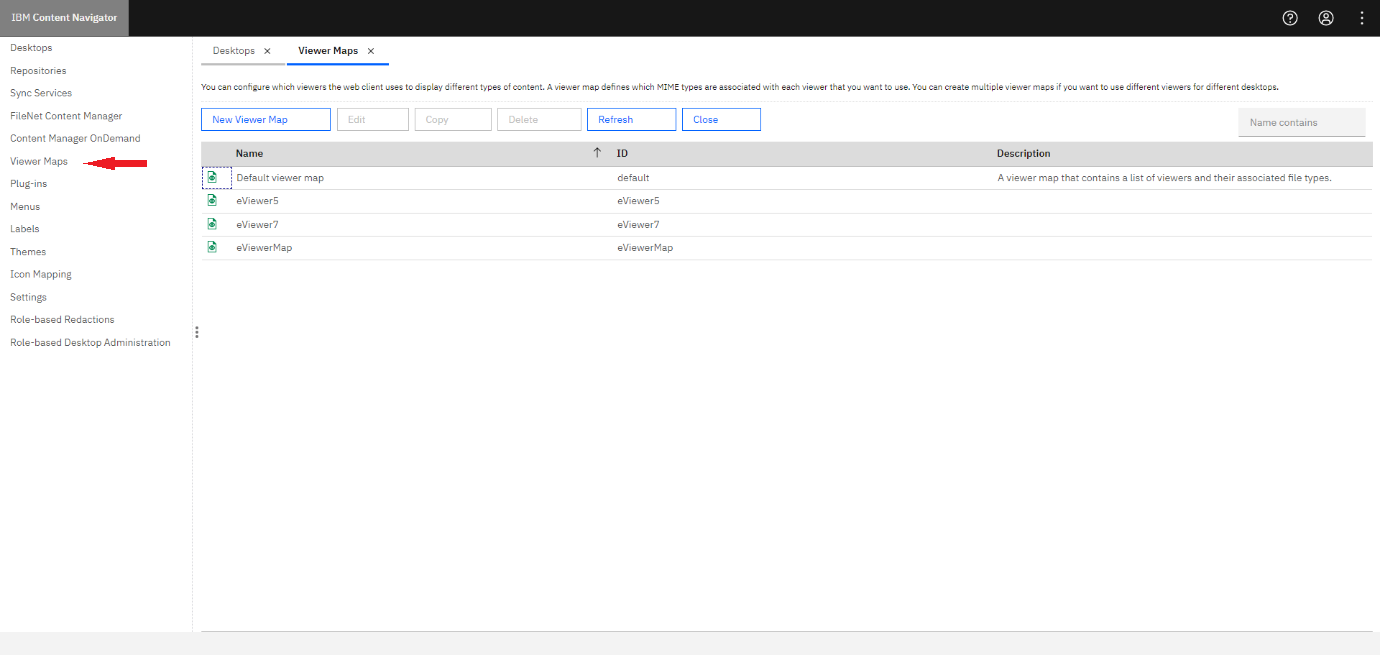
Step 2: Select New Viewer Map.
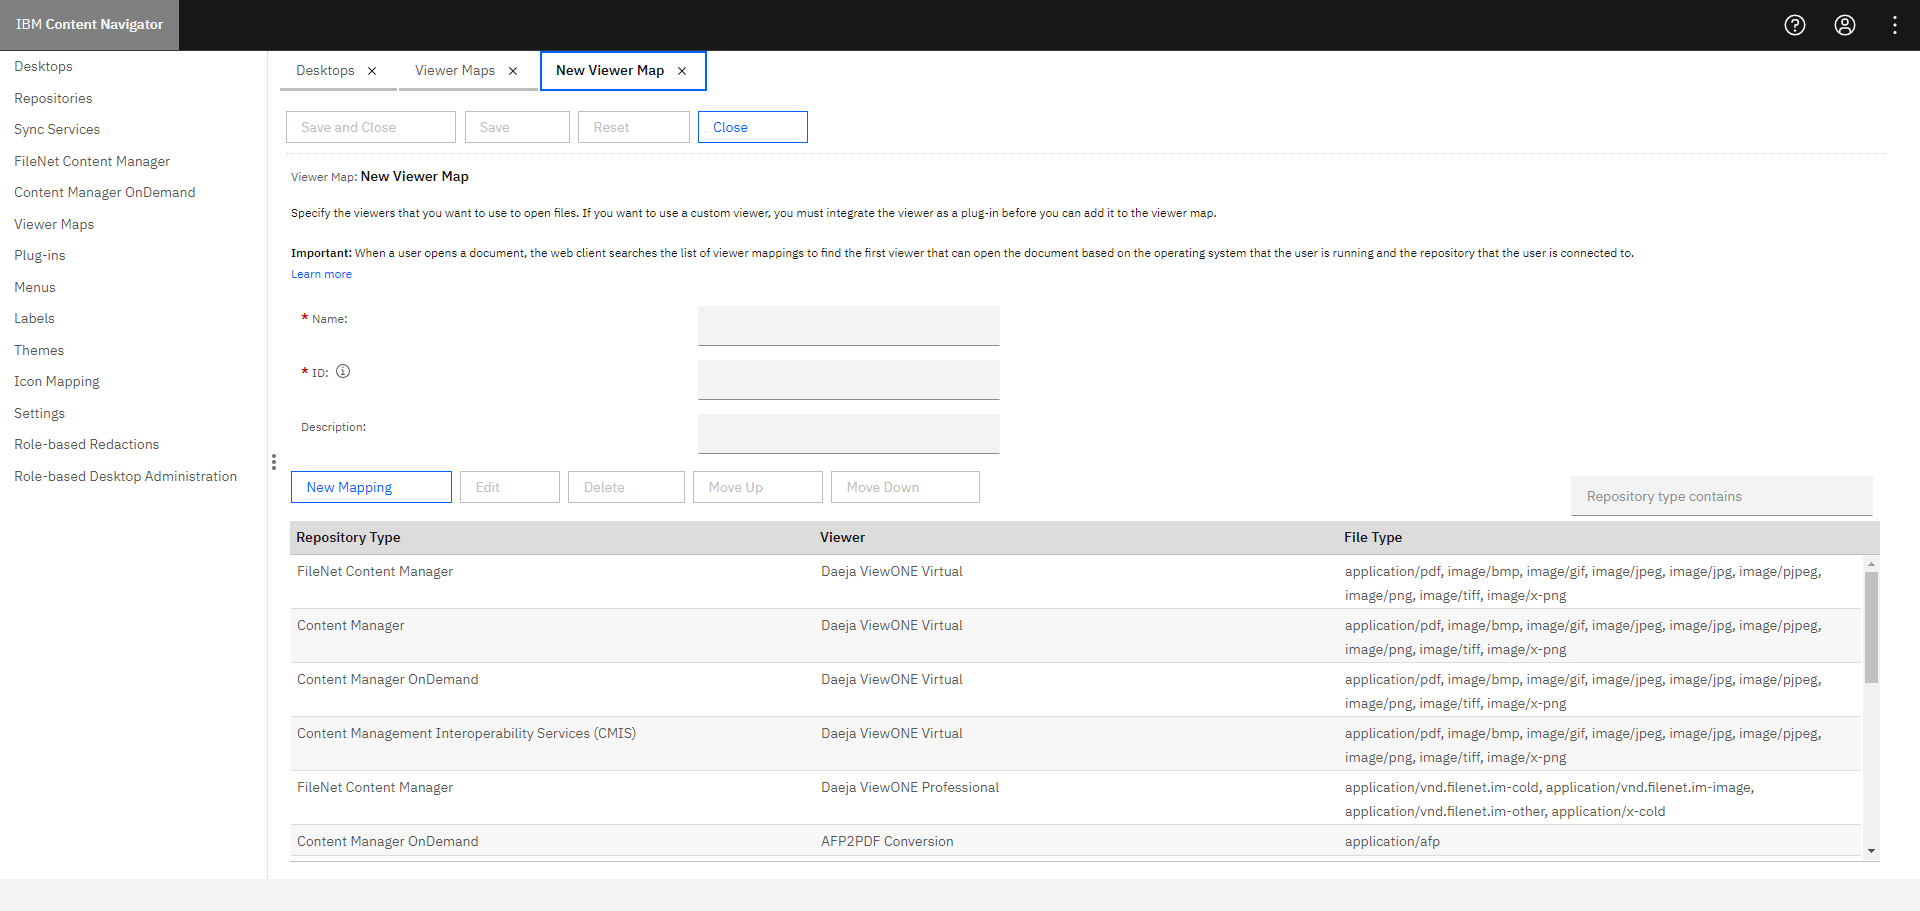
Step 3: Enter the Name and ID for the viewer map. For example: eViewer7.
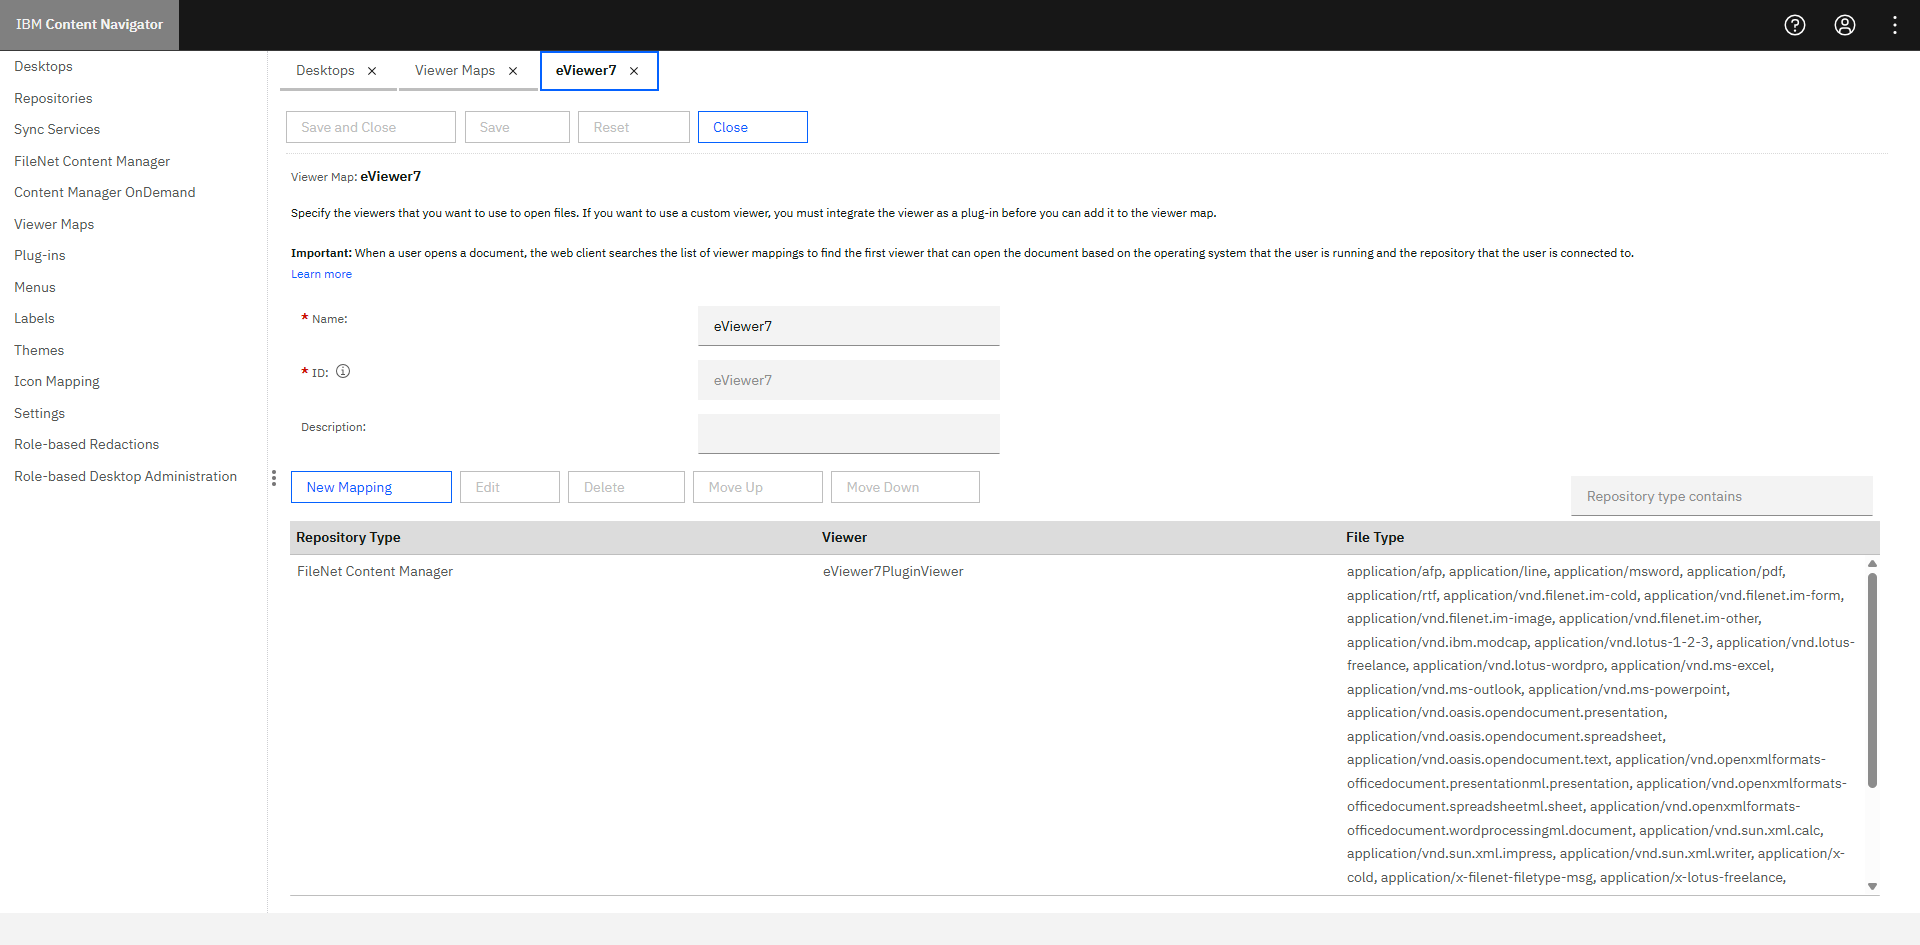
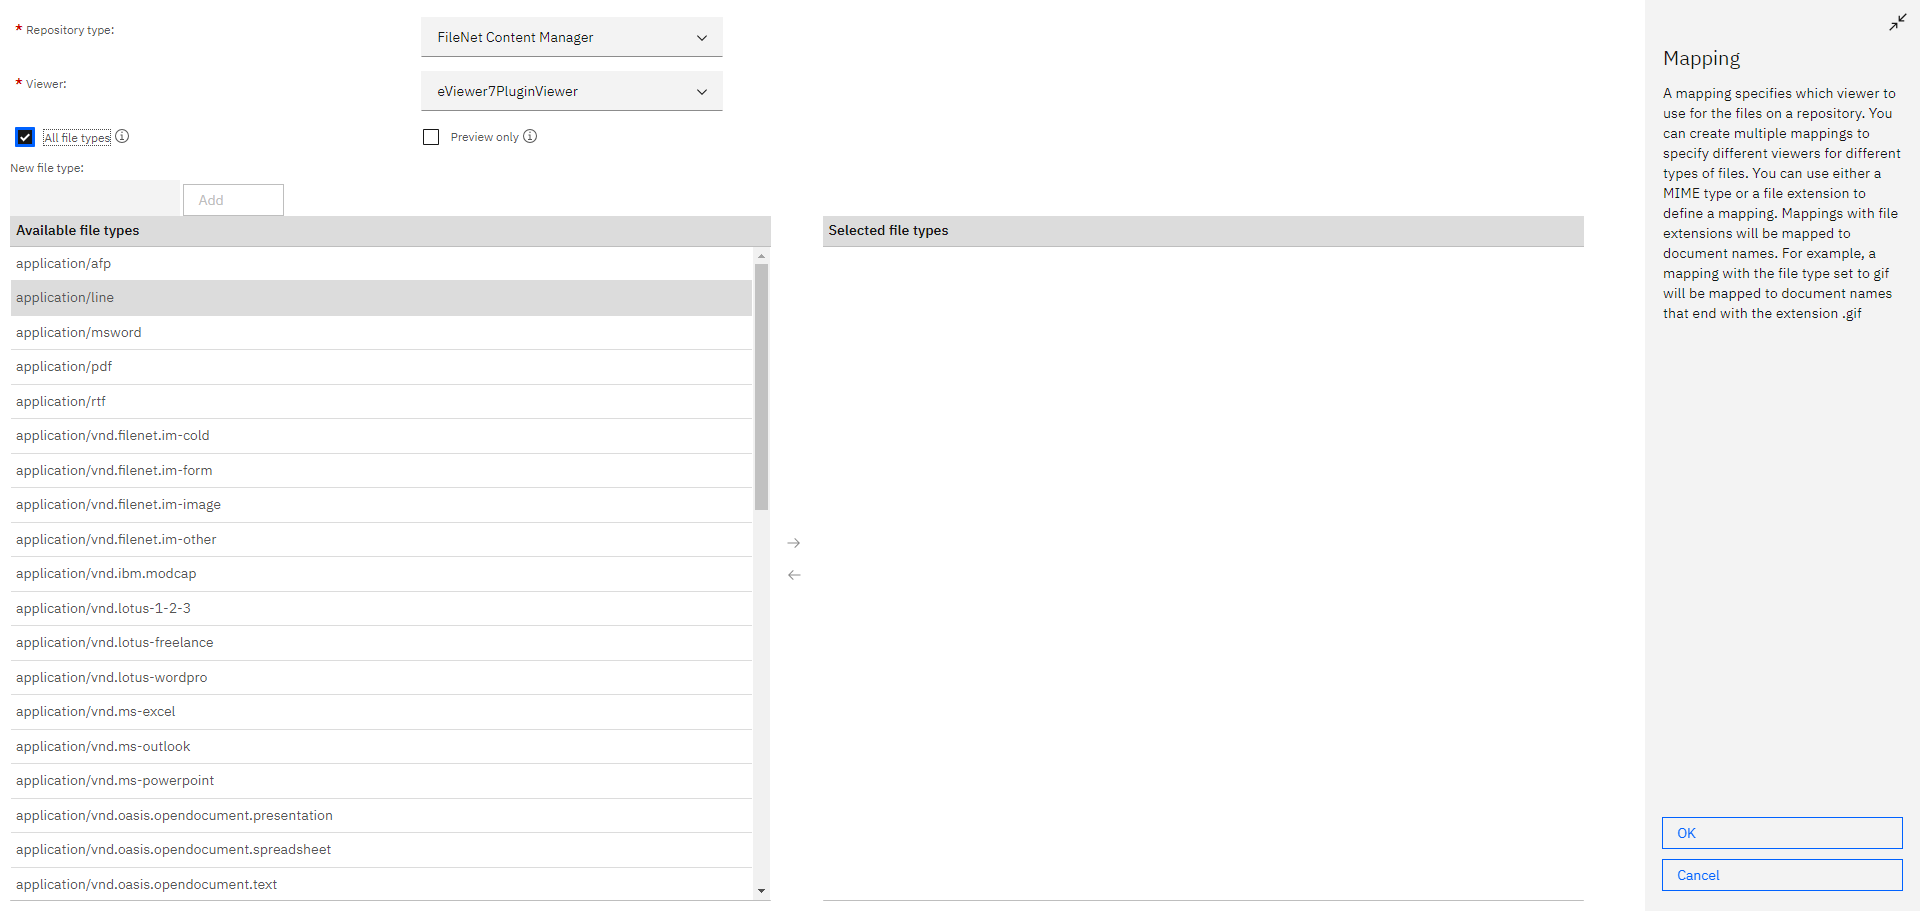
Step 4: Click New Mapping.
Step 5: Choose the following fields:
- Repository type: FileNet Content Navigator
- Viewer: eViewer7 Plug-in Viewer (Plug-in that was created earlier)
Step 6: Select the All file types checkbox, and then click OK.
Step 7: Click Save and then Close.
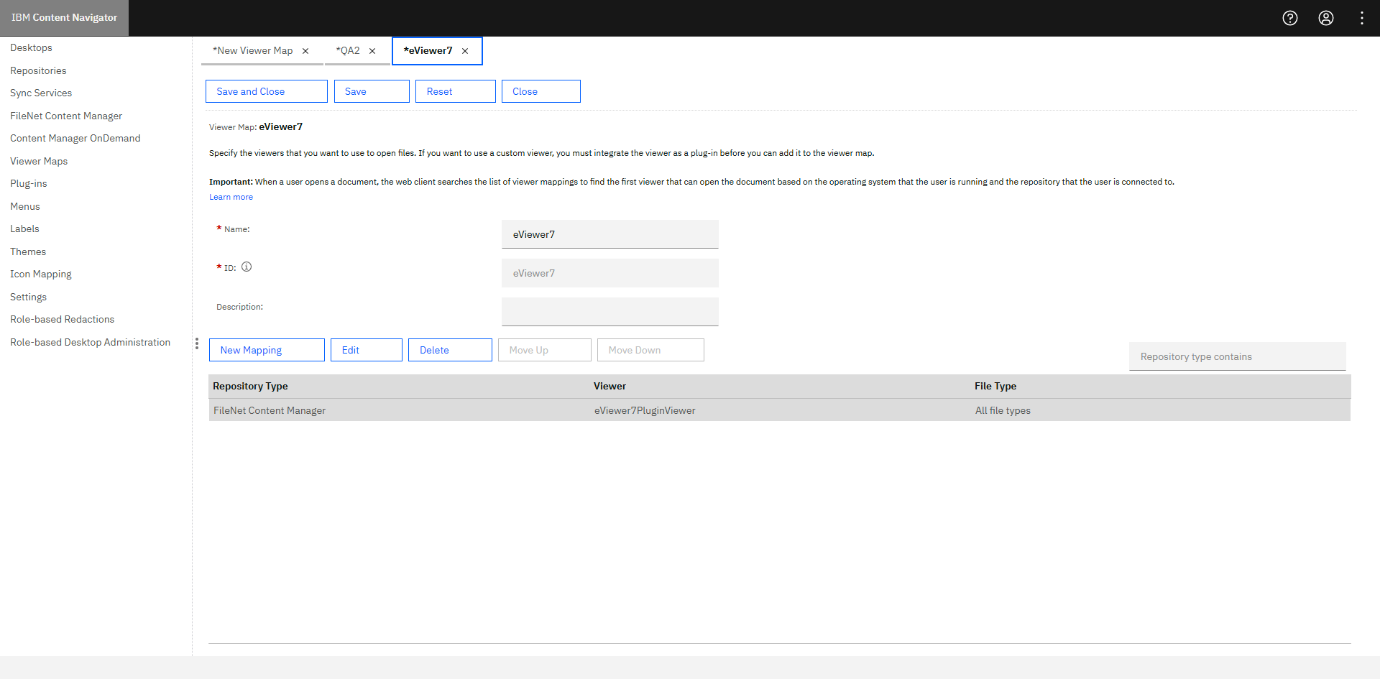
The newly created mapping will be listed in the list of existing viewer maps.
Link Viewer Map to ICN Desktops
Link your existing Desktop with the viewer map by following these steps:
Step 1: Select Desktops from the left menu.
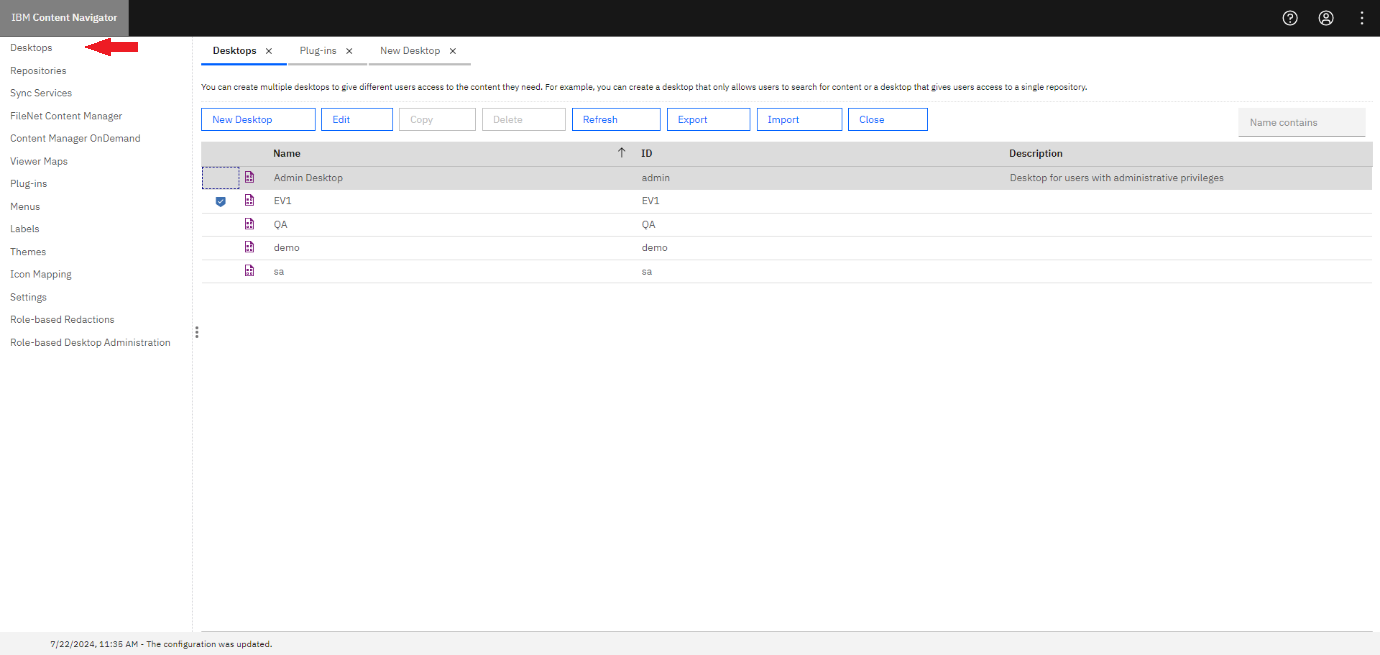
Step 2: Select your desktop and click Edit.
Step 3: Select the Viewer map under the Desktop Configuration section, select the chosen name for the viewer in your application (eViewer 7) from the drop-down list.
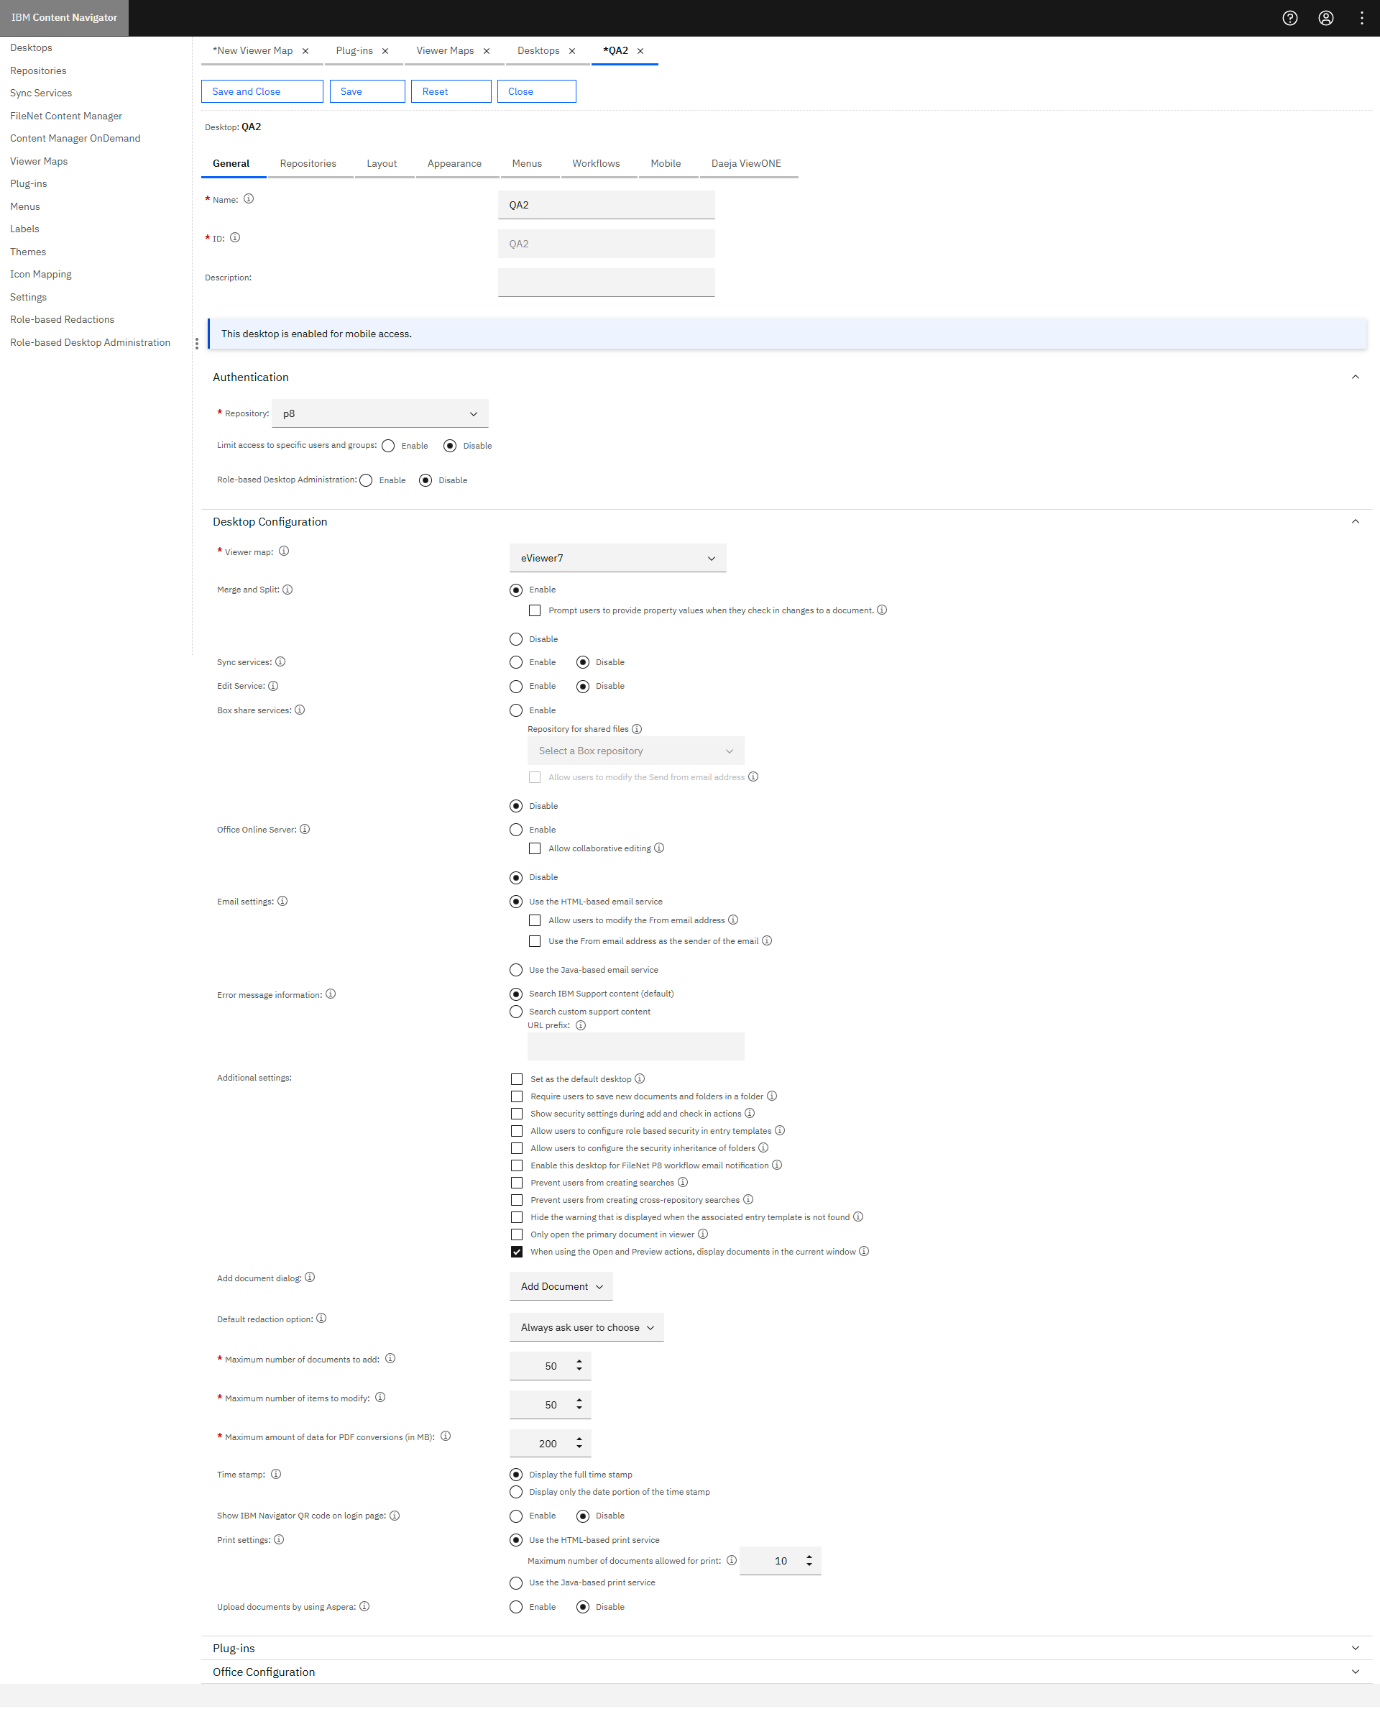
Step 4: Click Save and then Close from the top ribbon.
Verifying the Deployment
Step 1: After setting up the ICN Desktop, you can view it by opening the browser and entering the URL in the following format. For example, https://servername:portnumber/navigator/?desktop=QA2. In this example, QA2 refers to the ID of the desktop.
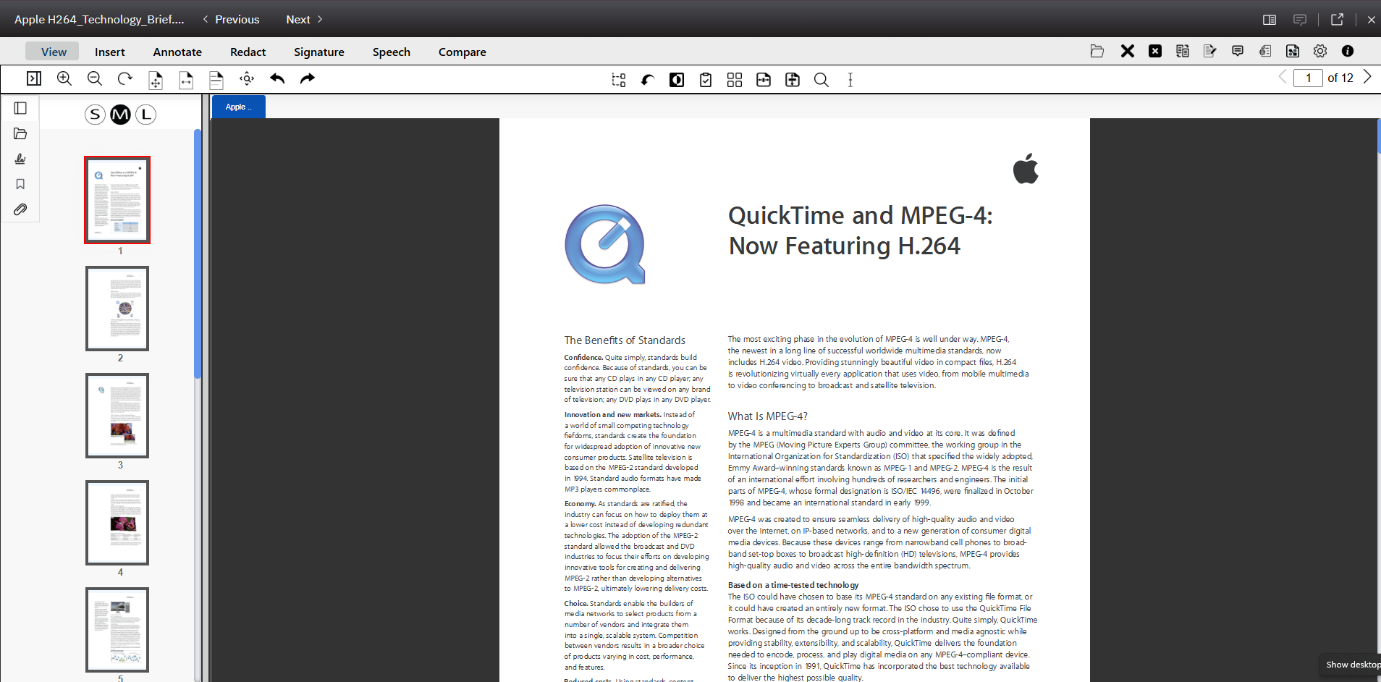
Step 2: Once you log in, search the document and load it into the viewer.
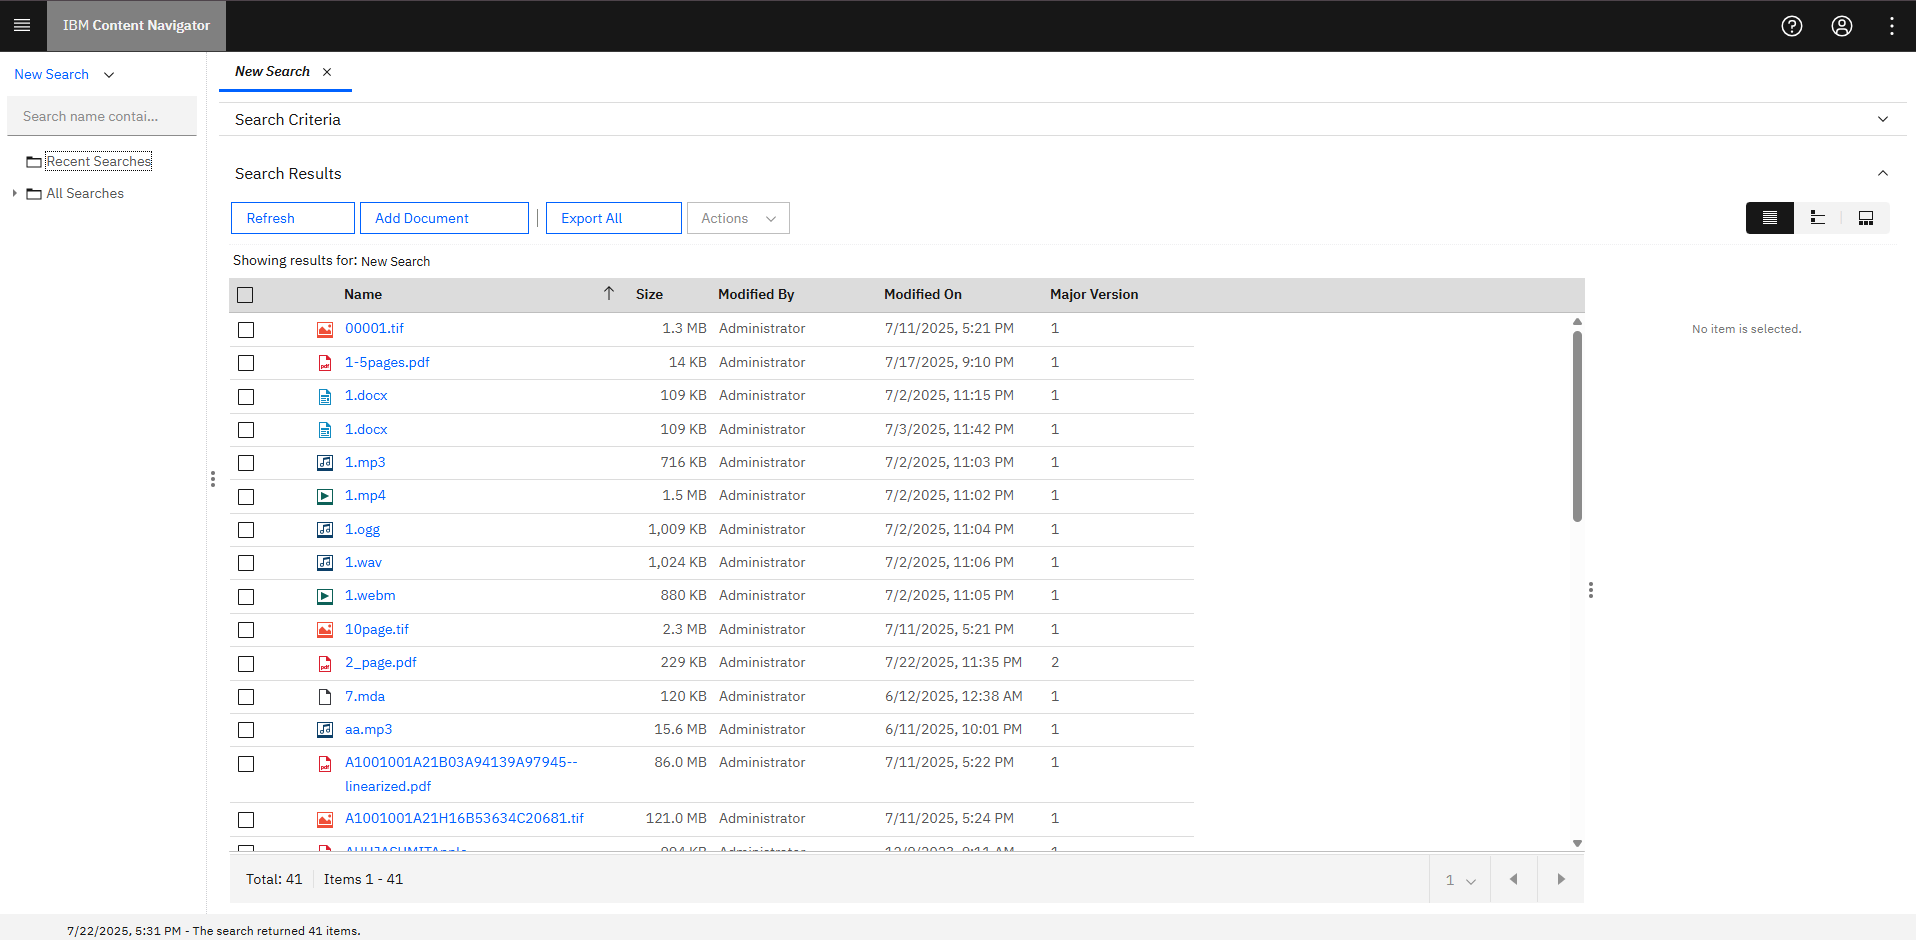
Step 3: The document will be rendered successfully.
SharePoint Online
Azure Deployment
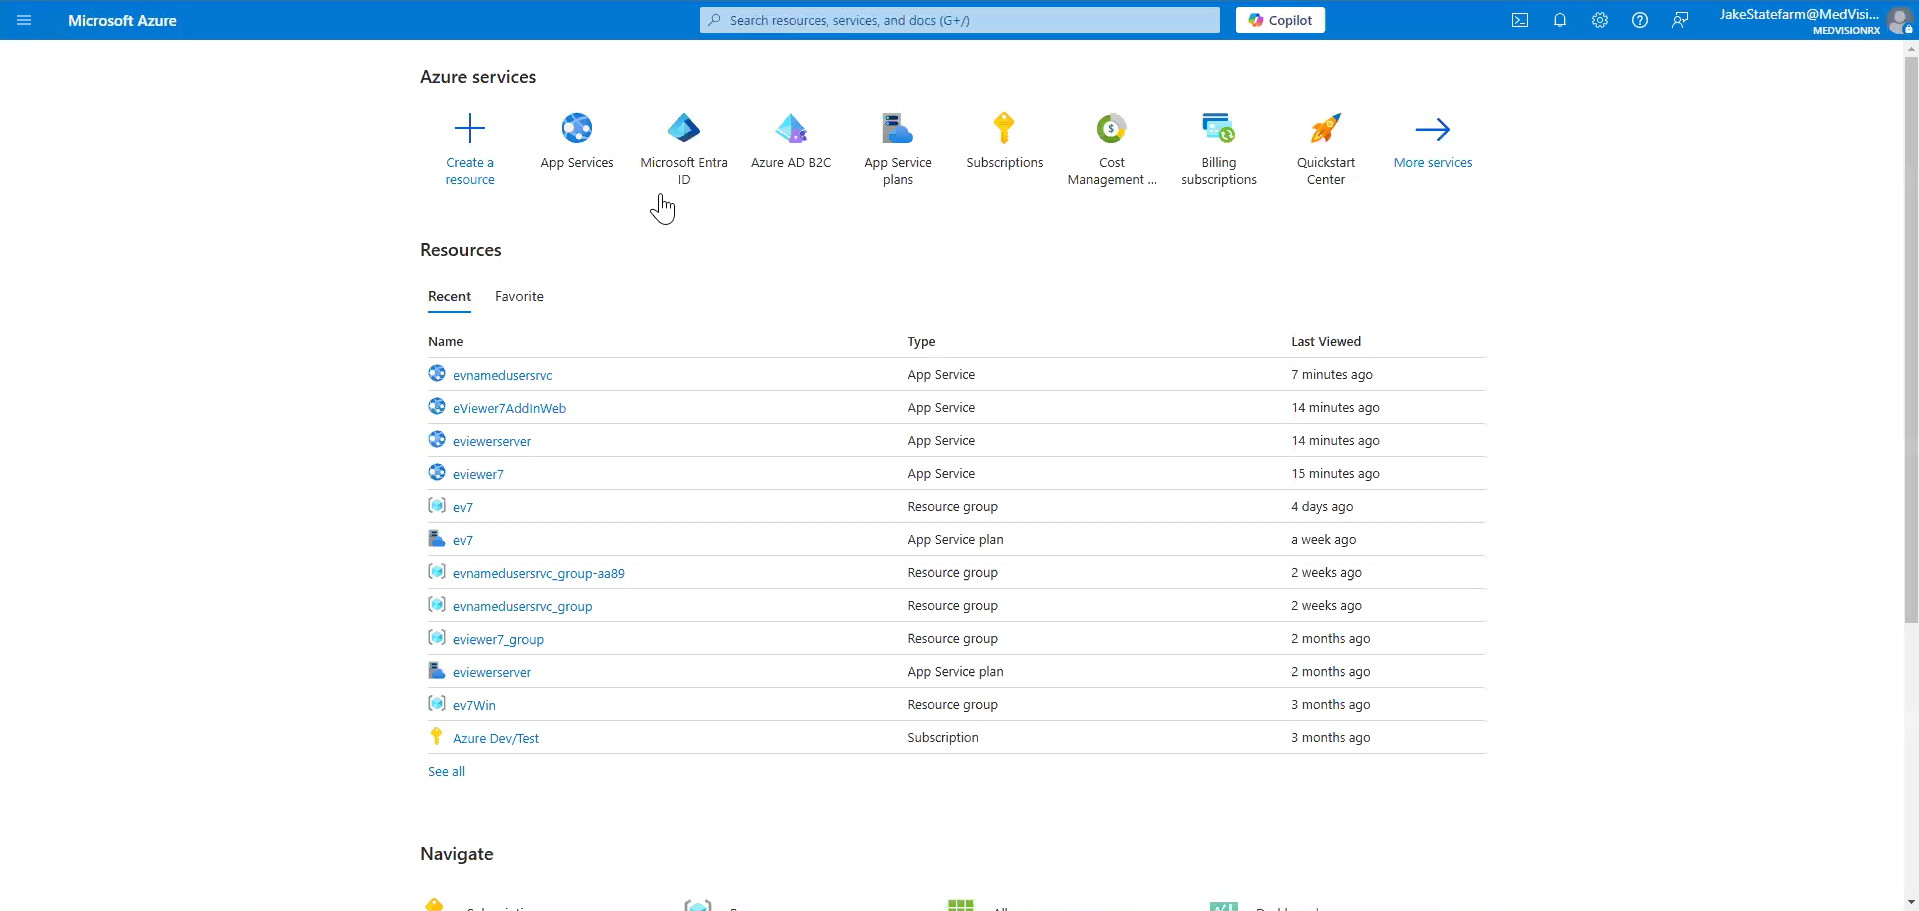
To begin deployment of eViewer for SharePoint Online, navigate to Microsoft Azure and select App Services. The following are the various services provided by eViewer, and detailing step-by-step deployment processes for each service for integrating eViewer with SharePoint Online.

eViewer 7
- Purpose: The primary frontend service required for advanced document viewing, editing, and collaboration features. It allows users to view, edit, fill out PDF form fields, add watermarks, annotations, save documents, and more.
- Deployment: Runs in a Linux-based Docker container.
- Docker Image: For instance, the Docker image can be referenced as: index.docker.io/mstechinc/eviewer7:<version_tag>
Deployment Steps:
Step 1: Deploy the eviewer7 service on Linux via a Docker container.
Step 2: Once deployed, verify the URL in the Default domain field.
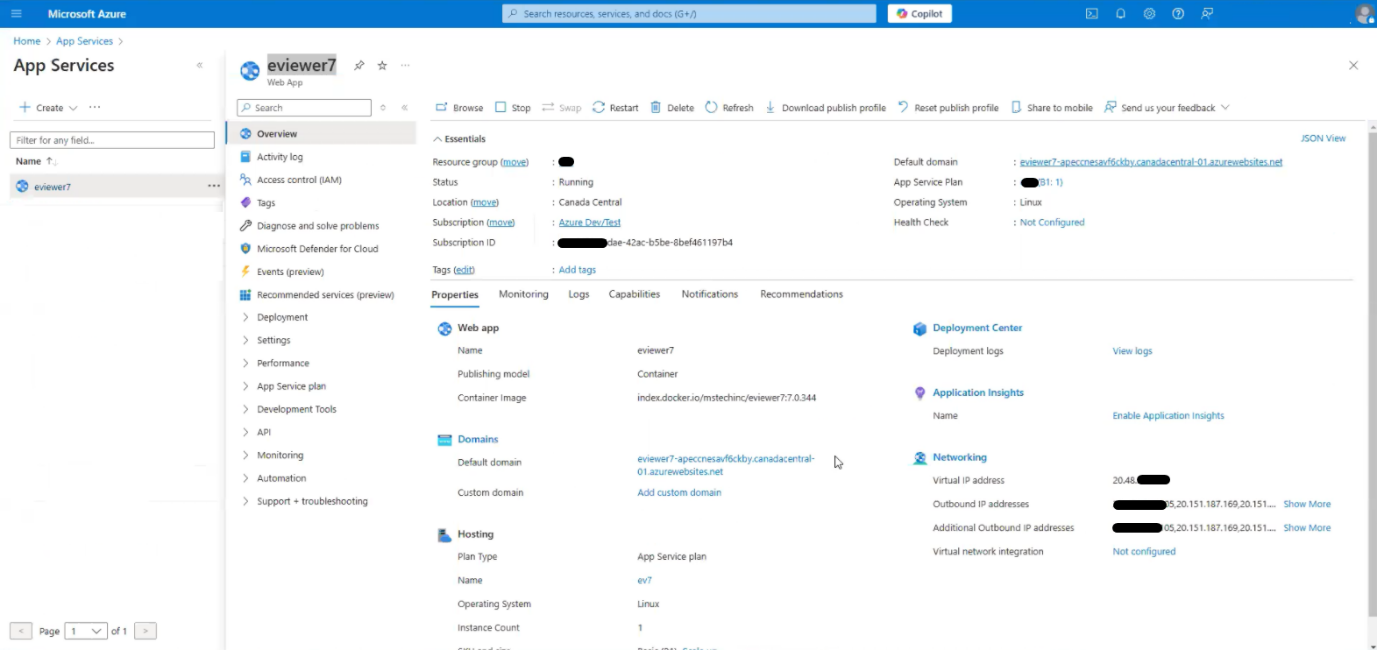
Step 3: Open the URL to ensure the viewer is rendered correctly.

eViewer Server
- Purpose: The viewer’s backend service requires the eViewer server to support advanced functionalities such as MS Office document rendering, redaction, document comparison, digital signature, and other advanced functions.
- Deployment: This service is optional and will be deployed using a Linux-based Docker container.
- Docker Image: For instance, the Docker image can be referenced as: index.docker.io/mstechinc/eviewer-server:<version_tag>
Deployment Steps:
Step 1: Deploy the eViewer Server service on Linux.
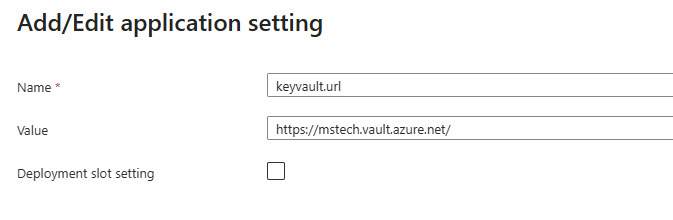
Step 2: Once the deployment is complete, you have the option to configure the variables securely in Azure Vault or add them as Environment Variables. If you decide to store them in Azure Vault, then you will only need to add the environment variable keyvault.url and set its value to the URI of your Azure Vault.
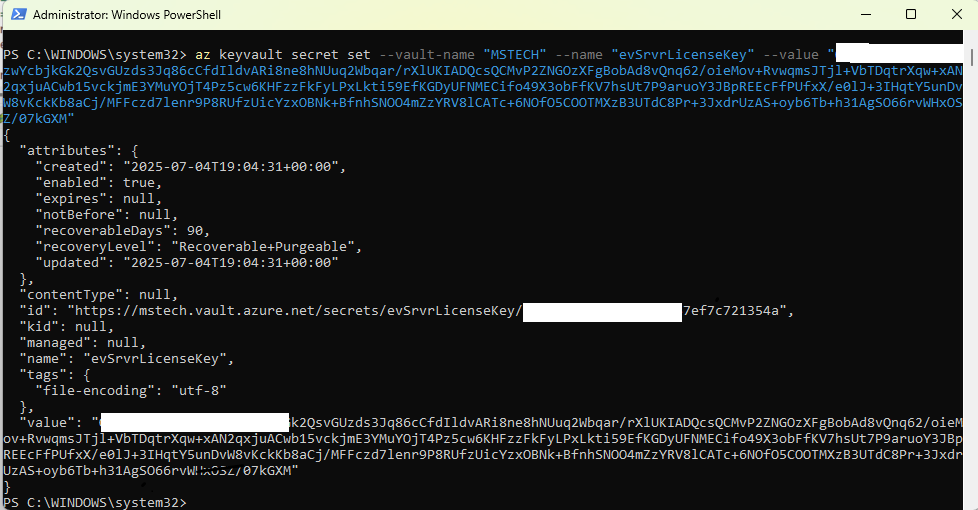
Steps for adding environment variables in Azure Vault:
- Open Windows PowerShell and run as Administrator.
- Log in to your tenant by running the following command:
az login --tenant “<Tenant_ID>” - Run the following command to configure the variable:
      az keyvault secret set --value-name “VAULT_NAME” --name
      “ev7LicenceKey” --value “encrypted key”
Step 3: If you decide not to use Azure Vault and simply store the configuration variables as environment variables, then navigate to Settings > Environment variables and add the necessary environment variables.
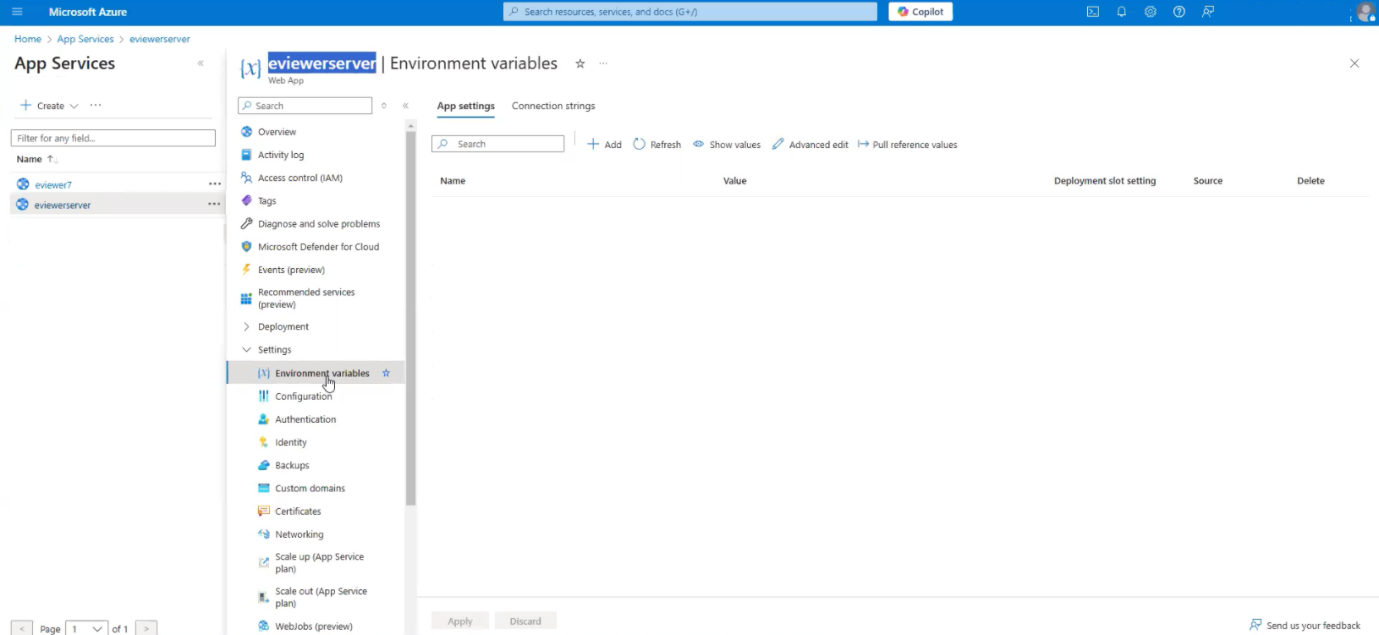
The list of environment variables is shown below:
| Name | Value | Example |
| WEBSITES_PORT | 8086 | 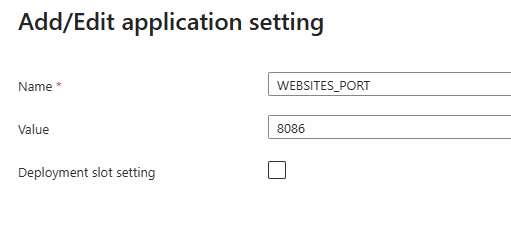 |
| evSrvrLicenseKey | Provided by MST | 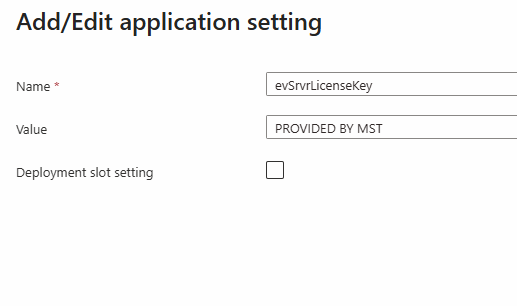 |
Note: WEBSITES_PORT will always be added as an environment variable, while evSrvrLicenseKey can be added in either Azure Vault or as an Environment Variable.
Step 4: Click Apply.
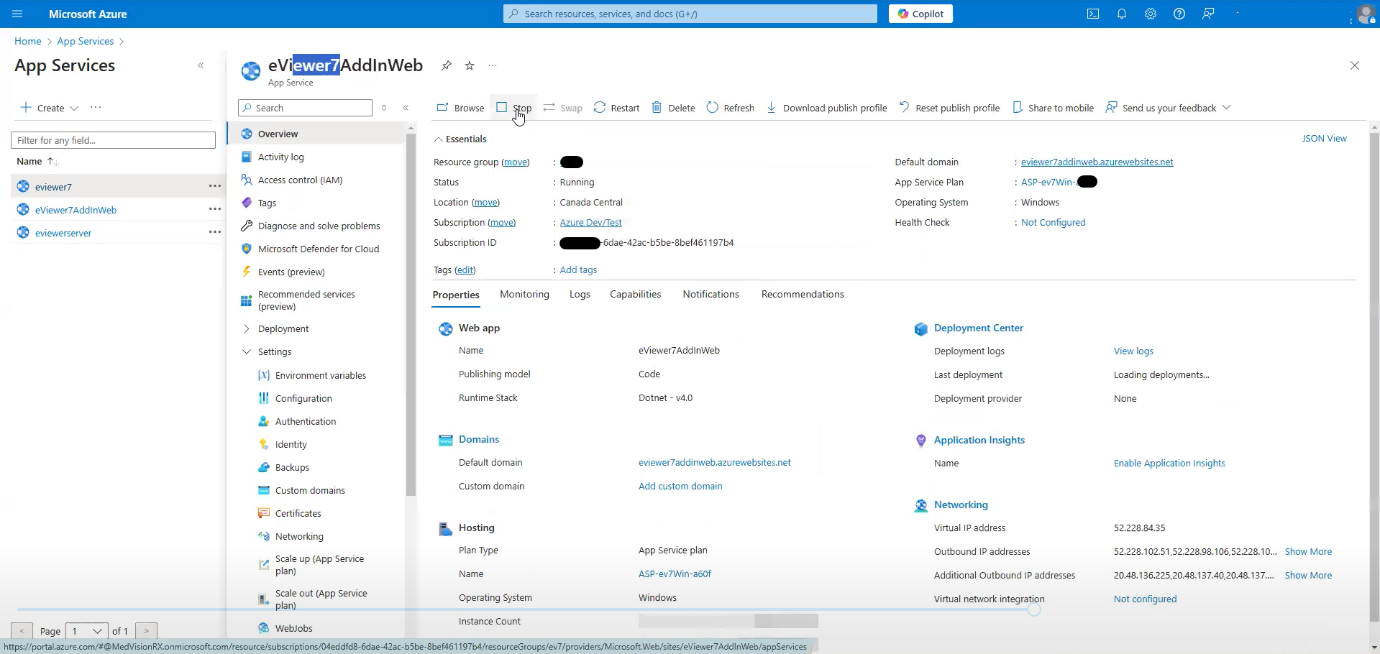
Step 5: Once the variables are added, navigate to the Overview section.
Step 6: Refresh the service by clicking Stop, and then click Start to restart the service to activate environment variables.
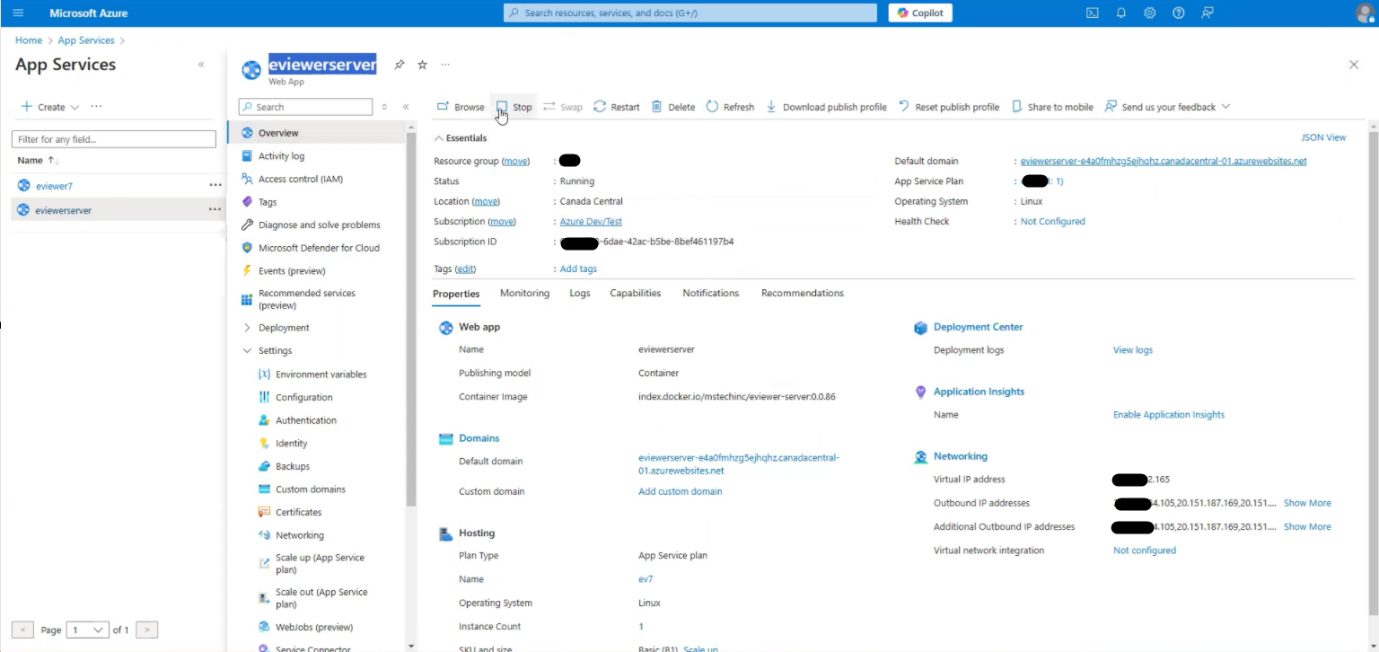
Step 7: Once environment variables are activated, verify the Default domain URL.
Step 8: Open the URL in the browser with /api/v1/getCurrentTimeStamp. This will display the current date and time of the server.
Permission Setup:
To establish a connection between eViewer Server and SharePoint, the appropriate permissions will need to be granted using the following steps:
Step 1: Navigate to the eviewerserver app service > Overview > Settings > Identity > System assigned.
Step 2: Turn On the Status option.
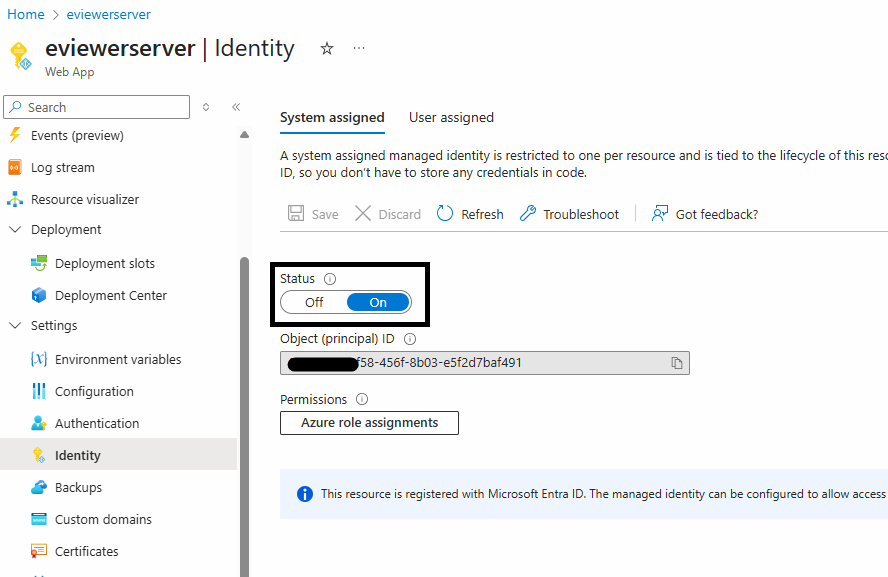
Step 3: To add a role assignment, click on Azure role assignments > Add role assignment.
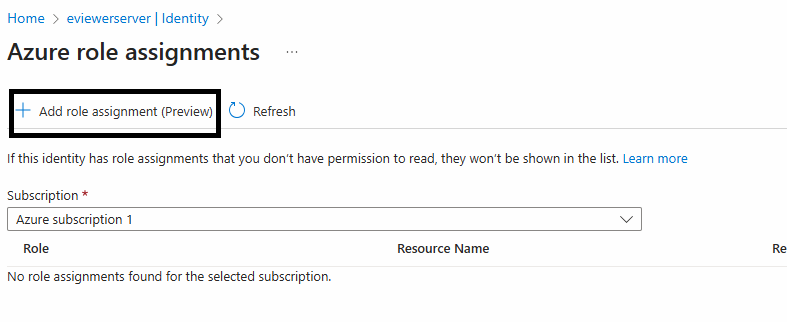
Step 4: Enter the following fields:
- Scope: Key Vault
- Subscription: Enter the name of your subscription
- Resource: Choose the appropriate key vault
- Role: Select the Key Vault Secrets User
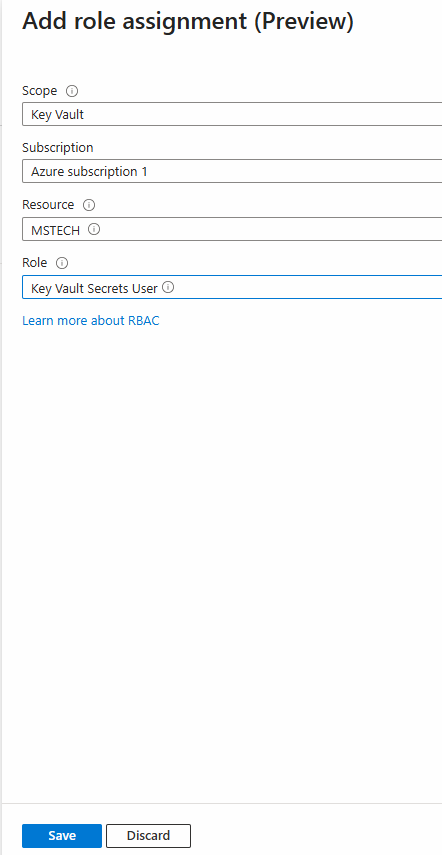
Step 5: Click Save to complete the role assignment. This will grant the eViewer Server read permissions to read the license key from the vault.
eViewer7AddInWeb
- Purpose: This is the required service, and it is a SharePoint provider-hosted web app designed for managing document retrieval, rendering, and saving.
- Deployment: The application will be deployed in a Windows-based Docker container.
- Docker Image: The Docker image to use is: index.docker.io/mstechinc/eviewer7AddInWeb:<version_tag>
Deploy the eViewer7AddInWeb service. Once the deployment is completed, proceed to
Permission Setup:
To establish a connection between eViewer7AddInWeb and SharePoint, the appropriate permissions will need to be granted using the following steps:
Step 1: In Azure, navigate to Microsoft Entra ID and open your tenant configuration page.
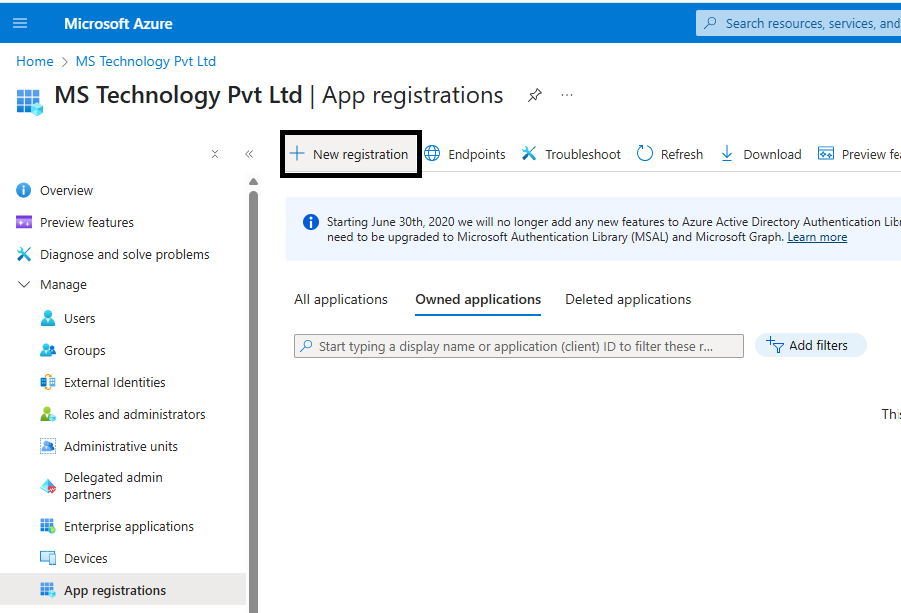
Step 2: Go to App Registrations to register the eViewer7AddInWeb application.
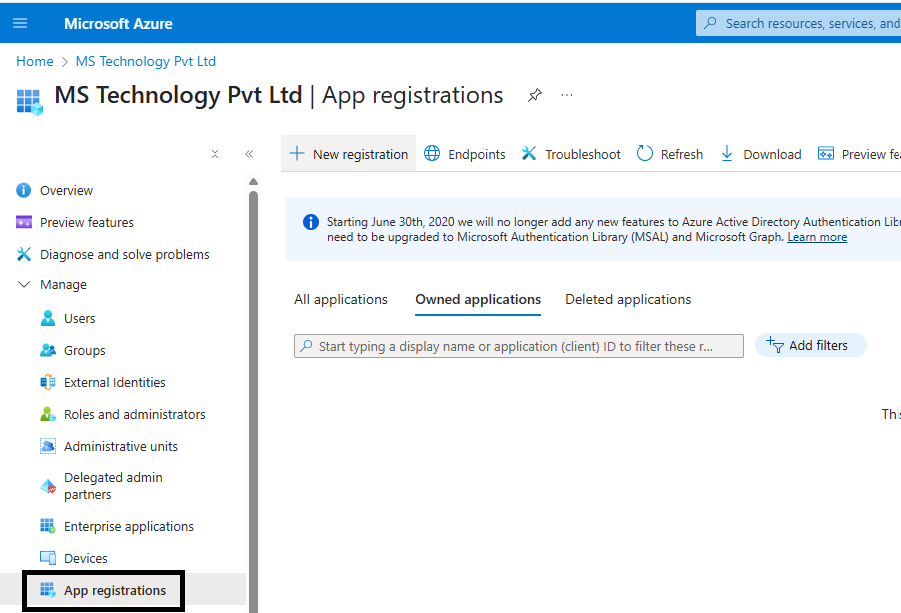
Steps to Add an Application:
Step 1: Access the New registration page.
Step 2: Enter the name of the new app registration, for example, eViewer7AddInWeb.
Step 3: Based on your configuration, set up the access permissions for this application to SharePoint:
- The application can access only users within the organization. (Single tenant)
- This setting allows our application to access users from other organizational directories. (Multitenant)
- The application can access both users within the organization and users with personal Microsoft accounts.
- The application can also be configured to access only personal Microsoft accounts.
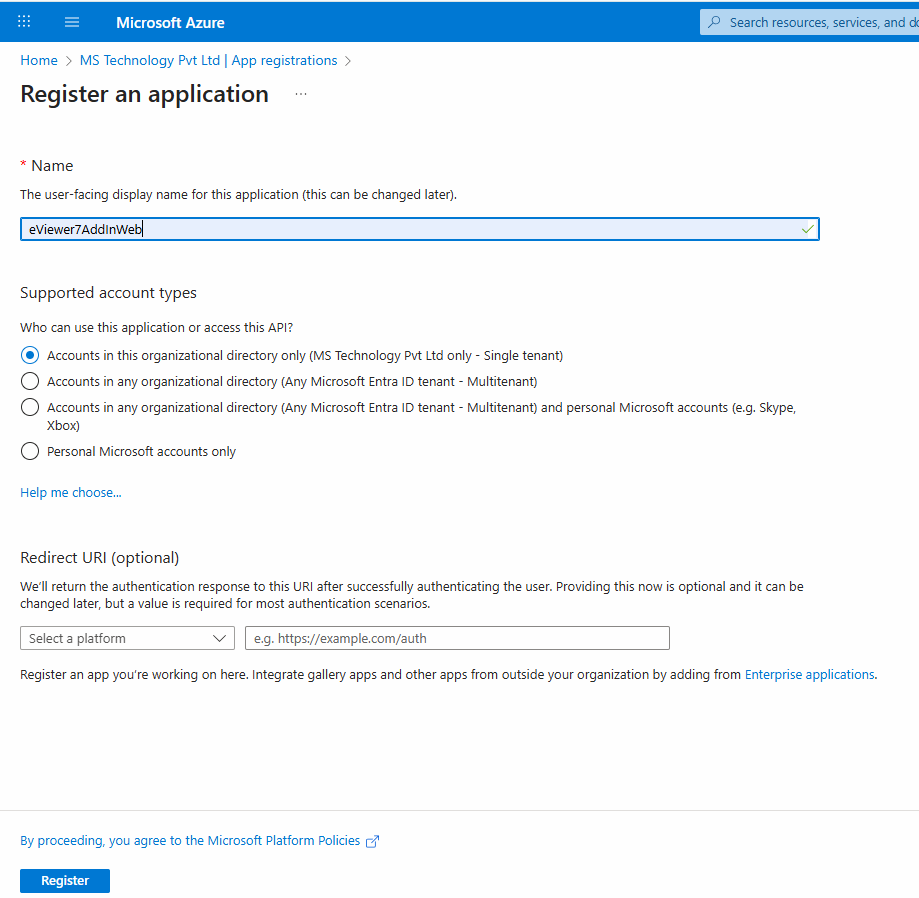
Note: By default, the application is registered as a single tenant.
Step 4: Click Register, and the eViewer7AddInWeb application will be registered.
Step 5: Once the application is registered, go to App registrations > eviewer7AddInWeb > Manage > Authentication.
Step 6: Click Add a platform.
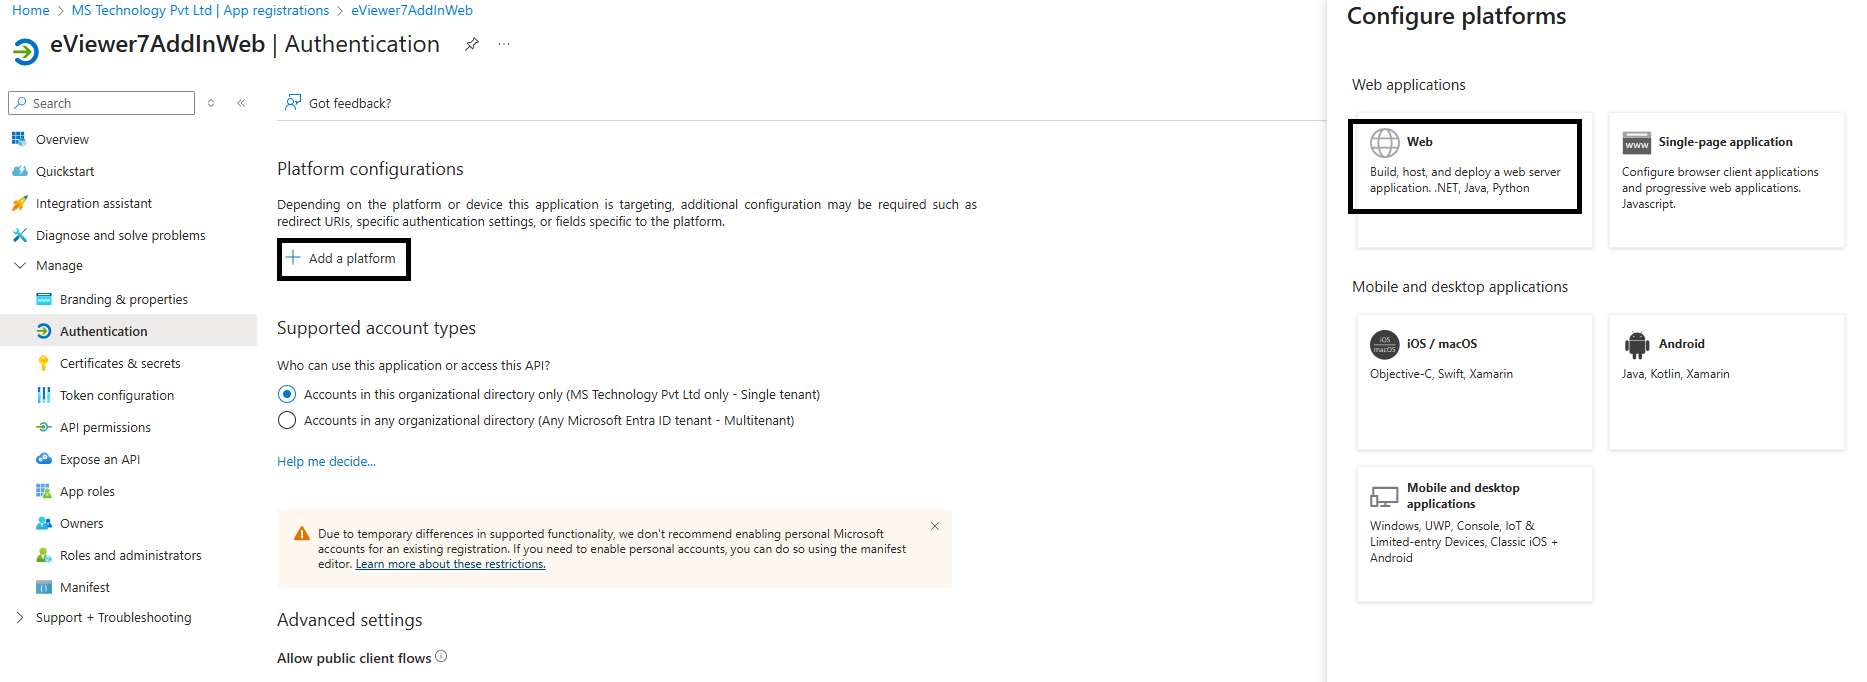
Step 7: Select Web, and enter the Redirect URI (the default domain URL of the deployed eviewer7AddInWeb service, followed by eViewer7).
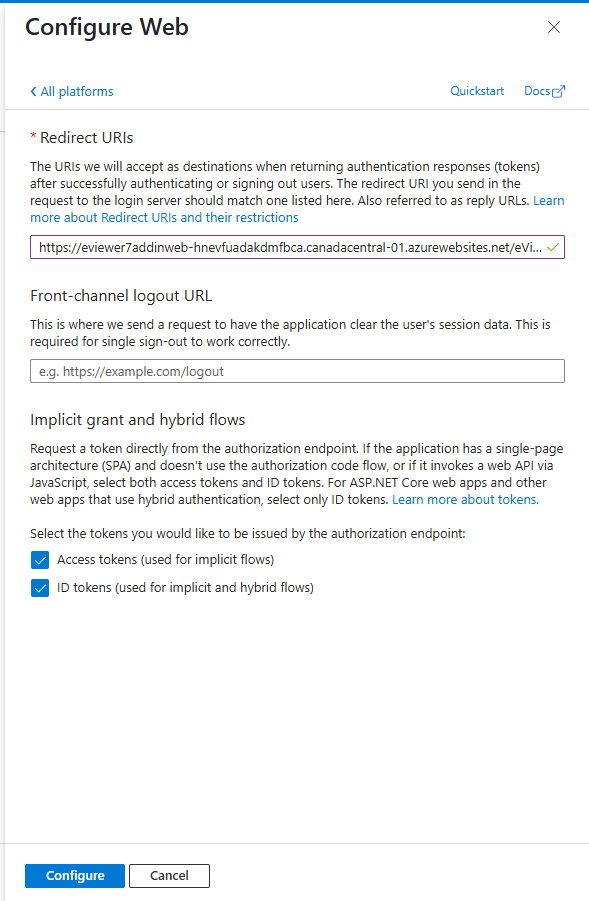
Step 8: Ensure that both Access Tokens (App-based tokens) and ID Tokens (User-based tokens) are allowed. And click Configure.
Step 9: Proceed to Certificates & Secrets.
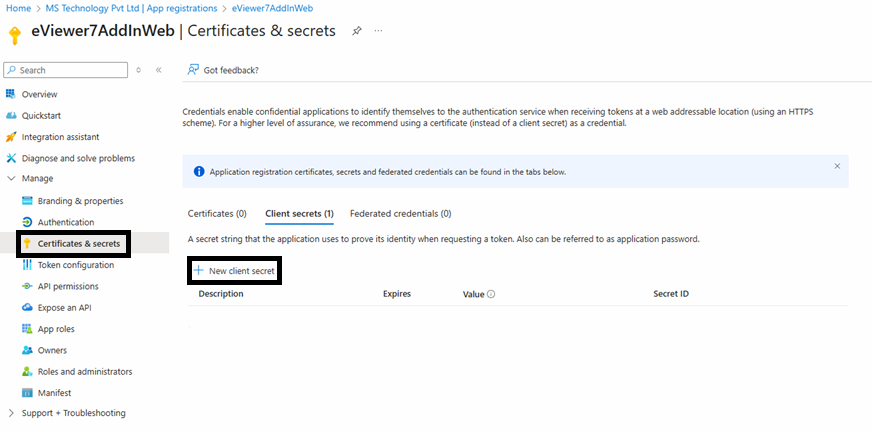
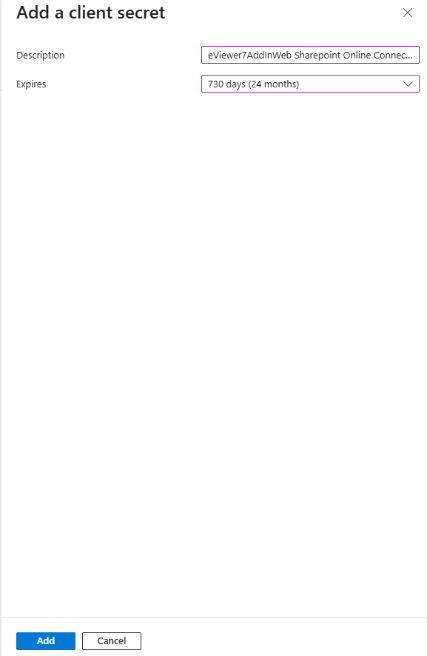
Step 10: Create a new client secret by entering the description eViewer7SPAddInWeb and setting the expiration time.
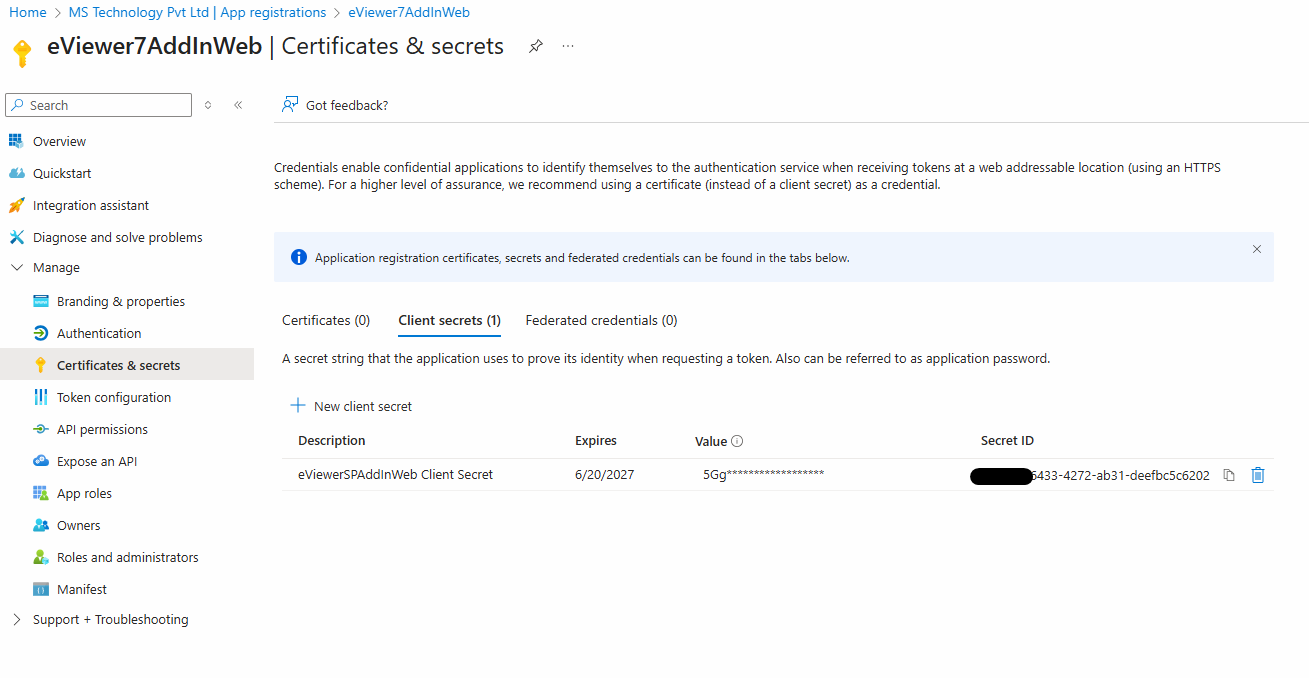
Step 11: After clicking Add, a secret ID and value will be generated; document this secret ID and value.
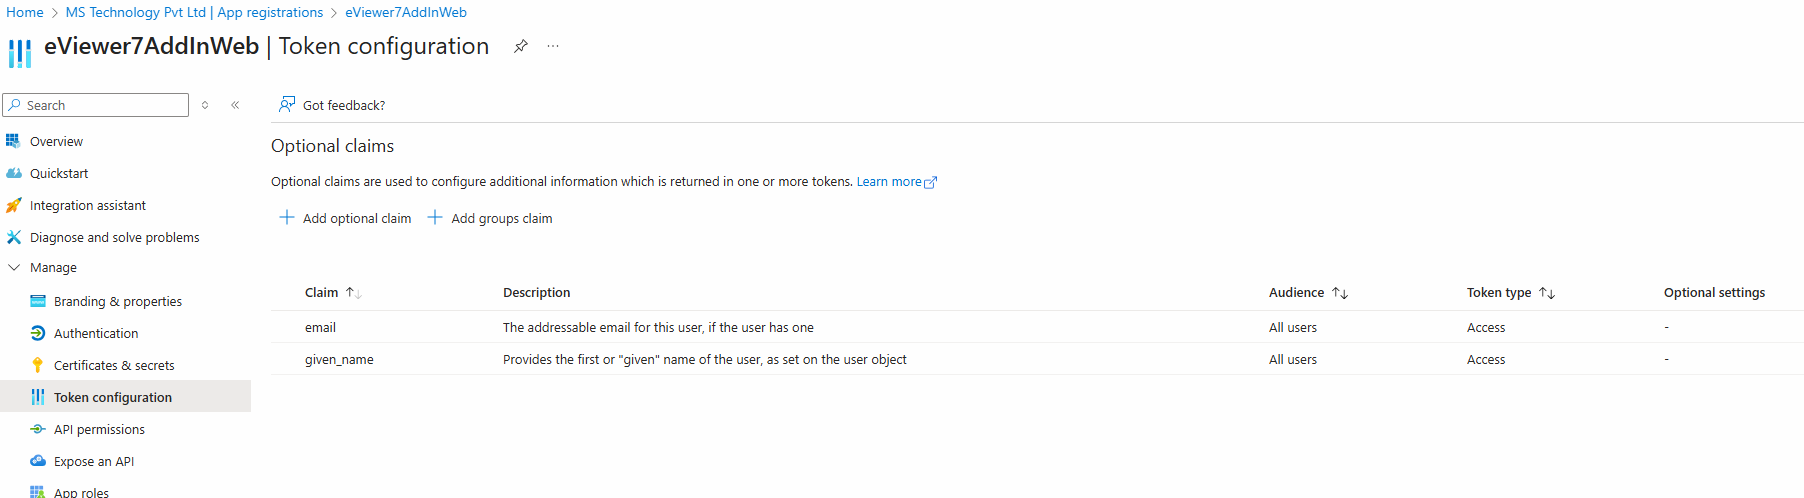
Step 12: Access the Token Configuration to add two claims to specify the information needed when generating a token, specifically the user’s email ID and username. To do this, click Add Optional Claim.
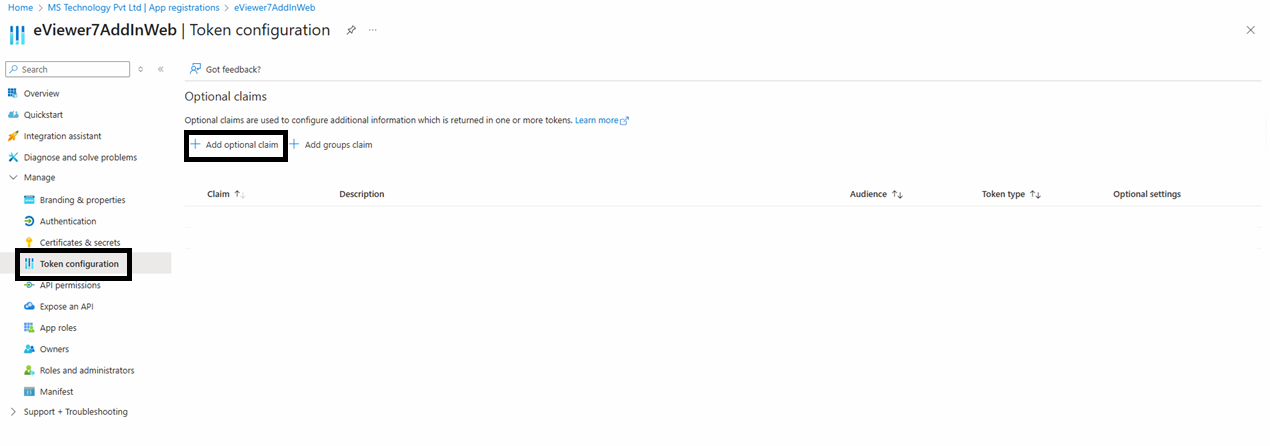
Step 13: Select the token type as Access and choose the email and given name.
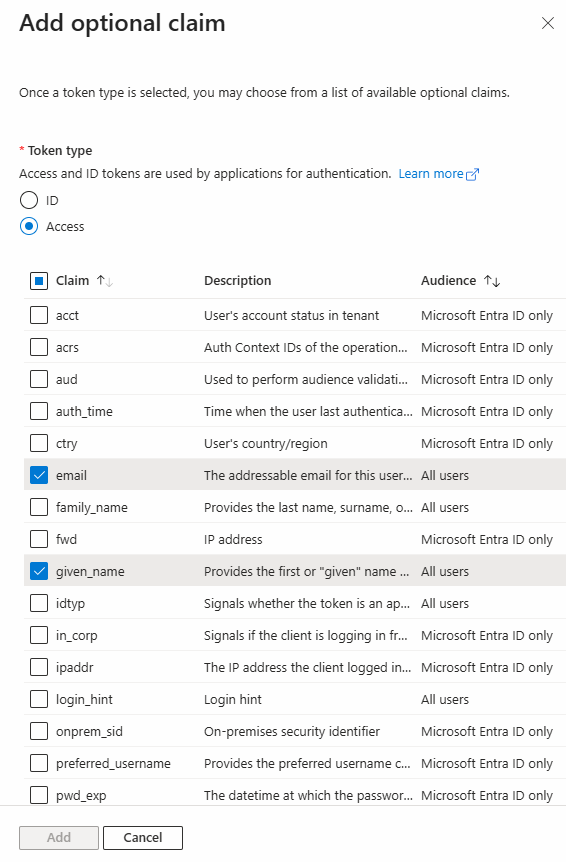
Then, add these claims. (This step can only be performed when the token type is set to App-based token.)
Step 14: Navigate to the API permissions.

Step 15: Click on “Add a permission” and select SharePoint.
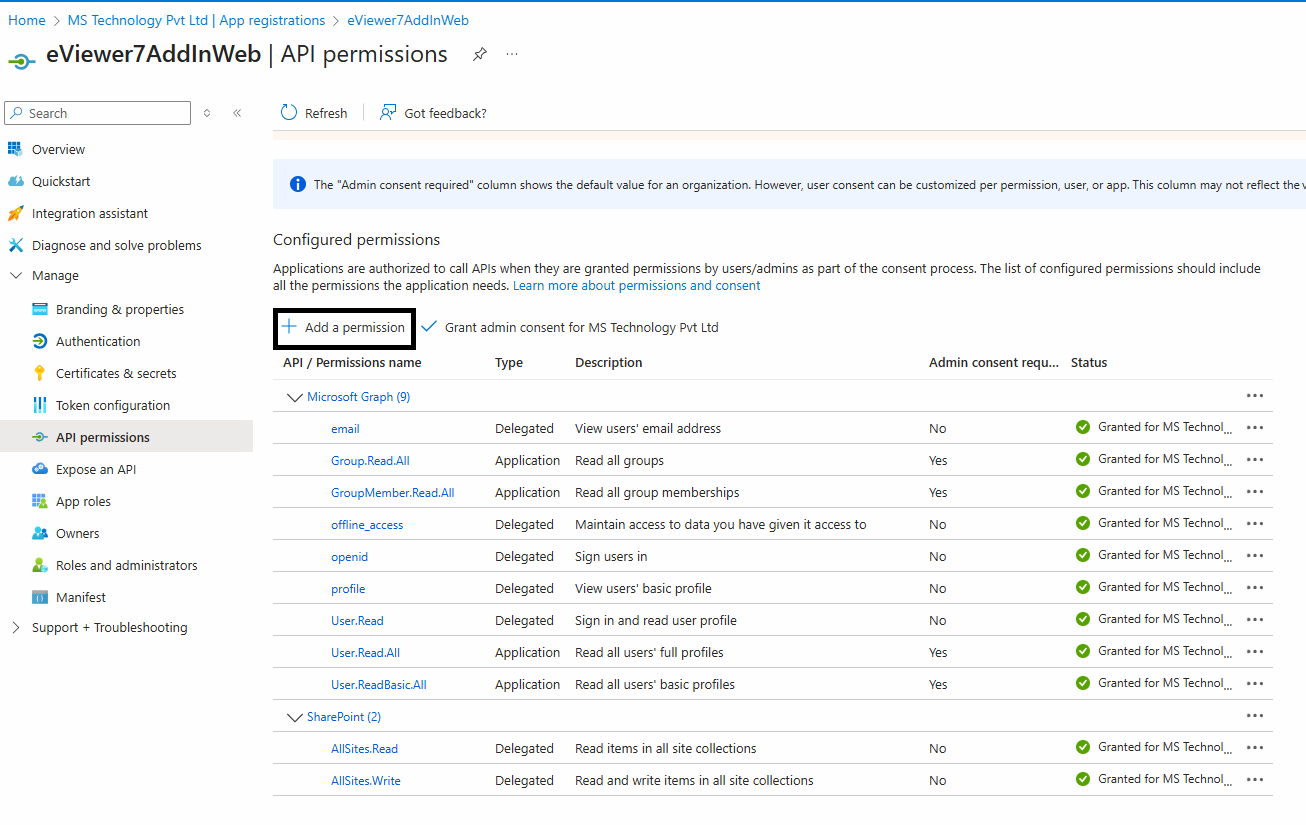
Then choose the permissions:
| Permissions Name | Type |
| Microsoft Graph | |
| Delegated | |
| Group.Read.All | Application |
| GroupMember.Read.All | Application |
| offline_access | Delegated |
| openid | Delegated |
| profile | Delegated |
| User.Read | Delegated |
| User.Read.All | Application |
| User.ReadBasic.All | Application |
| SharePoint | |
| AllSites.Read | Delegated |
| AllSites.Write | Delegated |
Step 16: Click on the permissions you just selected, and then click Grant admin consent.
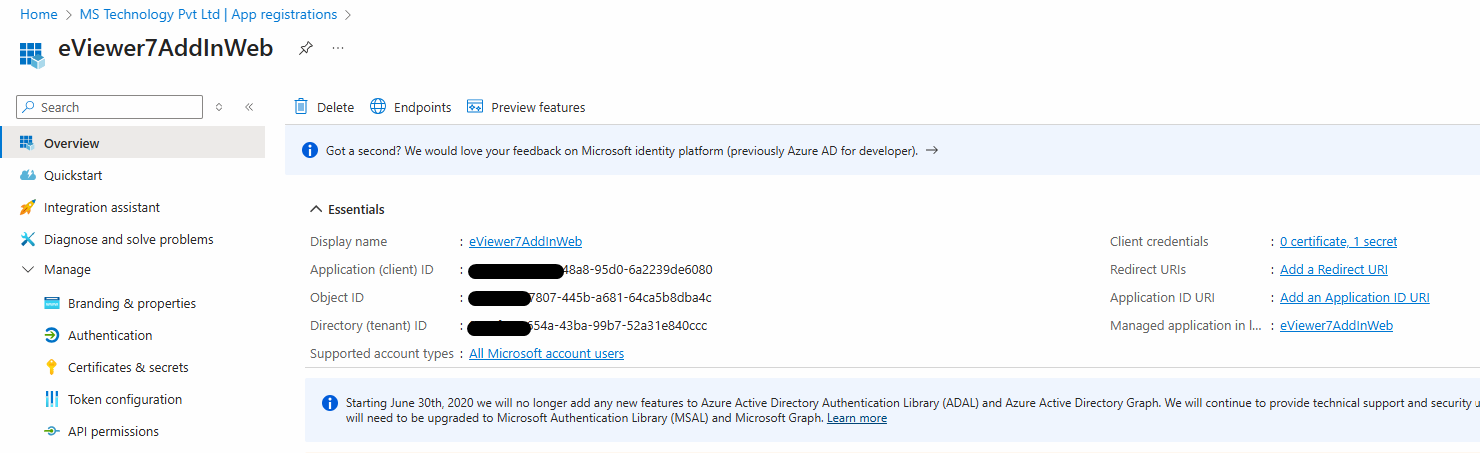
After adding the permissions, go to the Overview section to view all the details based on the information provided.
Environment Variables:
To add an environment variable using Azure Vault, you first need to add the KEYVAULT_URL environment variable and set its value to the URI of your Azure Vault.
Steps for adding environment variables in Azure Vault:
Step 1: Open Windows PowerShell and run it as Administrator.
Step 2: Run the command:
az login --tenant “<Tenant_ID>”

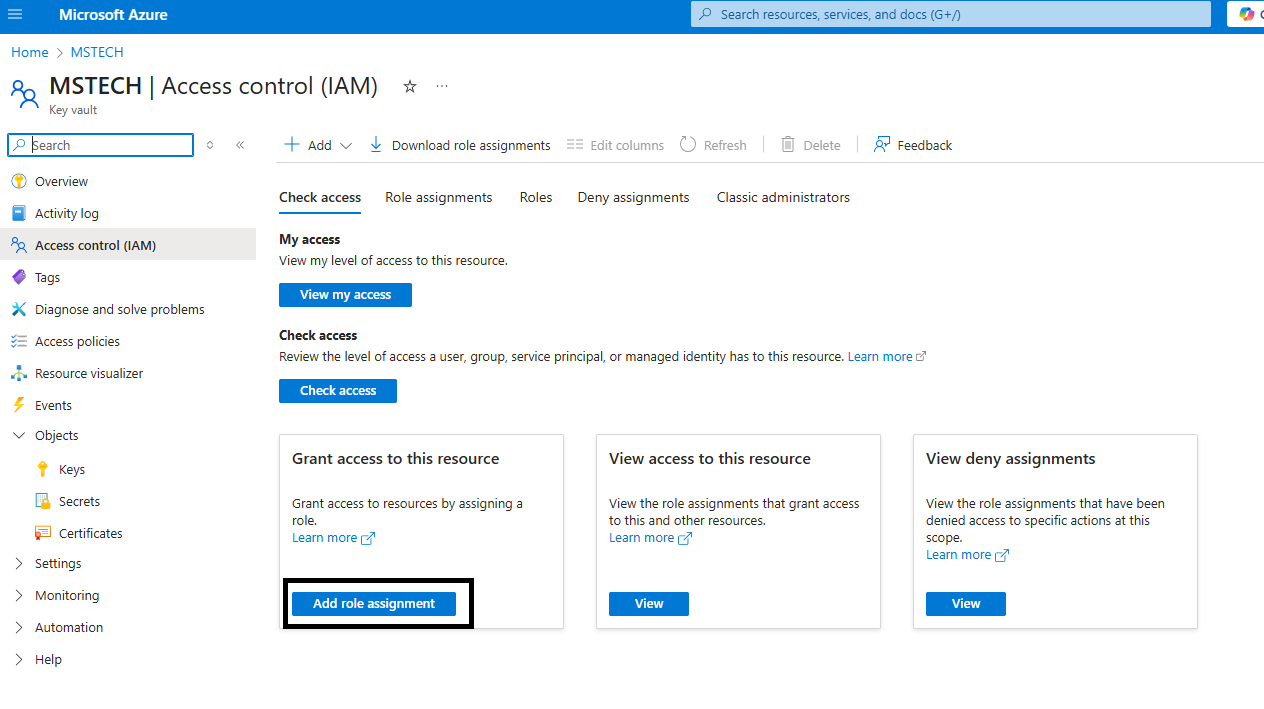
Step 3: Before adding any secrets to the Azure Vault, ensure that the user has the necessary rights. To check the role assignment, navigate to the tenant and select Access control.
Step 4: Click Add role assignment.
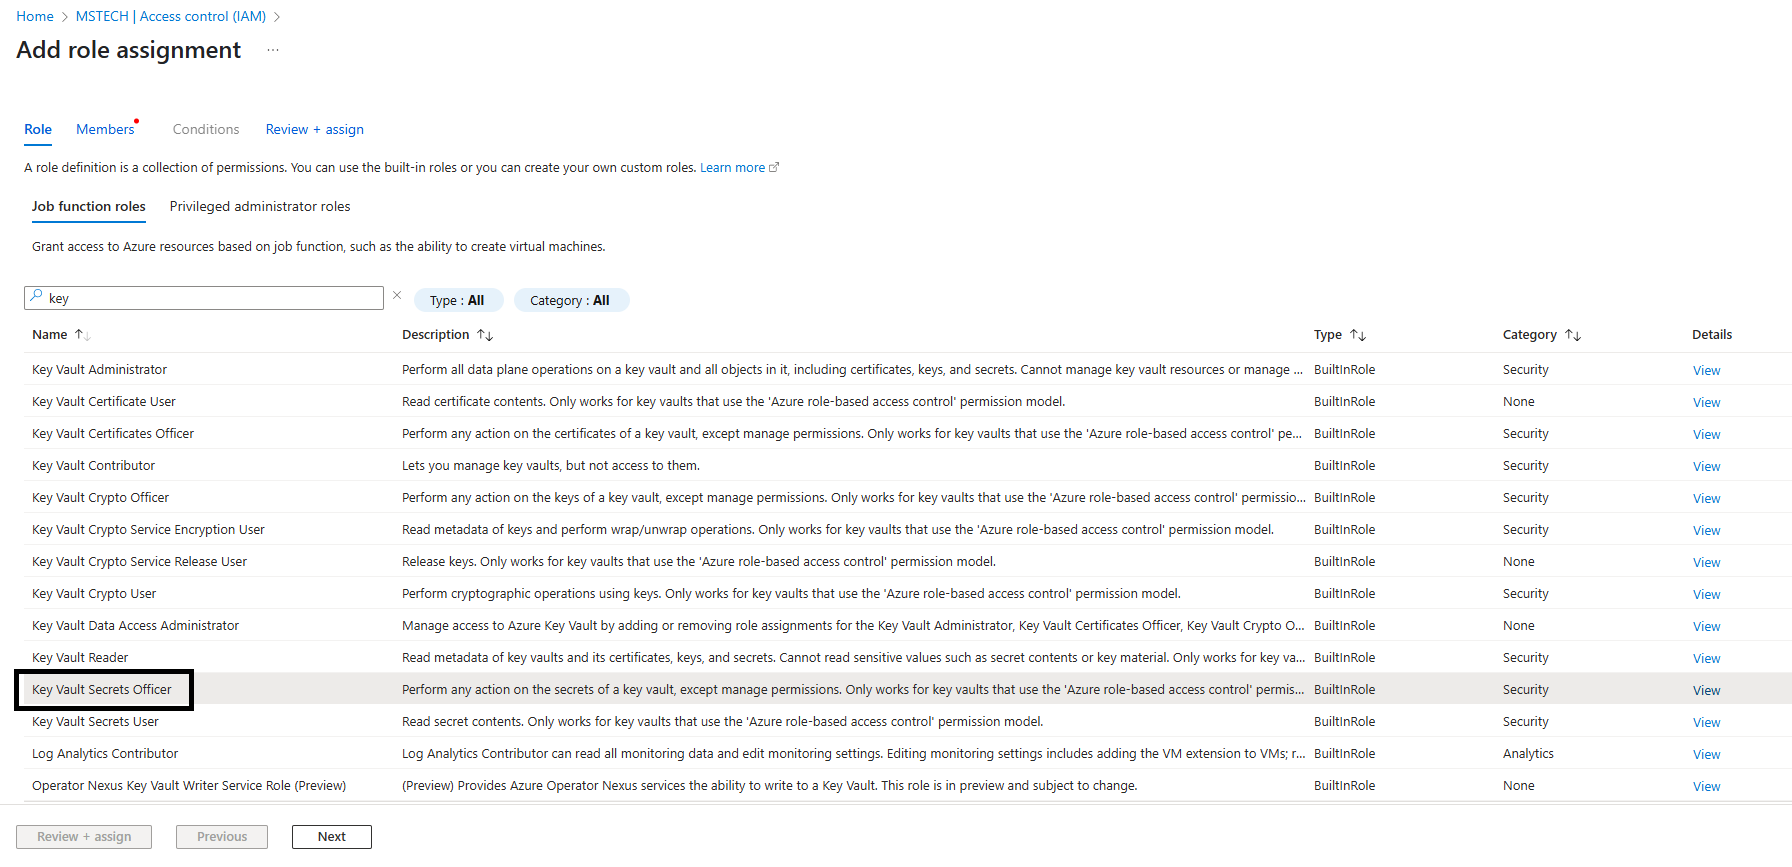
Step 5: Select Key Vault Secrets Officer and click Next.
Step 6: Click Select members and add the members who will have permission. Typically, this should be the admin responsible for managing, adding, or storing keys in the vault. Access will only be granted to this user.
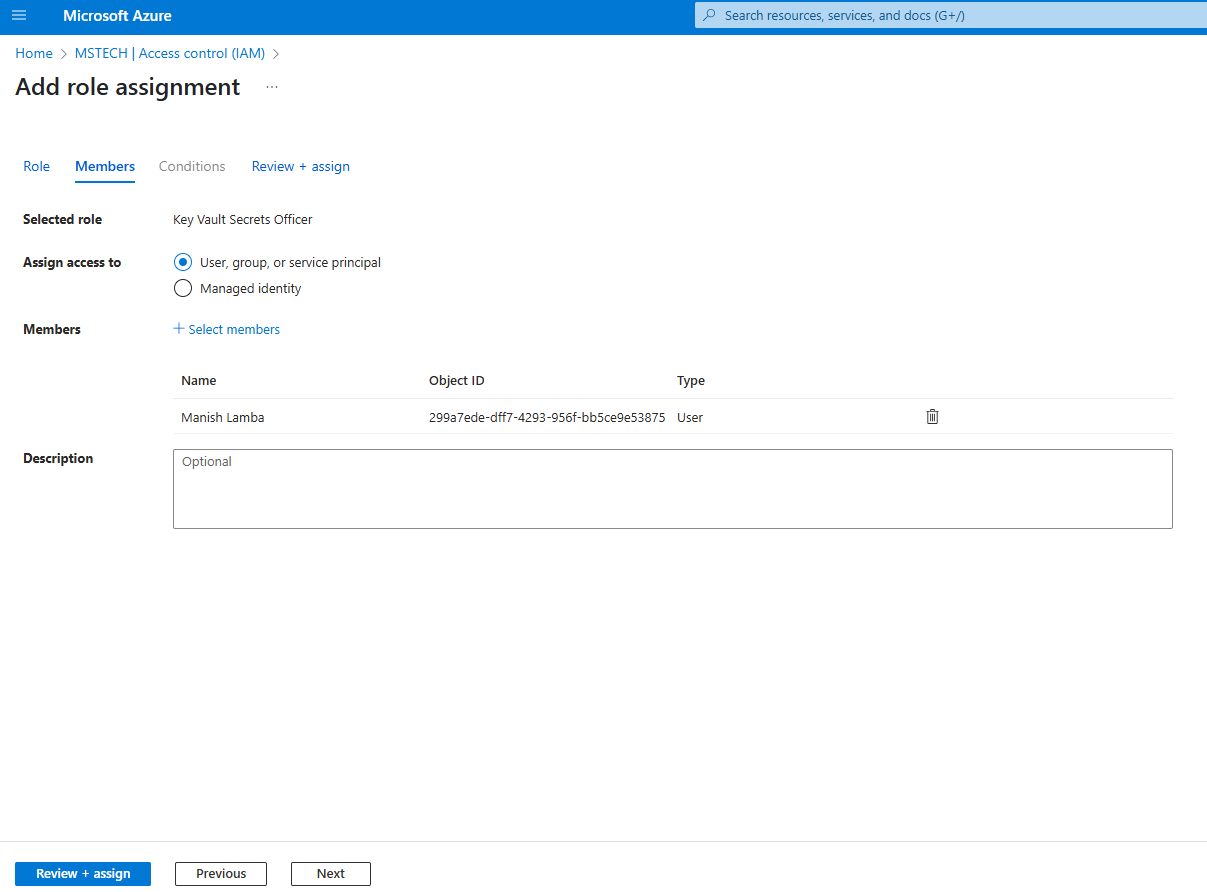
Step 7: Click Review + assign to complete the role assignment.
Step 8: To assign another role, select Key Vault Secret User and click Next.
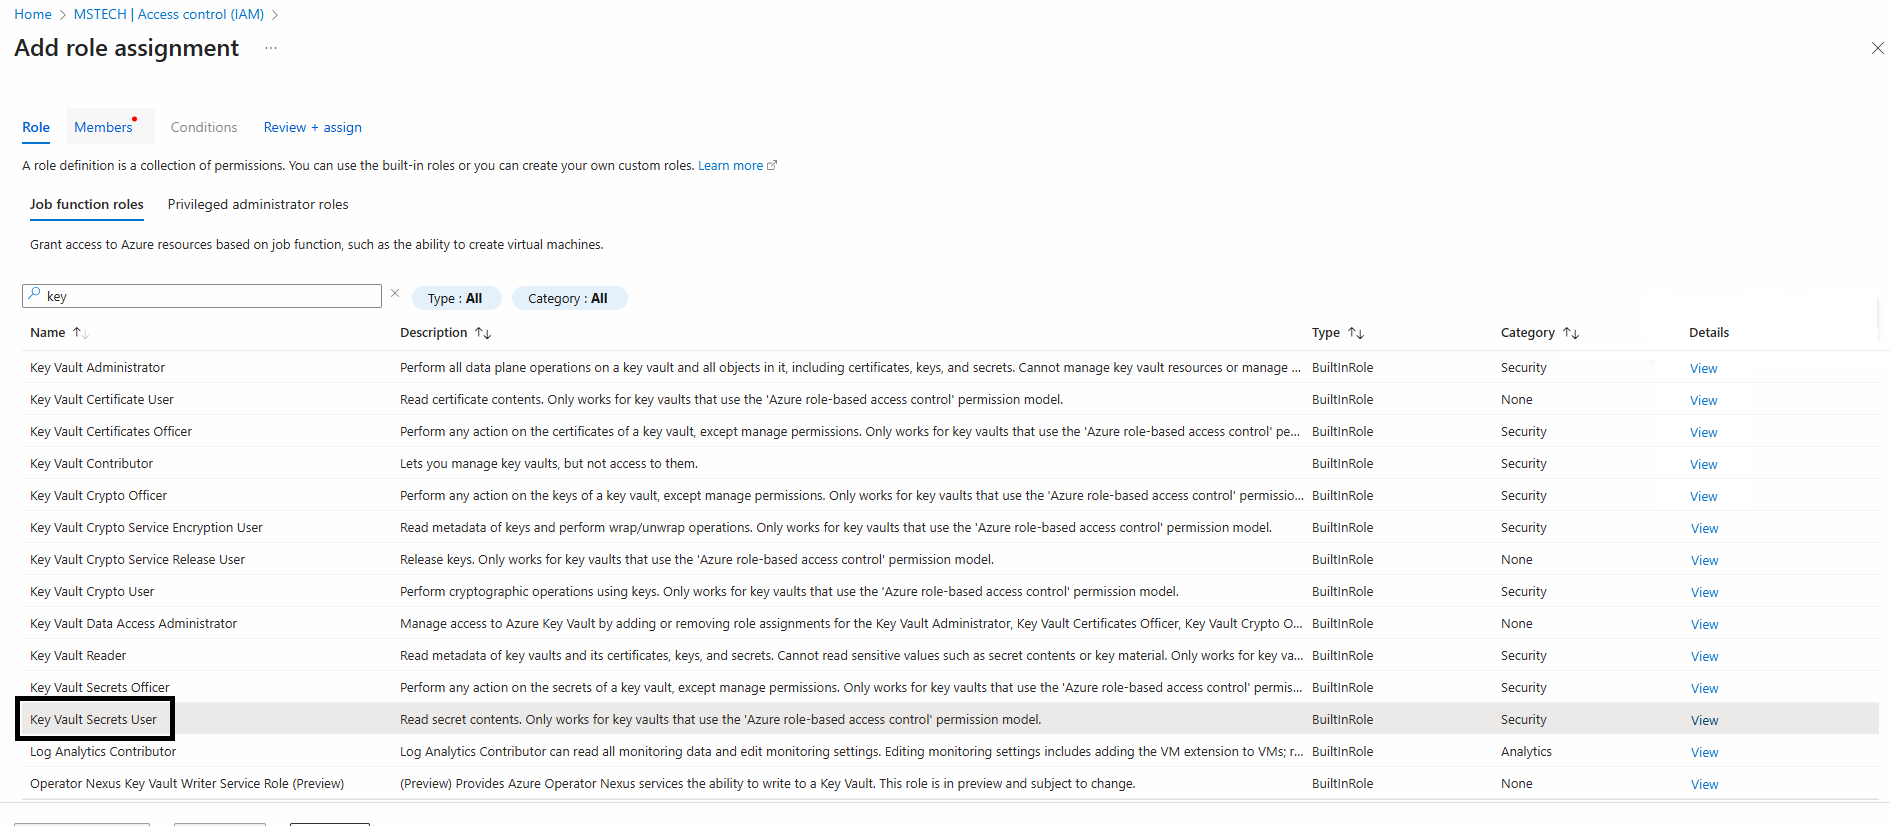
Step 9: Click Select members and add those users who will have read-only access to it.
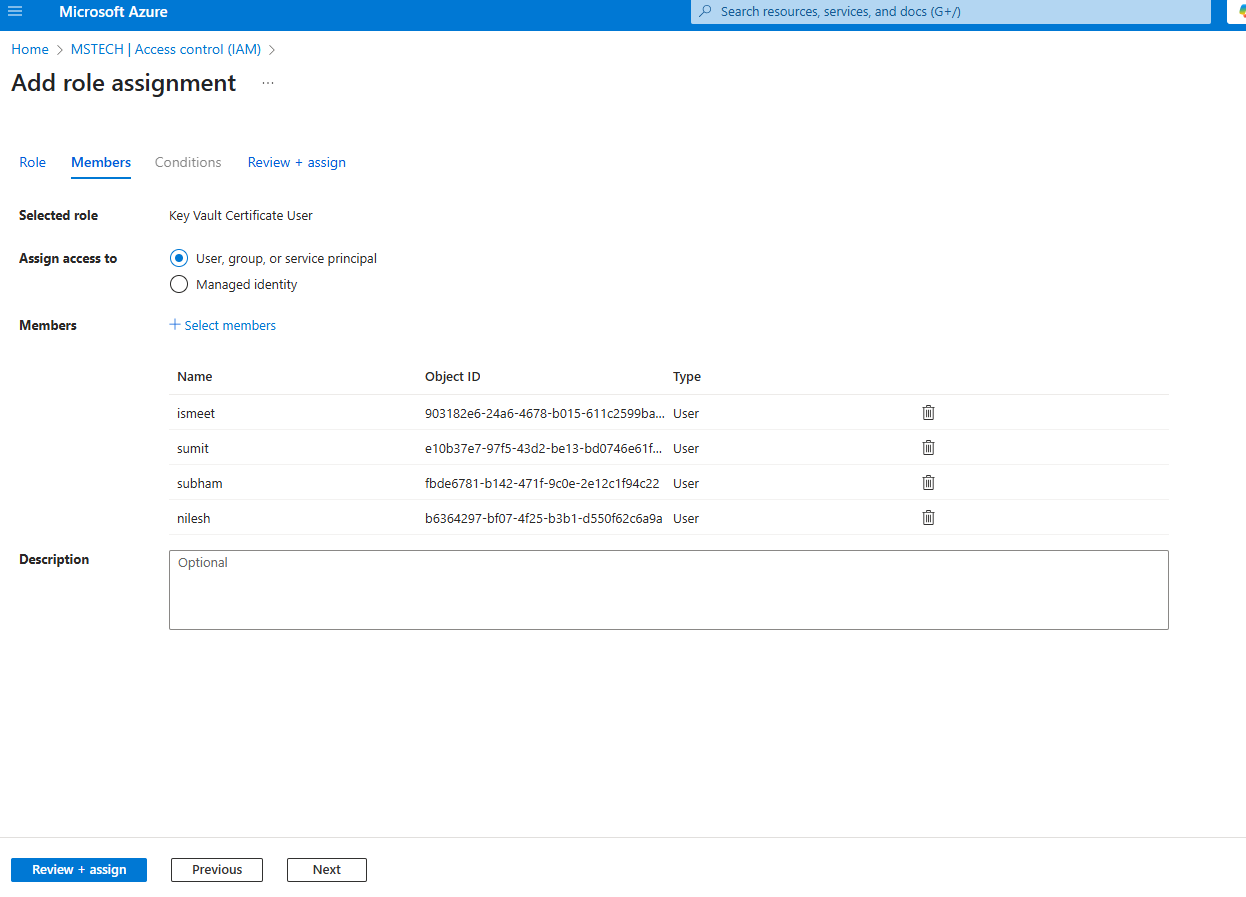
Step 10: Click Review + assign to finalize the role assignment.
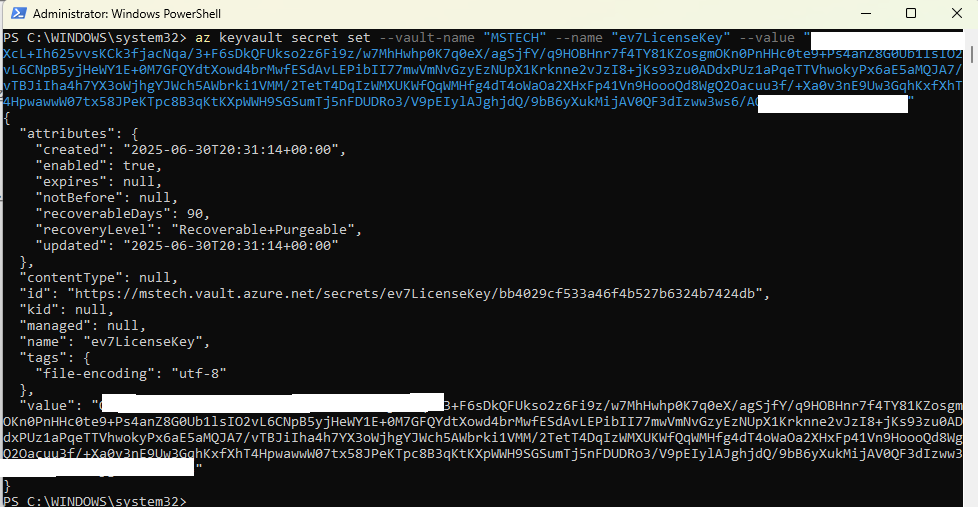
Step 11: Now, add the following Environment Variables:
- ev7LiceneceKey
Open Windows PowerShell and run the command:az keyvault secret set --value-name “VAULT_NAME” --name “ev7LicenceKey” --value “encrypted key”
This will successfully add the ev7LicenceKey environment variable to the vault. - ev7SiteUrl
Run the command:az keyvault secret set --value-name “VAULT_NAME” --name “ev7SiteUrl” --value “The site URL obtained from the eViewer7 service after deployment”
This will successfully add the ev7SiteUrl environment variable to the vault. - eViewerServerUrl
Run the command:az keyvault secret set --value-name “VAULT_NAME” --name “eViewerServerUrl” --value “The server component’s URL if it has been deployed then include the URL followed by /api/v1”
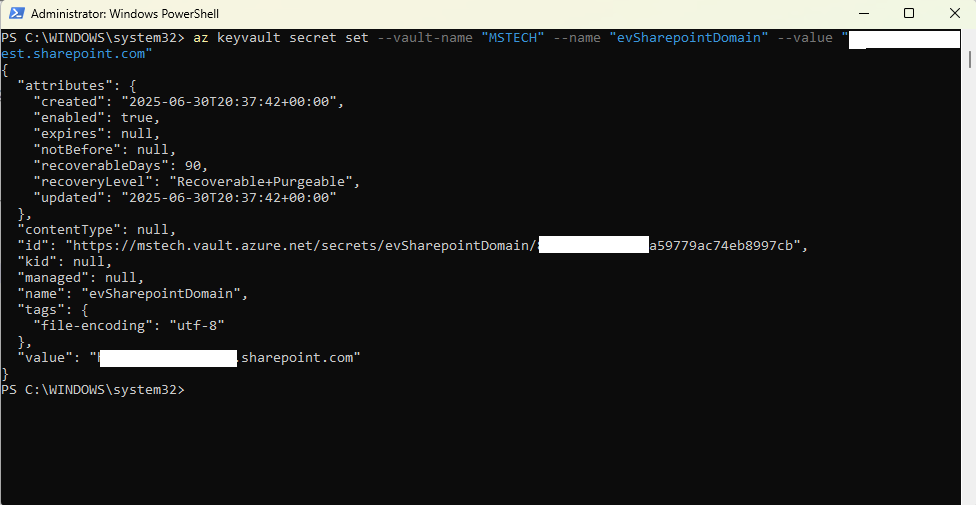
This will successfully add the eViewerServerUrl environment variable to the vault. - evSharepointDomain
Run the command:az keyvault secret set --value-name “VAULT_NAME” --name “evSharepointDomain” --value “root domain of the SharePoint Online”
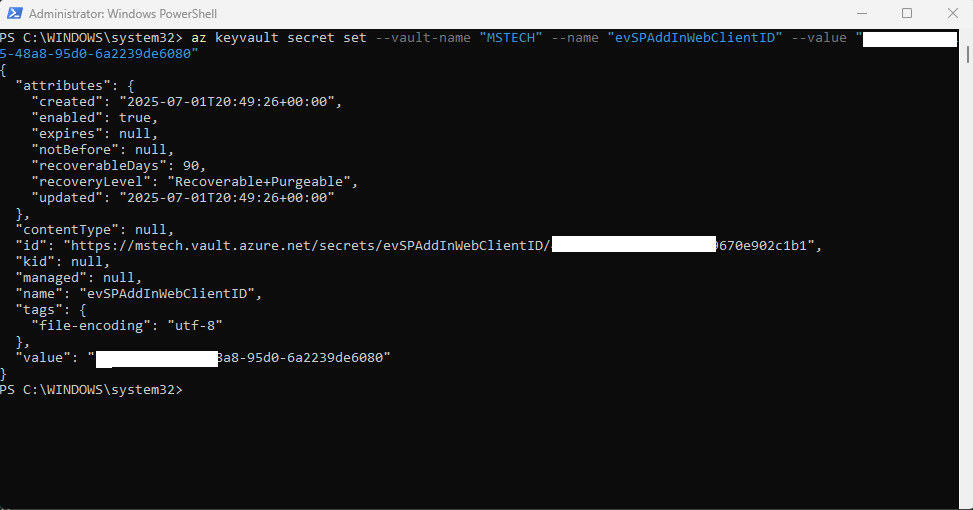
This will successfully add the evSharepointDomain environment variable to the vault. - evSPAddInWebClientID
Run the command:az keyvault secret set --value-name “VAULT_NAME” --name “evSPAddInWebClientID” --value “clientID of the app registered under your tenant with the name eViewer7AddInWeb”
This will successfully add the evSPAddInWebClientID environment variable to the vault. - evSPAddInWebClientSecret
Run the command:az keyvault secret set --value-name “VAULT_NAME” --name “evSPAddInWebClientSecret” --value “value of secret created in eViewer7AddInWeb app registered under your tenant”
This will successfully add the evSPAddInWebClientSecret environment variable to the vault. - evSPAddInWebTenantID
Run the command:az keyvault secret set --value-name “VAULT_NAME” --name “evSPAddInWebTenantID” --value “ID of your tenant under Microsoft Entra”
This will successfully add the evSPAddInWebTenantID environment variable to the vault.
Permissions Setup:
To setup the permissions for the users, follow the steps below:
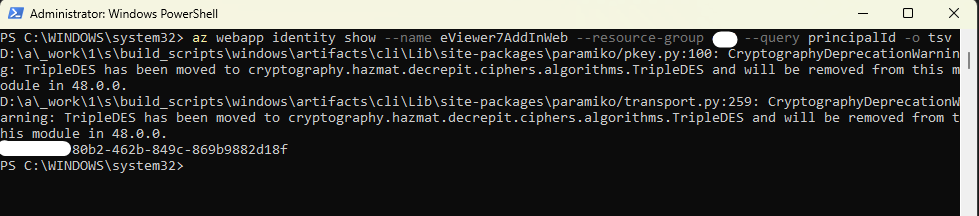
- Run the command:
        az webapps identity show --name eViewer7AddInWeb --resource-group
        <resource group name> --query principalId –o tsv
This command retrieves the object ID of your App Service’s managed identity. - Grant access to Key Vault Secret User (providing read-only access to secrets) by running the command:
        az role assignment create --assignee “object ID” --role “Key Vault Secrets User”
        --scope “/subscriptions/<subscription ID of key vault>/resourceGroups/<name of vault resource group>
        /providers/Microsoft.KeyVault/vaults/<vault name>”
- Once this command runs successfully, the user will have permission to read data from the vault.

Step 17: If you are not using Azure Vault, then navigate to the homepage of eViewer7AddinWeb, and go to App Services to add environment variables.
Step 18: Go to Settings > Environment variables.
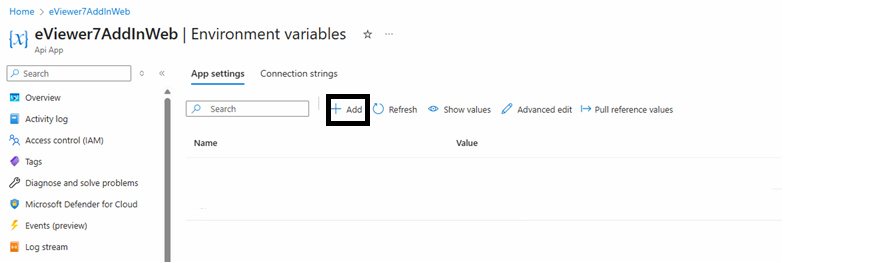
Step 19: Click on the Add option and add the necessary environment variables:
| Name | Value | Example |
| ev7LicenceKey | Encrypted License Key for eViewer 7. | 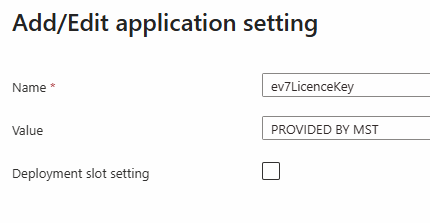 |
| evSPAddInWebClientSecret | The client secret Value is found in the Certificates and Secrets (under “App registrations”) section. | 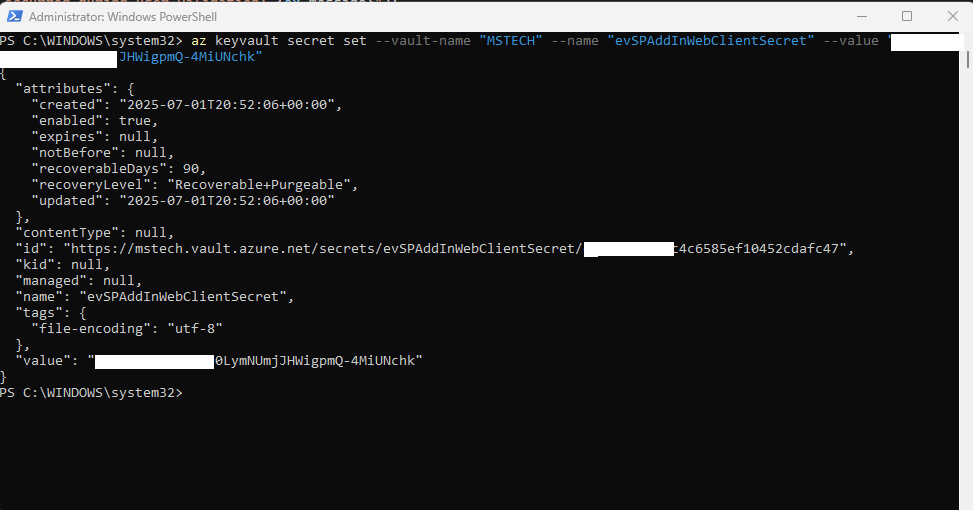 |
| evSPAddInWebTenantID | The tenant ID is found under the app registration page, which is also the directory ID. | 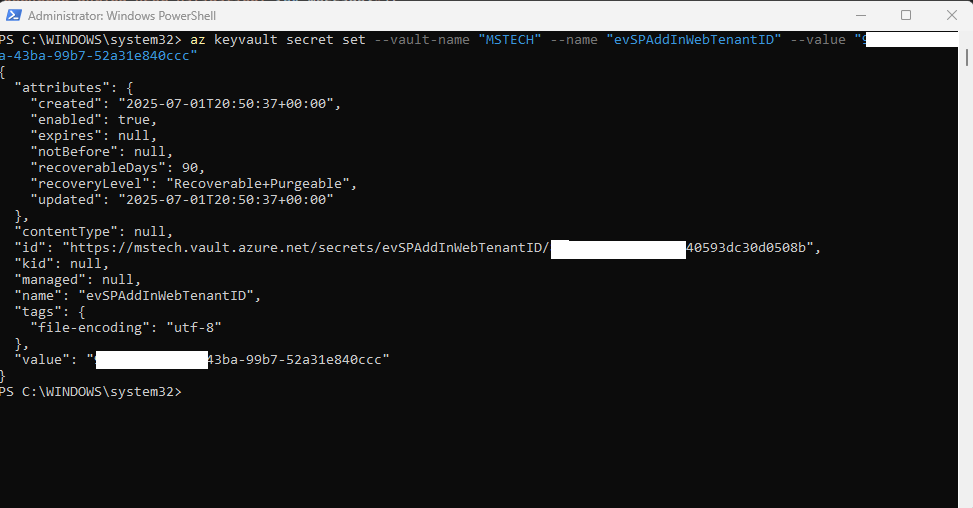 |
| ev7SiteUrl | The site URL obtained from the eViewer7 service after deployment. | 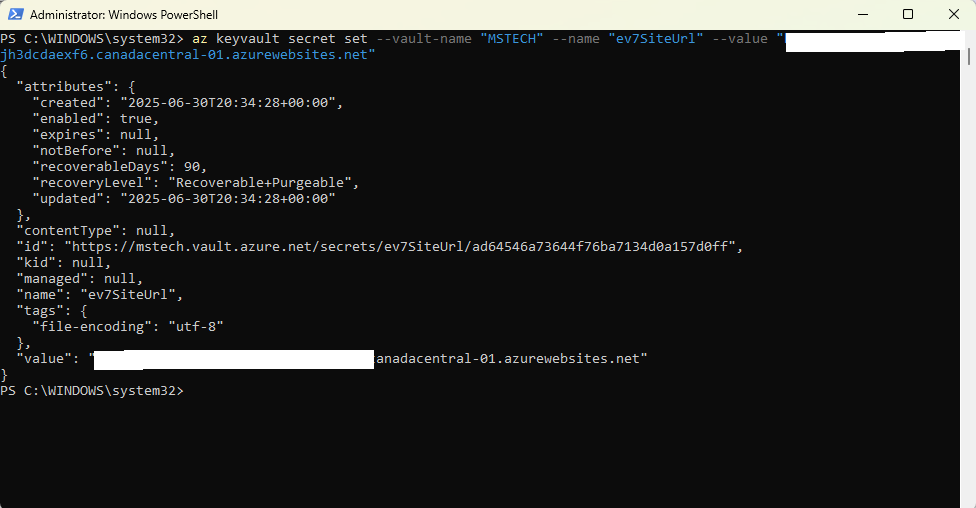 |
| eViewerServerUrl | The server component’s URL if it has been deployed then include the URL followed by /api/v1 | 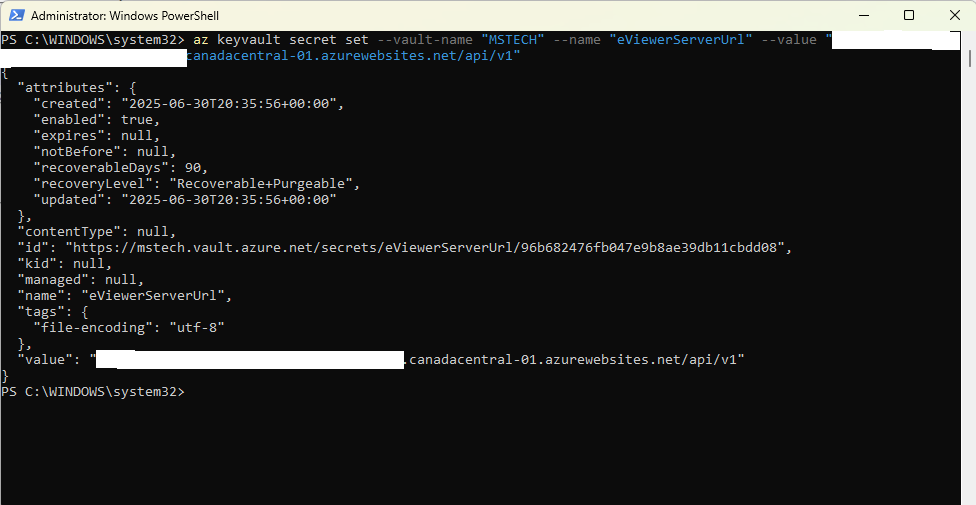 |
Step 20: After adding these variables, Click Apply & Confirm.
Step 21: Navigate back to the Overview section, click Stop, and then click Start to activate the new environment variables.
By completing these steps, you can successfully integrate eViewer into your SharePoint environment, unlocking powerful document viewing and editing capabilities.
Setting Up User Access
Creating a Security Group
To enable access to eViewer7 for a specific group of users, you need to create a security group in your tenant. After creating the group, you can add members or other user groups to this security group. Any group or user added will automatically gain access to eViewer7, while those not included will not have access.
Here are the steps to create the security group:
Step 1: Navigate to Home > Tenant > Overview > Groups.
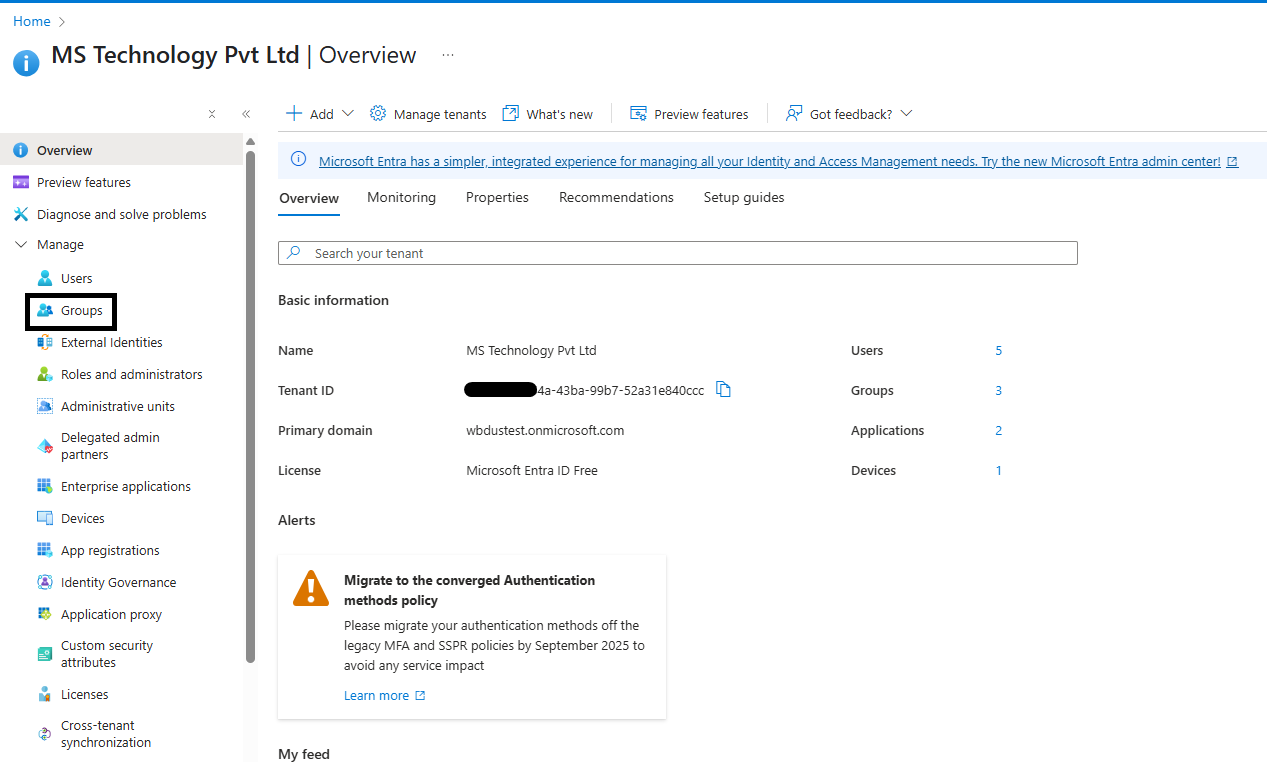
Step 2: Click on New Group.

Step 3: Enter the following fields:
- Group type: Security
- Group name: eViewer7-Access

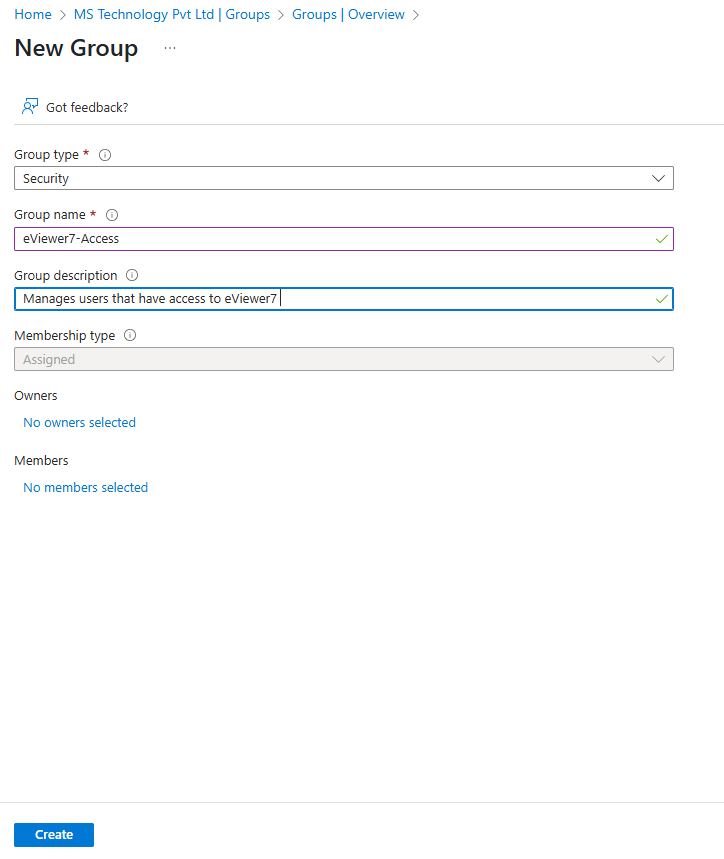
Step 4: Click Create to finalize the setup.
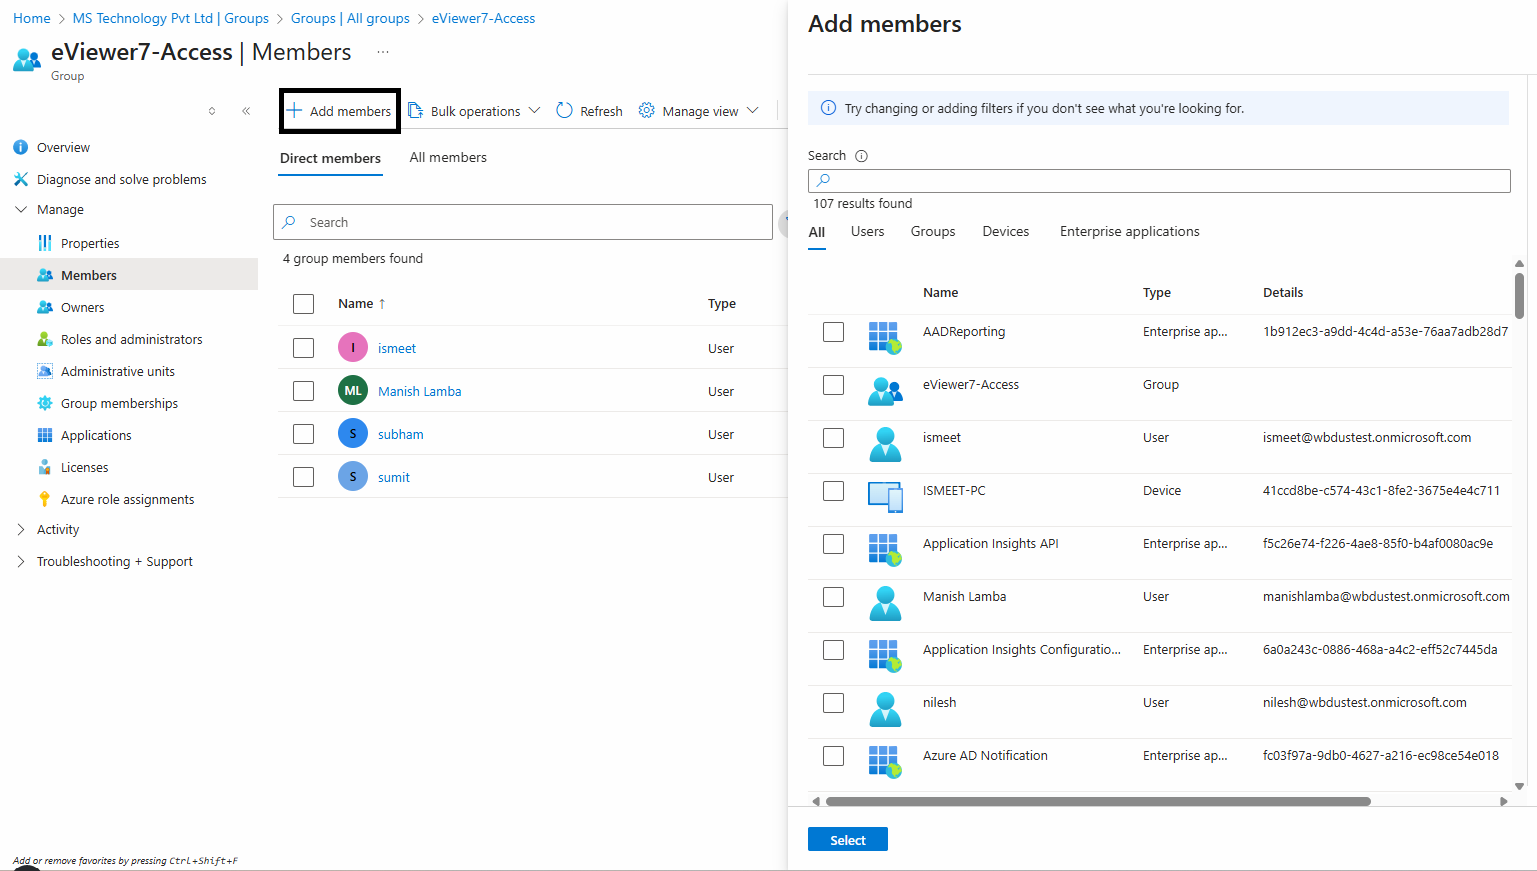
Step 5: Once the group is created, assign members who have access to eViewer 7 to this group.
Step 6: To do this, navigate to Group > Members > Add members, and then add the desired members to the group.
How eViewer is Integrated with SharePoint Online
Integrating eViewer with SharePoint Online enables users to view and interact with a broad range of document types directly within SharePoint, improving accessibility and enhancing the overall document viewing experience. The integration process is straightforward and can be completed by following these steps:
Steps to Integrate eViewer7 with SharePoint Online
Setup eViewrAppConfig List:
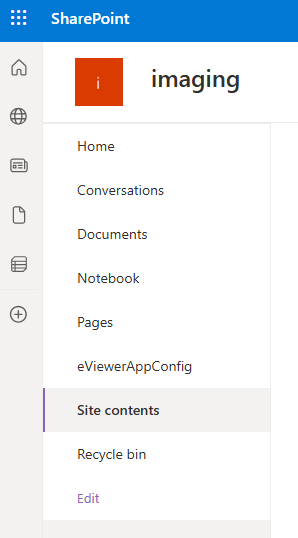
Step 1: Create a new list in the root site of SharePoint, name it eViewerAppConfig.
- Open the root website and navigate to Site contents.

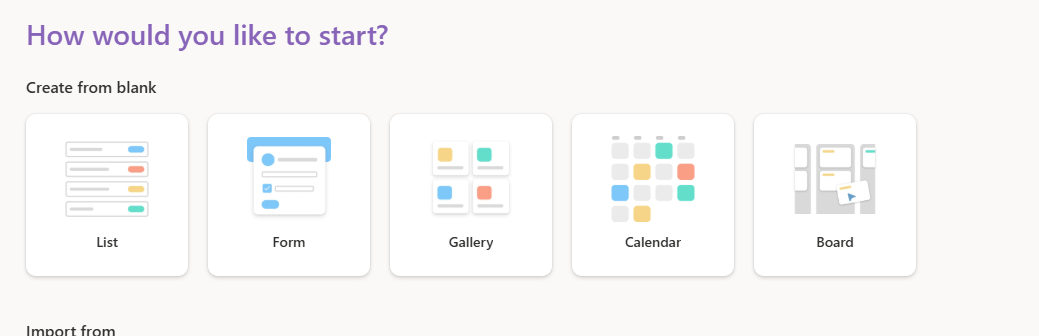
- Click New > List.

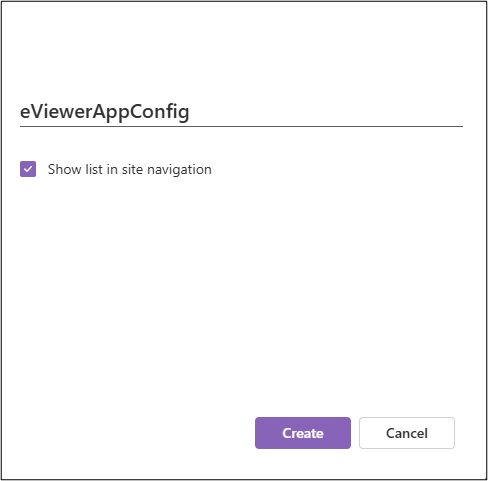
- Choose List, and name it: eViewerAppConfig.


- Click Create.
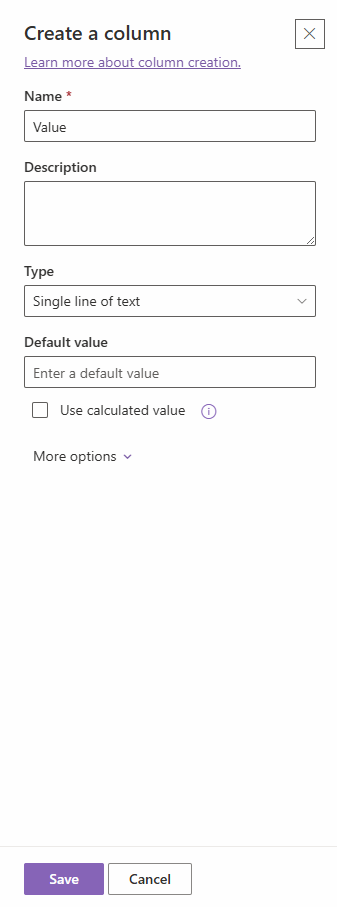
- Click on Add column and select type Text, and click Next.

- Name the column “Value” and click Save.


Step 2: Now add the following two parameters:
Click Add new item. Provide Title as key and value as value.
| Key | Value |
| eViewerSPAddInWebUrl | URL of eViewerSPAddInWeb app service |
| eViewerSPAddInWebClientId | Client ID of eViewerSPAddInWeb App Registration |
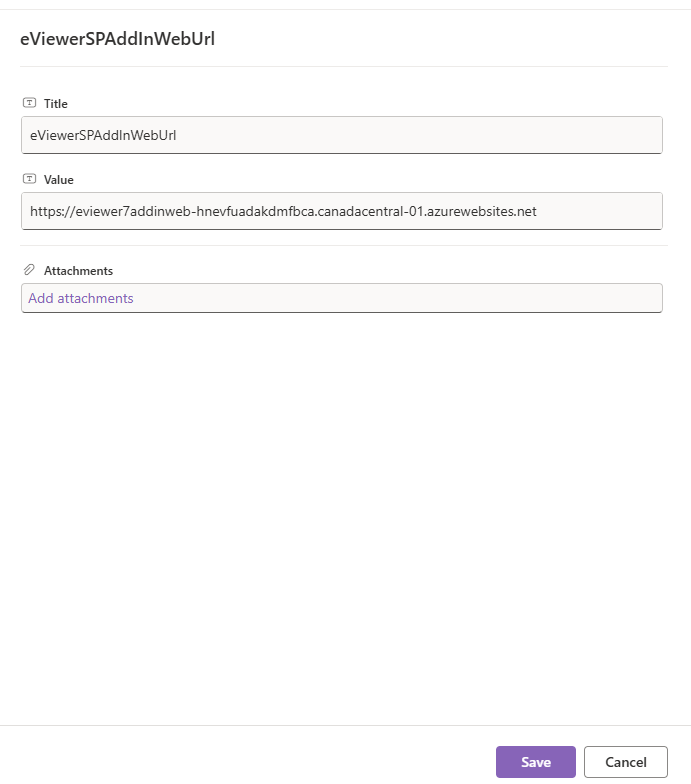
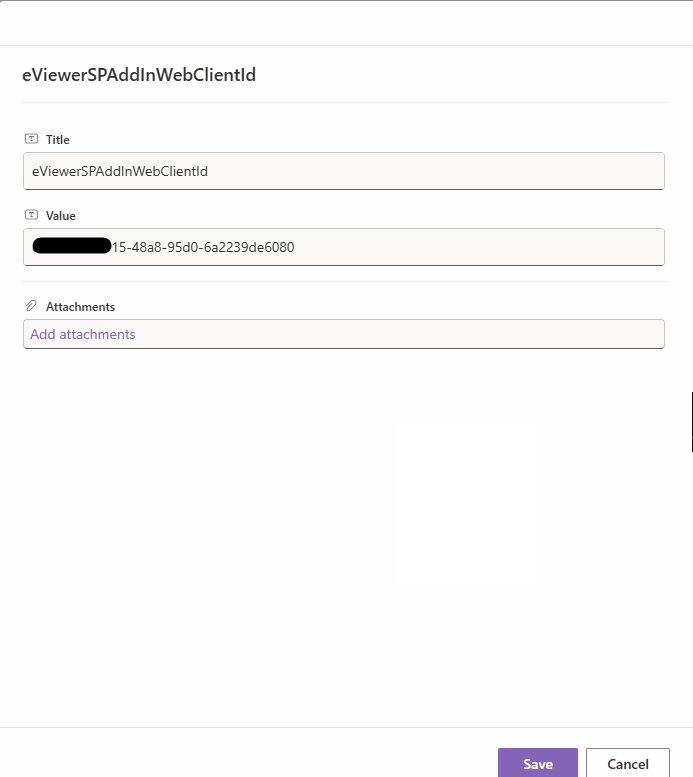
Step 3: Click Save.
Steps to Access eViewer7
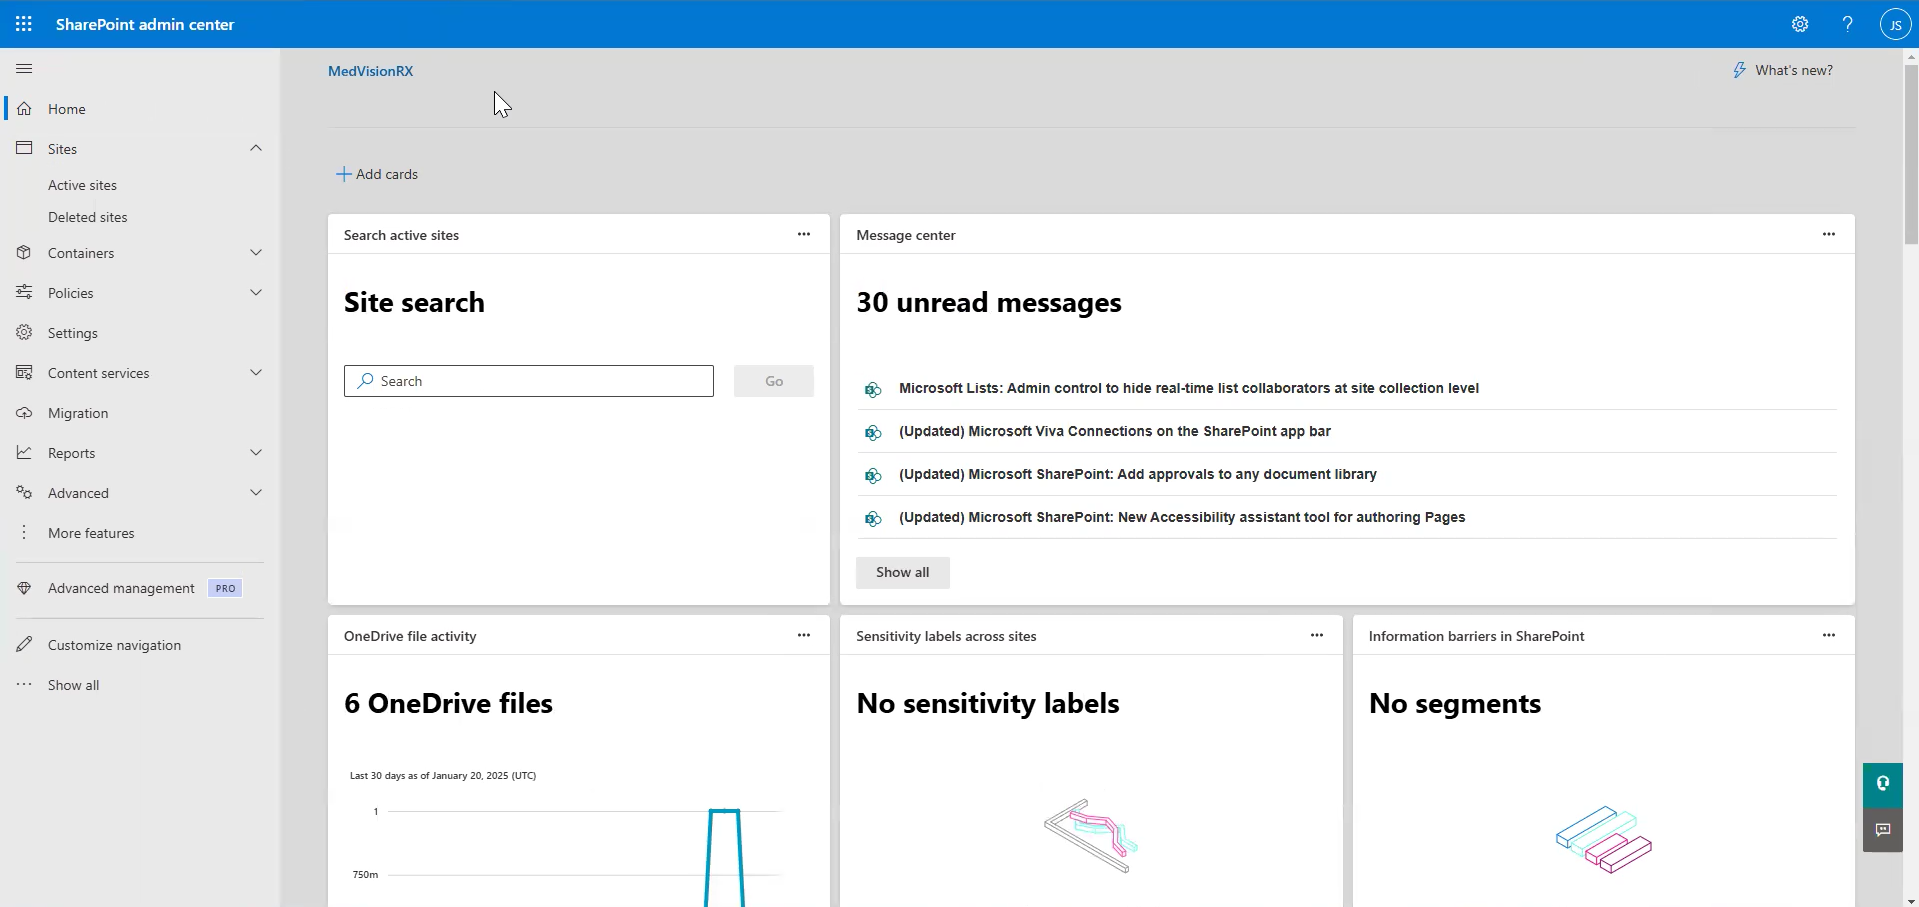
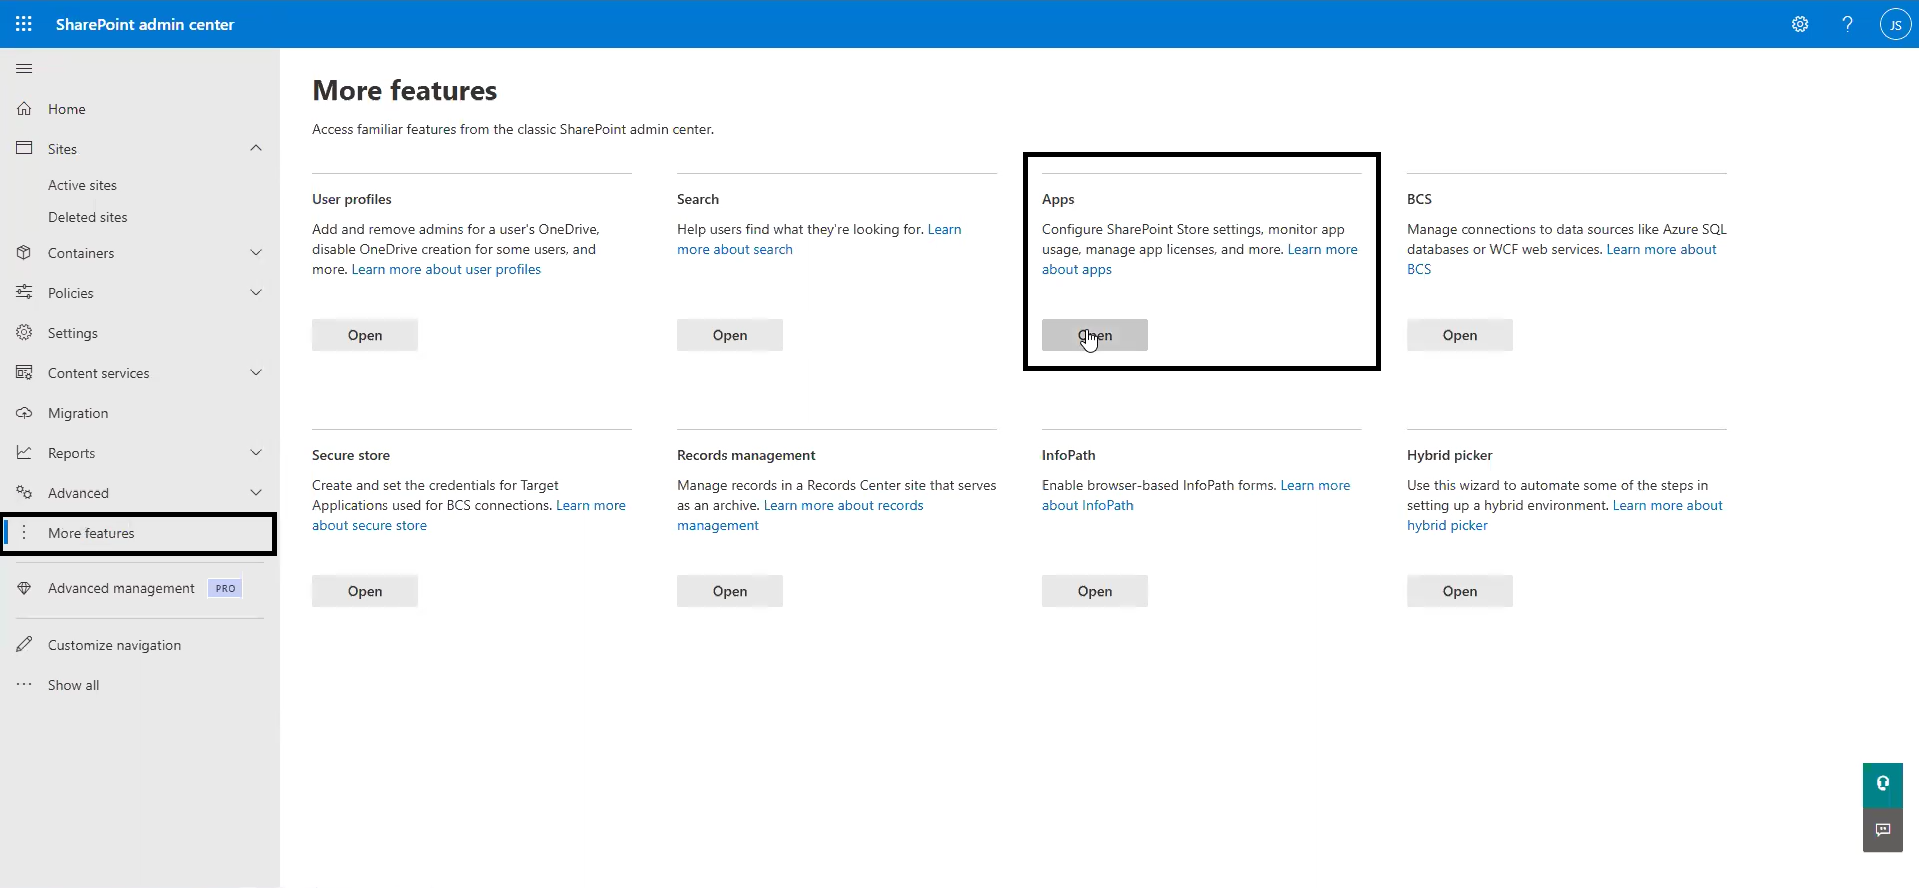
Step 1: Access the Admin Center:
- Log in to the SharePoint admin center.

- Navigate to More Features > Apps.

Step 2: Upload the eViewer extension:
- In the Manage Apps section, click Upload.

- Select the eViewer package file.


Step 3: Enable the eViewer App:
- Once uploaded, select Add to All Sites to deploy eViewer across all SharePoint sites automatically.


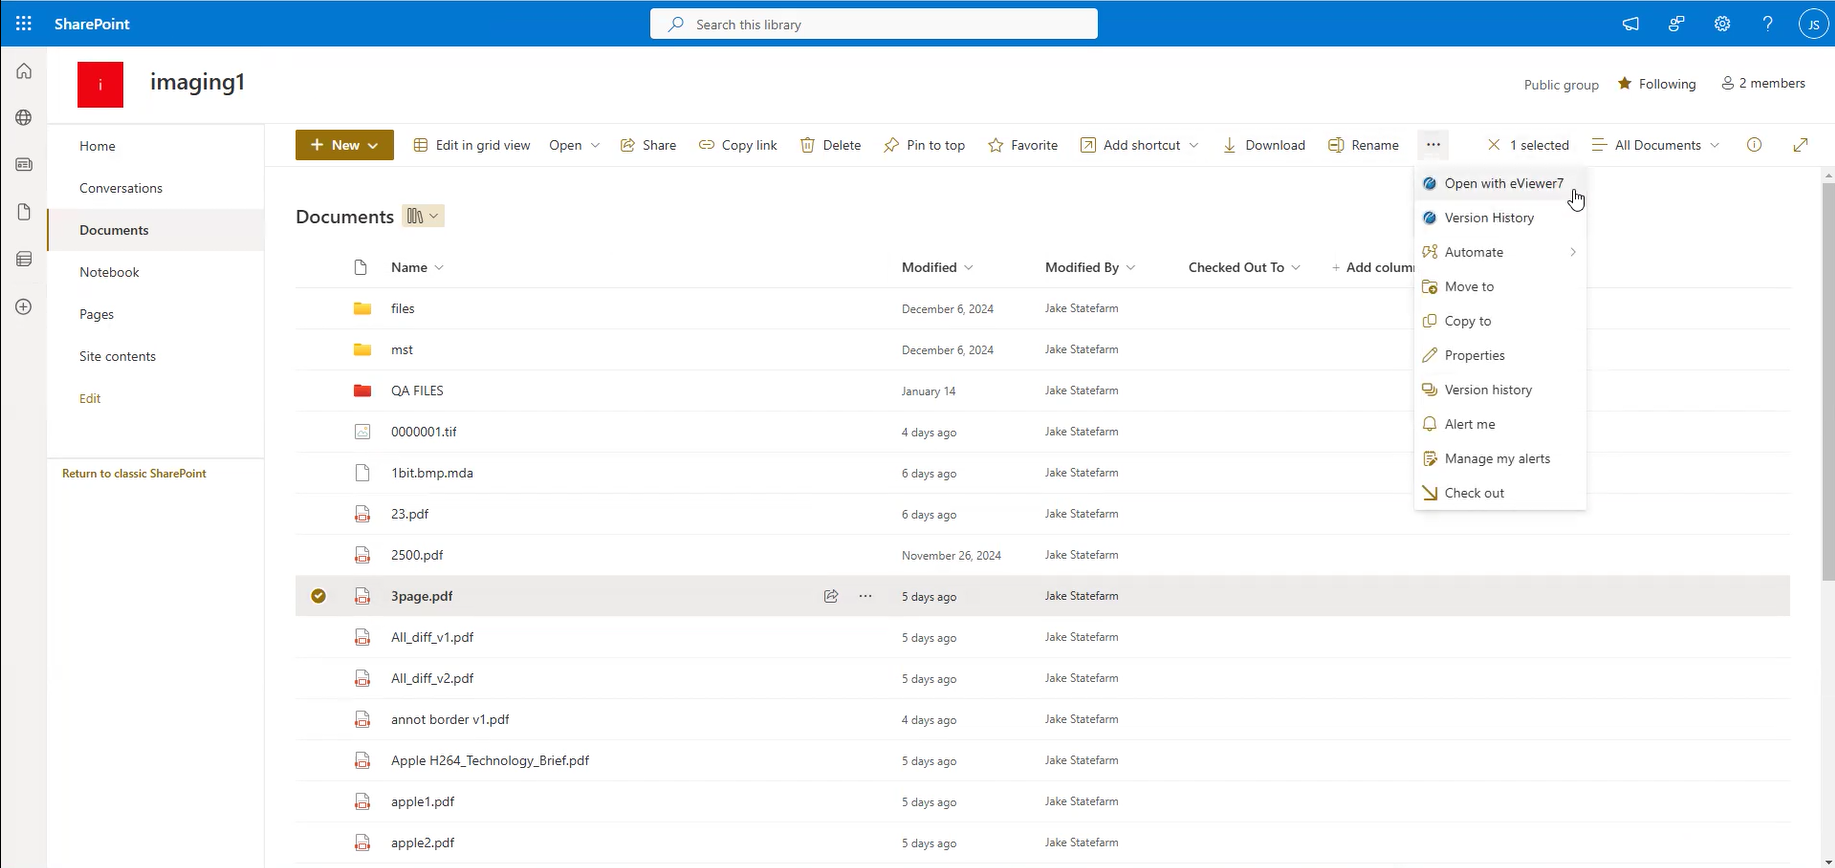
Step 4: Open and Edit Documents:
- Navigate to a document library in your SharePoint site.
- Select a document to render and click the Open with eViewer button added to the ribbon.

- Open with eViewer: Render the file in a new tab. Use the eViewer interface to view, annotate, edit, and save changes. Saved changes are uploaded as a new version in SharePoint automatically.
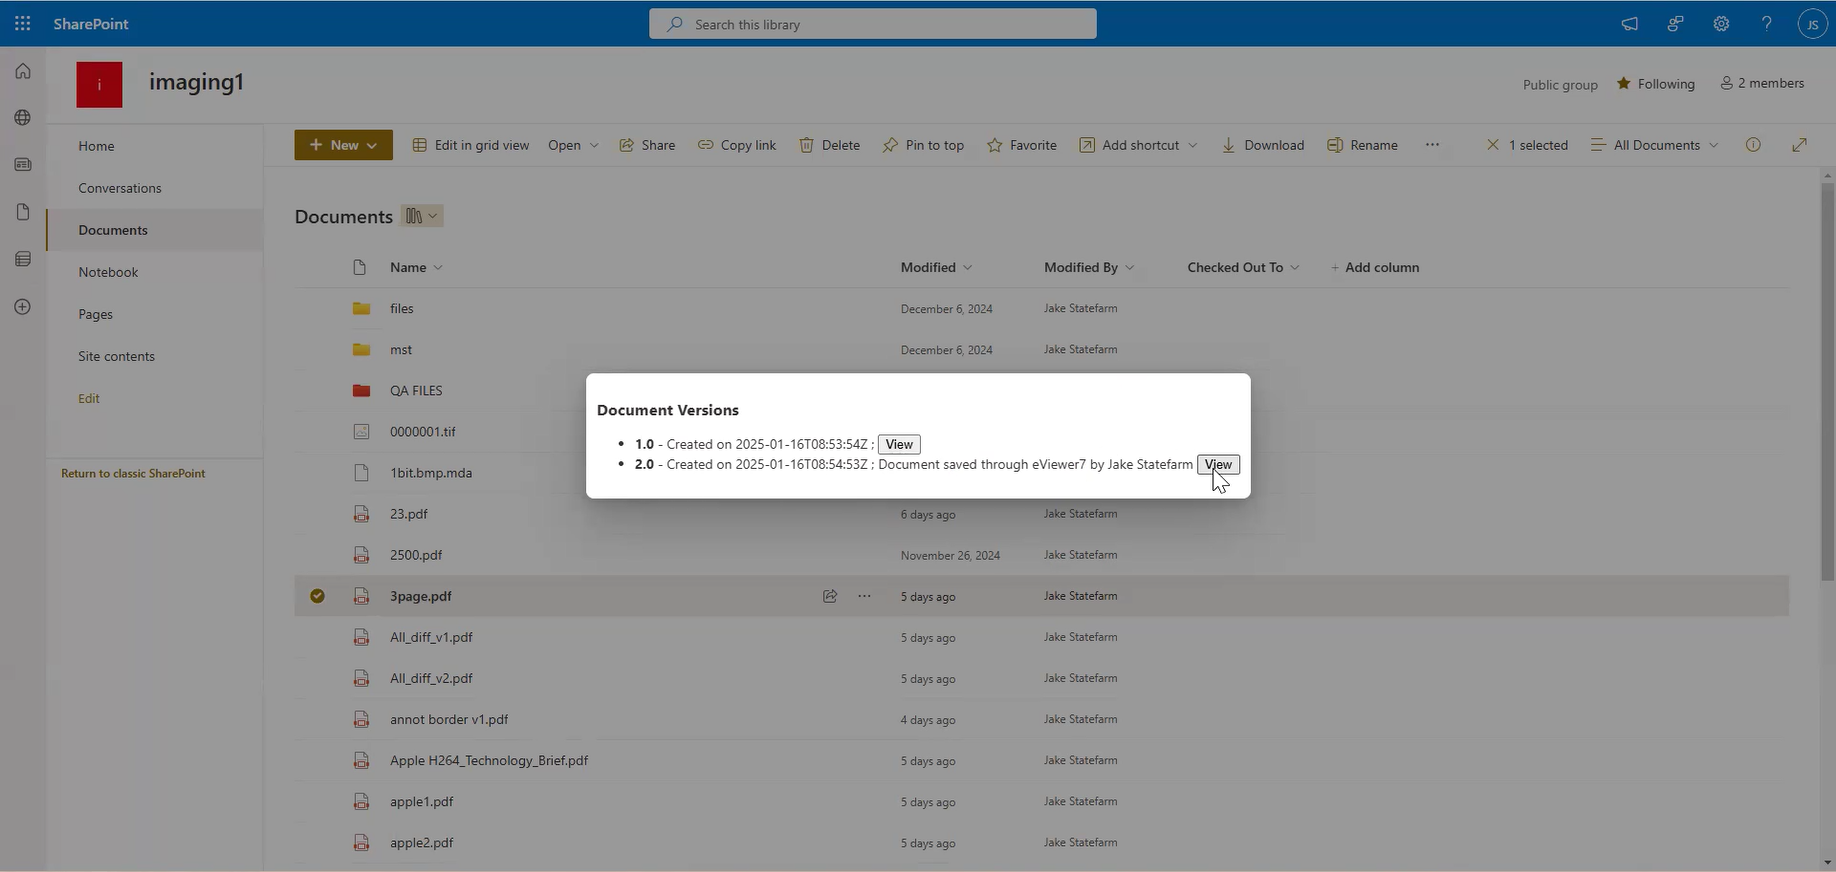
- Version History: View the document’s version history, including annotation revisions.
Step 5: Support for Media Files:
- Open media files directly in eViewer from the Media List.
- Edit, review, and save changes seamlessly back to SharePoint.